How to Digitize Your Parents’ Old 8mm Movies
It’s been three years since my father passed away, and I’m still working on digitizing many of his old photos. I also have his negatives and ancient slides. It’s been a slow and painful process, both physically and emotionally.
I can’t possibly digitize every photo. So, I need to decide which ones are important in telling the official family history.
Are You Peering into an Alternate Universe?
Curating a family’s story across generations can be a draining process. Some photos fit in nicely to support your own memories. Others seem like splinters to slightly alternate dimensions.
There can be a variety of little surprises that force you to realign your understanding of your own past. The good news is that can also contain priceless gems. These gifts can make what is an otherwise time-consuming process worth it.
So, I’ve started. Stopped. And started again, sometimes months later.
I’ve been using an Epson scanner/printer for my parents’ old prints and a Wolverine slide/negative converter to drive my digitizing/archiving project.
I’ve made progress, and I know there’s a finish line out there, which I’ll eventually reach.
What are You Supposed to Do with 8mm Film?
But I’ve also inherited dozens of my father’s 8mm film reels. They’re tiny time capsules from decades ago that reveal the past in action… three minutes at a time.
But how am I supposed to convert this ancient media without a working film projector?
I had three choices:
- Package up my 8mm movies and mail them to a company to do the work.
- Find a store in town where I can physically hand over my dad’s motion pictures.
- Buy a conversion device to do it myself.
Do You Actually Know What’s On Those Film Reels?
Mailing out your film reels to digitize is usually less expensive than using a local brick and mortar operation. (That said, working with a local establishment may feel more secure, because there’s no risk of losing your film in the mail.)
But mailing it in can still be relatively expensive. And that price point can sting even more if you don’t really know what’s on all those film reels. (My father didn’t label his reels well.) So, you may be spending hundreds of dollars for old footage that you wouldn’t otherwise want to keep.
Yes, it’s a different story if you do know what’s on your film. With that level of knowledge, paying someone else do the conversion is an incredible time saver and can be worth it.
But for me, the only way to know for sure is to first engage a do-it-yourself strategy. And then if you uncover a few reels that contain priceless memories, then you can send just those few out for professional conversion.
So that’s what I set out to do…
Film Digitizers to Consider
There are two conversion devices on the market that I researched:
- Wolverine Data Film2Digital Moviemaker-Pro
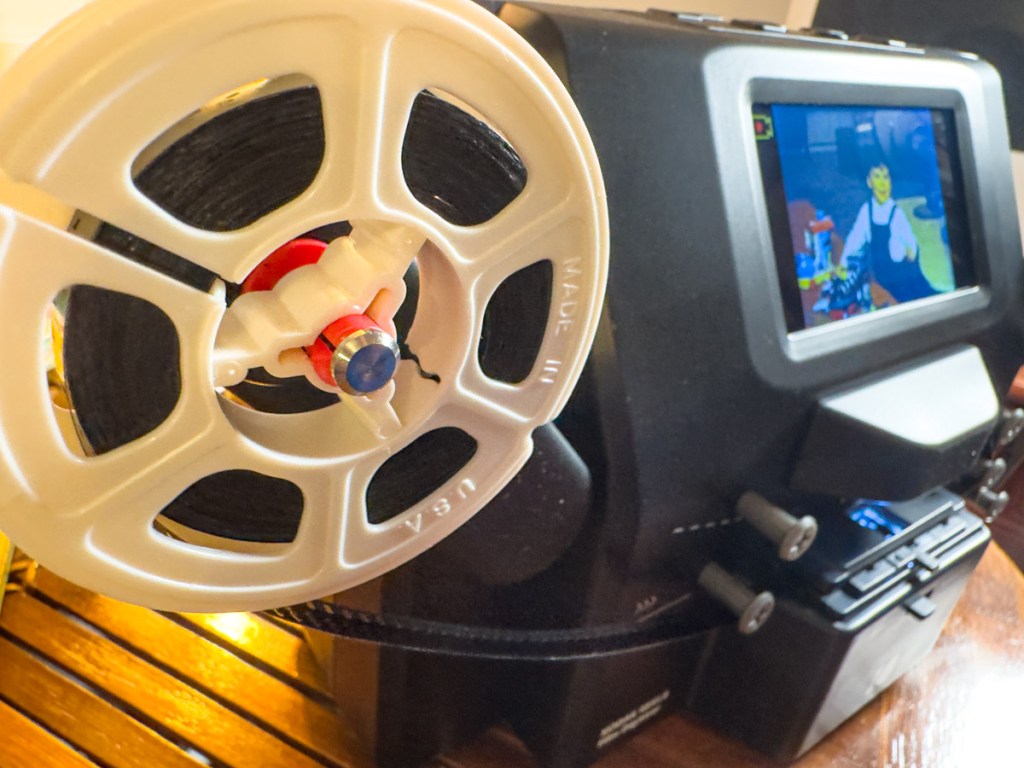
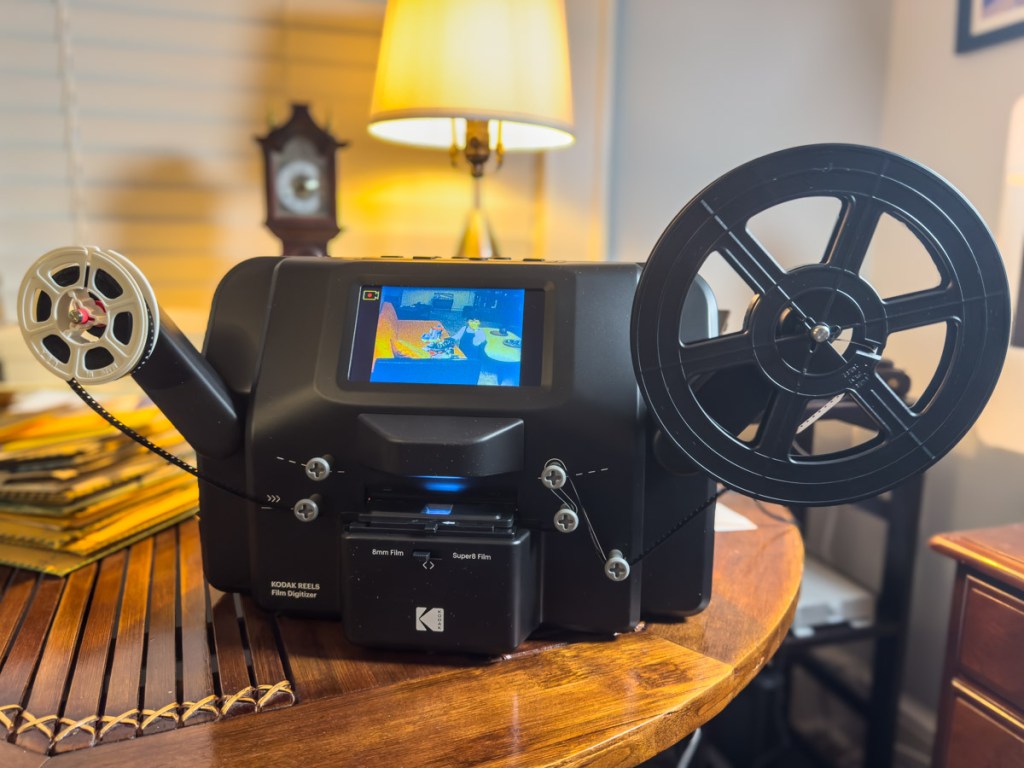
- Kodak REELS Film Digitizer
These movie film scanners literally photograph each frame of your film (8mm or Super 8) one at a time and then stitch them all together into a movie file on an SD card.
This takes a while.
- Each 3-minute reel takes about 30 minutes to scan. So, you should plan your workflow accordingly.
- There’s no sound conversion
(8mm film didn’t contain sound anyway).
Ultimately, I ended up purchasing the Kodak REELS Film Digitizer because it creates a slightly higher resolution file (1728×1296).
Who Are Those People?
As I write this, I’ve converted my 10th film reel. So, I’m about five hours in, and I’ve got a long way to go…
The process has so far felt like sifting for gold. I’ve found plenty of family vacation footage from tropical locations with me running around as a young child. Yes, I know I was cute, but a few of those shots is all anyone could possibly want to watch now.
Then, there are clips of what looks like friends of my parents, but they are total strangers to me. They may have a place in another family’s family archive, though not mine.
Remember you really can’t tell what you’re going to get from the first few frames on a reel. You need to go through all of it.
Separating the Digital Wheat from the Chaff
In hindsight, I’m not surprised I’ve had to sift through a lot of cutting-room floor clips to find the money shots. This is all unedited footage. (If someone should somehow find my iPhone in 100 years and extract my own family video clips from it, I’m sure many of them will seem superfluous as well.)
That said, I am finding some cool clips of my family in action that are worth saving. So, I’m glad I’ve embarked on this project.
I also came upon some interesting environmental shots from the 1960s.
My father was clearly flying somewhere and shot this clip over Manhattan. Nice!
Doing It Yourself is a Reasonable Choice
As for the quality of my father’s converted films using my Kodak REELS Film Digitizer, it’s what you’d expect. It’s good… good enough.
(I know a professional shop would do a better job using equipment worth many thousands of dollars.)
And so far, my Kodak consumer unit has been operating well, though the image framing sometimes slips out of its center a bit after you start a conversion.
(So, you need to start it again.)
Don’t Wait Any Longer
Yes, I’m pleased with the way my film conversion project has been going. It’s a very hands-on process working with film, and I have to admit the tactile experience is strangely satisfying.
And yes, I’m glad I didn’t pay a company to globally convert all my father’s 8mm movies.
No matter how you approach this, it’s a lot of work (and some money). But if you’re the family’s archivist and you uncover old family film footage, there’s really no choice on what to do next.
Digitize it.