How to Update Account Settings on Apple Watch Using your iPhone
I don’t like messing with my Apple Watch. I’ve set it up to do what I want, and I usually don’t dig in to change the settings. The screen is so tiny. Yes, its interface is clever, but it’s not much bigger than a postage stamp.
And that’s fine. It’s a watch… not an iPhone.
Sure, it’s similar to iPhone in certain ways and is best tethered to one. And I can easily interact with it using the Digital Crown and side button.
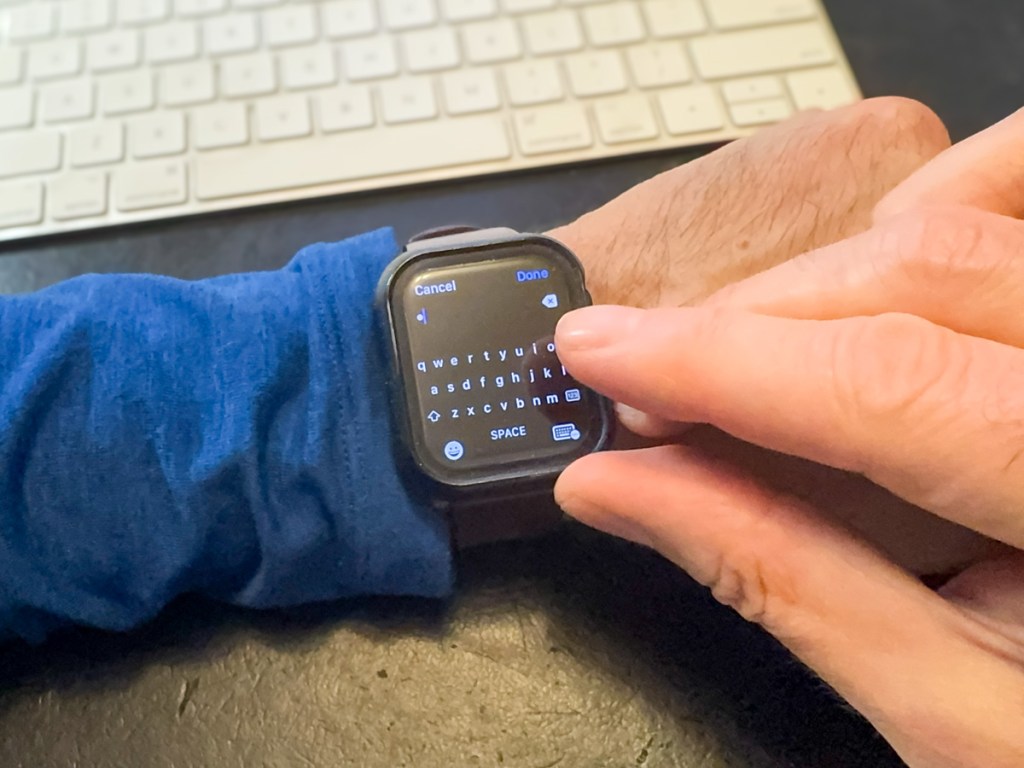
But please don’t ask me to type anything into my current Apple Watch Series 9. That’s absurd. Yes, you can call up a cute micro keyboard to use. But come on… My index finger takes up 30% of the entire surface of my Apple Watch.
Update Apple ID Account Settings on your Apple Watch
But that exactly what my Apple Watch sometimes asks me to do after a software update. I’m supposed to log back into my Apple ID account. And then my Apple Watch presents me with its tiny keyboard. Are you kidding?!
My finger’s surface area can press onto 3 keys easily… so tapping away gives me about a 30% chance of keystroke success. (And the tiny scribble pad? That’s no better.)
So recently, after failing to sign into my Apple account after multiple miss-tapping sequences, I looked for another way in…
Use your iPhone Instead
If you think your iPhone can help, you’d be correct. Strangely, I couldn’t quickly solve this tech challenge by Googling it, but eventually I found the clue. Here’s how it works:
- You simply need to activate your sleeping iPhone right after your Apple Watch prompts you to micro-tap your password.
- Immediately, your iPhone will come to the rescue and open a thin text-prompt window on its own screen for you type into.
- And as you do that, your password will magically mirror onto your Apple Watch’s screen. Done.
So obvious, right? (The solution is already baked into the Apple Watch/iPhone relationship.)
No More Micro Tapping
Perhaps the whole world already knows this trick. And if it’s just you and me who’ve finally caught on, so be it. (I won’t tell anyone.)
But now, my finger will never again attempt the absurd micro-tap dance on my Apple Watch.
It’s a micro win… but a win, nevertheless.