At Home with Tech

Unlock the power of all your technology and learn how to master your photography, computers and smartphone.

Category: family

Is There a Wireless Charging Stand for iPhone SE?

Even though iPhone SE isn’t built with MagSafe magnets, you can still charge it wirelessly. But it won’t stick to a charging pad. Thus begins my journey for a workable solution.

By now, it shouldn’t be this hard to figure out how to charge up all your gear. But if you’re like my family, you’ve got different versions of the same device (like iPhones) running simultaneously. So, over the years, I’ve collected various chargers that could keep powering newer tech. That’s good, right?

But the charging equation is complicated now that the tech industry sells much of its gear with the ‘bring your own charger’ sales strategy. Then, you’re forced to figure out how to power your new device. You need to immediately run through the compatibility equation with your existing power blocks.

Yesterday’s chargers may not be strong enough to handle today’s power-thirsty tech. And in a family where the kids are likely using older gear than the adults, every charger won’t work across the board.

And the complexity doesn’t stop there. There’s fast-charging technology and wireless-charging to also consider.

Wow. Do you also feel it’s hard keeping up?

Barrett’s Recent iPhone Purchases
Some months back, I had a little kayaking mishap, and my old iPhone XS Max drowned only weeks before iPhone 15s came out.

So, I decided to buy myself a new iPhone SE to hold me over with the plan to later gift it to our 13-year-old son.

For that period, I stuck with the standard Apple 20W USB-C Power Adapter and lightning cable. But when I ordered my new iPhone 15 Pro Max, of course I quickly upgraded to Apple’s MagSafe wireless circular charging pad.

No Click-and-Stick for the SE
When I had a moment to stop fixating on my new flagship iPhone, I turned my attention back to the scrappy but still totally capable new SE. I wondered whether it couldn’t also charge wirelessly. (Yes, I was totally enamored with the belated joy of wireless charging.)

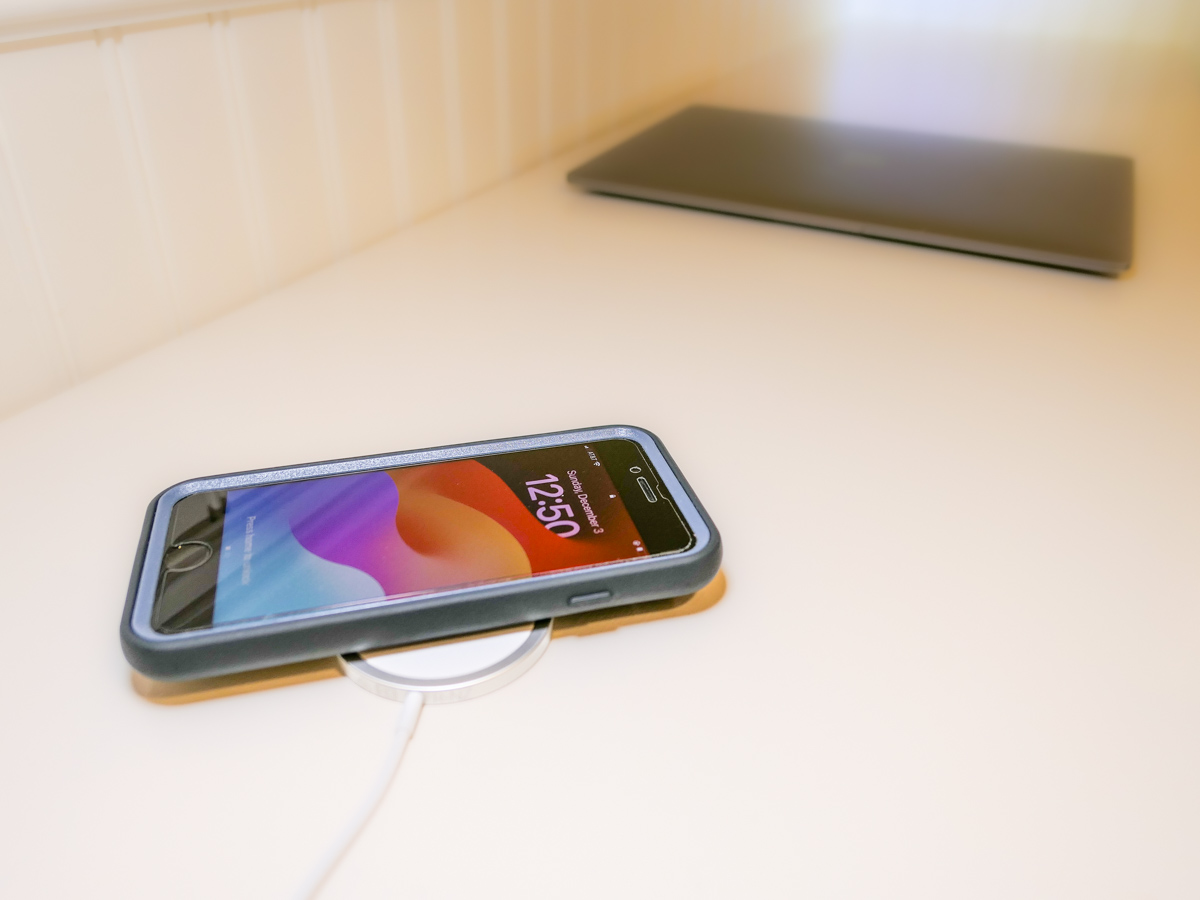
Unfortunately, the basic iPhone SE doesn’t contain the magnets for MagSafe functionality. But yes, it actually can wirelessly charge if placed properly on top of a Qi charger.

That last detail didn’t thrill me. Without that magnetic ‘click-and-stick,’ you can easily miss the charging connection lock by a few millimeters and end up in the morning with a smartphone that’s not ready for the day.

Stand vs. Pad
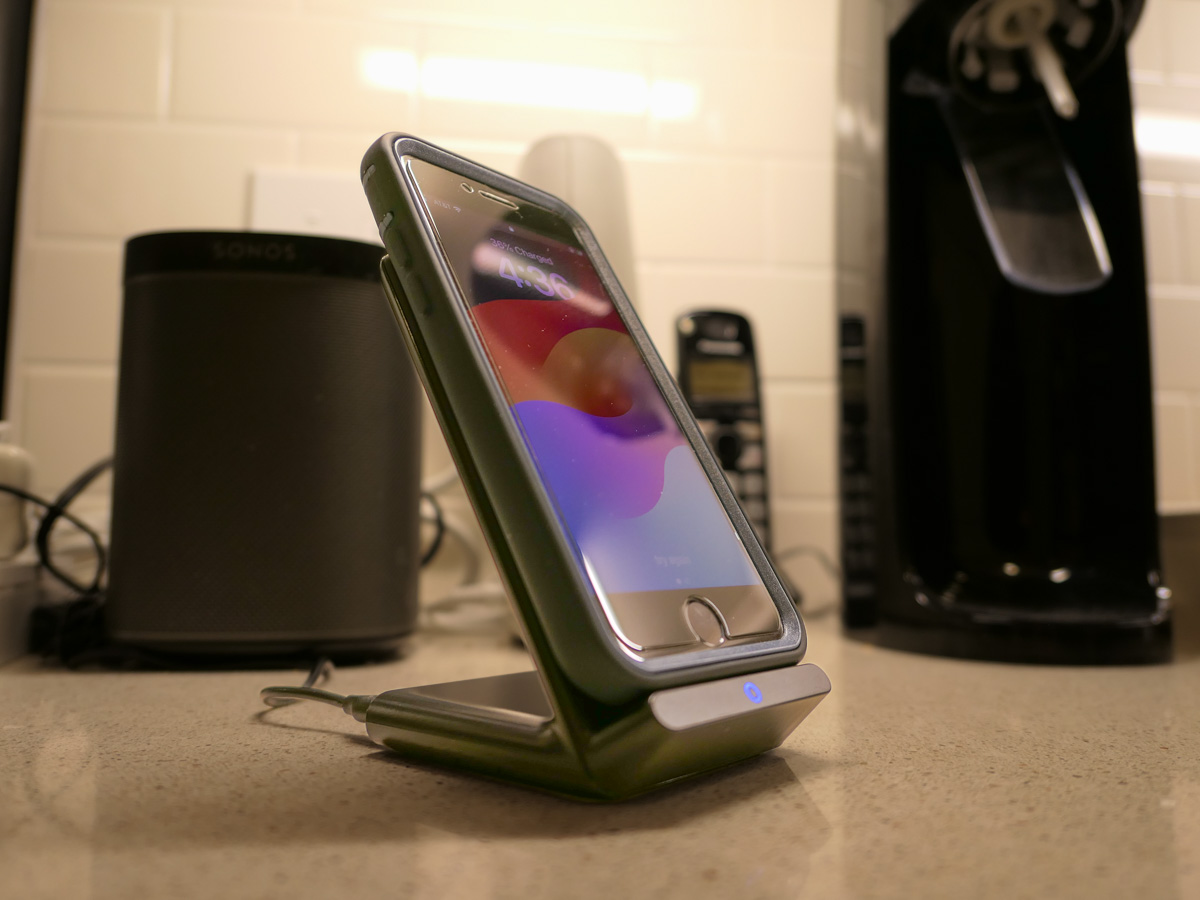
But I figured if I could find a solution where the iPhone SE fit more snugly into place, like on a stand vs a pad, that could be a better system for charging success.

Unfortunately, Apple does not sell a wireless charging stand without a MagSafe connection requiring iPhone levitation. So, I had to turn to other manufacturers…

Fortunately, I found two brands I trust that offered what I needed.

Anker 313 PowerWave Wireless Charger Stand
Anker makes a Qi-certified, tilted stand that an iPhone SE can safely lean on without relying on MagSafe.

The stand is boxed with a Micro USB to USB-A cable that connects to a USB-A wall charger. But it doesn’t come with the charger. You’ve got to provide that separately.
Anker states that you can’t use one of your old Apple 5V/1A stock chargers (the original tiny white block). Not powerful enough. You need a minimum of 5V/2A output. An iPad charger will work if you believe in sharing one charger for different devices. (What could go wrong with that plan?)

So, I knew I also needed a new power block.

Anker PowerPort+ 1 with Quick Charge 3.0
I read the fine print on the Anker stand’s power requirements to maximize its capabilities. My mind started to melt.

I immediately searched for a shortcut and landed on Anker’s only small USB-A charger. (All of their other models are USB-C.)

With both stand and charger, the Anker price is $30.38.

Belkin Boost Charge Wireless Charging Stand
Belkin offers an all-in-one solution, which you may feel is more elegant that my MacGyvered Frankenstein Anker plan.

You don’t have to figure out which charger block to buy. A Belkin charger comes packaged with the stand (which is similar to the Anker model, though more rounded).

I Bought the Anker Wireless Charging Package
I think both the Anker and Belkin options are solid choices. That said, the Anker stand and charger is only 30 bucks vs $45 for the Belkin option.

Based on this pricing differential, I went with Anker.
Click.

Fast-Charging is Always Helpful
All I really wanted was an overnight wireless charging solution for our iPhone SE. And now we’ve got that.

But as it turned out, I’ve also put in place a fast-charging solution with the Anker 313 Stand and PowerPort Quick Charger for any number of our current and future devices.

As much as I prefer the overnight charging rule for our son, what could possibly go wrong with that rigid strategy combined with the complexities of busy family life?

We all sometimes need a little quick boost of power in the morning.

And so do our devices.

Is the Lifetouch Digital Package for your Child’s School Photo a Good Deal?

After your kid’s school picture day, it’s time to choose which photo package to buy. Here’s how to figure out what might be best for you.

I have a confession to make. I have dozens of unused Lifetouch school photos of our son still sitting in their original envelopes. They span back over a decade of my middle schooler’s life. What happened?

Quite simply, I ordered more photos than I needed. Each year, I’ve really tried to order to right package for my family. But the truth is the package configurations are supersized with options I don’t need. I’ve never wanted those little 2×3 wallet photos to give out. (Doesn’t a digital picture on a smartphone serve the exact same purpose?)

Sure, an 8×10 print is nice. Even a couple of 5×7’s. But really, it’s the digital file that’s most important to me. Then, I’ve got the keys to do exactly what I want with it. I don’t really need a photo factory churning out a high volume of prints for me. (Caveat: I’ve got a smaller family.)

But of course, Lifetouch wants you to buy prints. That’s their profit margin. So, the digital file is difficult to isolate.

Welcome to the Digital Landscape
Now, Lifetouch (owned by Shutterfly) offers their new Digital Only Package.
Yay! But wait…

It contains two digital versions of the exact same photo. One has the standard blue background. The other offers the background of your choice.

You also get the option to stamp your kid’s name and grade on the front, and the option to allow a Lifetouch artist to retouch your kid’s photo to ‘improve’ it.

Really?

Keep it Real
So, I don’t really want or need a buffed-out photo of my 13-year-old son. He’s perfect. And I say that every kid is perfect. There’s no need to change anything. Seriously. I understand why a parent might want to improve a photo, but that’s not the way your kid looked in that moment.

If you’re buying school portraits every year, like I’ve done, I think it’s best to think of them as a progression of a child’s life over time. That’s their ultimate value. We all have thousands of photos of our children that we’ve taken ourselves. We don’t really need another photo.

But taking the same photo year-over-year… and then putting them together in a montage… I find that’s a magic equation to help tell the story of a person’s early years.

The Basic Package
For $19.99, the Basic Package offers plenty for most needs (unless you have a large family). You get the digital photo file with the basic background (forwarded to your Shutterfly account). Plus. you receive a few prints:

  • 2 – 5×7
  • 2 – 3×5
  • 4 – 2×3

The two 5×7’s are useful, and I can pop them in frames. The rest will sit in the envelope forever.

Still… spending twenty bucks for a portrait, the digital file and a couple usable prints is a good deal.

The Digital Only Package
For $36.99, the Digital Package still only gives you the one portrait. Sure, they say they give you a second digital file with a different background. And that’s true, but I don’t feel that almost doubling the price is worth it for the exact same picture of your child.

No, I don’t need the ‘premium’ touch up treatment, thank you very much.

And I absolutely don’t want his name and grade burned into the image of the digital file. That’s really limiting for future use in my own photo montages of him that I may create. (I just want the ‘clean’ photo.)

Basic is Best
If you compare the two packages and strip away the undesirable pieces, the Basic Package gives you more. You get the digital portrait plus a few hard copies.

The Digital Package effectively gives you the same digital portrait. And that’s it. For almost double the cost.

So, this year, I’m buying the Basic Package.
Click.

Barrett’s Suggestion for Lifetouch
If I were to design a Digital Only Package that I would want to purchase, it would contain four digital files.

  • 2 digital files with the background of my choice
  • 2 duplicate files with the name and grade burned into the image
  • Optional premium retouching service (if you insist)
  • $29.99

You’ve got to believe that eliminating the printing/packaging/delivery costs of physical prints is a huge savings for Lifetouch. Why not beef up the Digital Only Package a bit and bring the price down?

Food for thought, Lifetouch…

How to Organize Vacation Photos to Tell a Complete Story

This is the start of our recent trip to Alaska. Here’s why this type of ‘reference photo’ is so important when you want to curate a complete visual story of your vacation.

After a family vacation, I always like to go through my photos and pick out the very best ones. Actually… the best few. (And that’s usually harder to do than you might think.) They’re the ones that really tell the story. And I’m talking under 40-50 pictures.

If you’ve tried a similar exercise, you know what a challenge this can be. Sure, creating a photo book with hundreds of your vacation photos doesn’t require you to choose from all your darlings. But if you’re going to simply show off your photos from your phone to family and friends, their eyes will quickly glaze over after only a dozen of your finger flips.

You’ve got to keep your presentation short. And you should choose the pics that go well together and represent the total arc your trip.

Ideally, they should also visually represent the key information about your travels. Sure, you can audibly fill in the details through a little voice-over support as you share your pictures in the moment. But I think the best collections of family travel photography don’t require that. The photos should stand on their own.

The 3 Categories of Vacation Photos

To create the best collection of vacation photos, you’ll need to take and include three types of shots.

#1 – The Money Shots
It’s obvious that you’ll want to show off your ‘money shots.’ These are your best photos of the ‘place’ you’ve visited. Whether it’s the natural beauty of the wild or a famous urban landscape, those are the photos that anchor your entire trip.

#2 – Your Selfies
And then we all know to snap some selfies along the way (or ask a friendly tourist to take a posed shot of you and your family). You’ve got to include a few of those shots in your collection, right? That’s what makes it your trip.

#3 – Reference Shots
This third category isn’t intuitive, and you’re not going to realize you really need them until you try to put your collection together. I call them reference shots. Think of them as the thread that stitches your whole photo story together. In many ways they’re like an establishing shot in a movie.

These shots provide the context you’ll want for your other photos.

The Boat
For example, on my family’s recent vacation to Alaska, we went on an amazing day cruise on Prince William Sound to get up close and personal with a few glaciers. It was incredible. So sure, I got tons of shots of the glaciers and some shots of my family posing in front of the glaciers. But I almost forgot to get a shot of the boat we were on.
The boat was really a big part of the story… We were on Prince William Sound… and cruised right up to a glacier… and there we are… on this boat. It’s so important to complete the visual sentence.

The Trailhead Marker
Another example: We took the hike of a lifetime right next to Exit Glacier in Kenai Fjords National Park up the Harding Icefield Trail.
The money shots were a couple hours away up the trail, but I intentionally dragged my feet at the beginning of our hike to let everyone in our Backroads group walk ahead of me as I shot the trailhead marker that contained the key details.

The Name of the Place
Ideally, it’s great to find a shot that includes the actual name of your location. That’s so helpful, especially as an opening shot for your visual story.
I found my ‘Alaska’ shot spontaneously as we were biking the Bird to Gird path along the Turnagain Arm. Suddenly an Alaska Railroad train roared by. I braked, grabbed my camera from my belly bag and snapped my photo!

Set Up your Visual Story
These reference shots are easy to forget. But they’re the glue to help group together all your other photos and represent a complete story.

In the same way that any written story has a beginning, middle and end, so should your collection of vacation photos.

Whether you think of them as ‘reference’ or ‘set up’ or ‘establishing’ shots, just a few of them can serve this need exceptionally well. You just have to be mindful to find them along the way.

Don’t Dilly Dally
And if your traveling companions glance at you quizzically the next time you take an extra few beats to snap one of these shots, just remember the value they represent.

Even through you might then have to hoof it to catch up to the rest of your group (guilty), it’s worth it.

Just don’t take too long. Otherwise you’ll risk falling too far behind your own story!