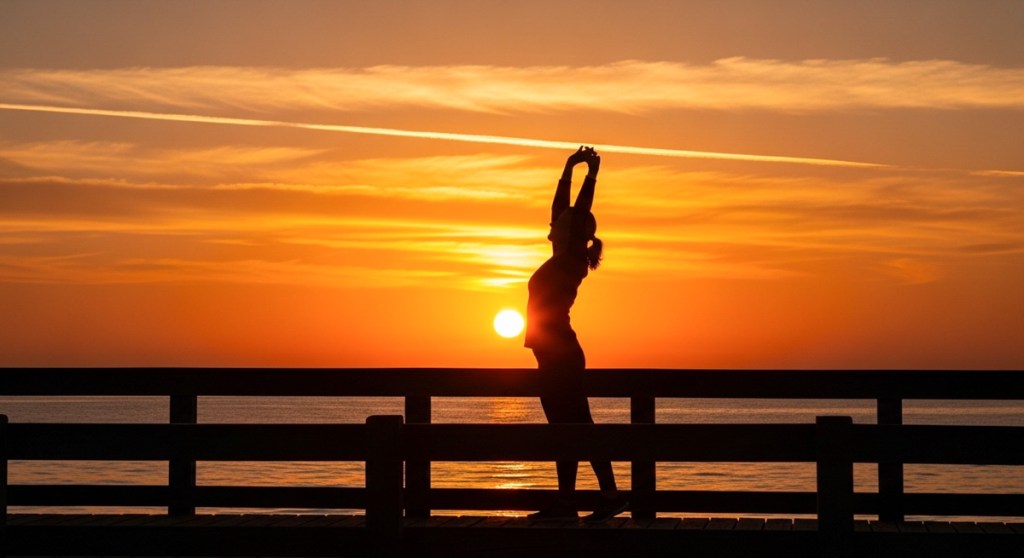
Is this a real photo I took or one generated by AI? It’s both and neither. And then I miraculously converted it into a short video clip. Welcome to bending the rules of reality with just a couple of clicks.
The creative realm is no longer inhabited exclusively by human minds. Generative AI tools have revolutionized how you and I can develop our own creativity. Yes, AI may still require our inspiration, but then it magically does most of the work.
One way to quickly immerse yourself in this new creative workflow is through a simple shortcut. Just start with a real photograph/image that you’ve already created as a reference point. Then, it’s much easier for an AI app to develop it further as opposed to having to start the process from scratch through extensive prompts.
For me, that’s been the key to easily unlock AI’s visual powers.
AI Follows the Creative Direction from your Photography After uploading your own photo, you can create an AI-generated clone in one click that looks remarkably similar. The AI takes certain creative liberties, but it nails the framing and essential visual elements.
And then, with just a few more prompts and a click, you can generate short video clips that bring your photos to life.
So yes, we can now create videos out of thin air based on our photography.
Here are a few examples I generated after feeding my photos through Google’s Whisk and Veo generative AI models. (Other companies offer similar fast-developing technologies.)
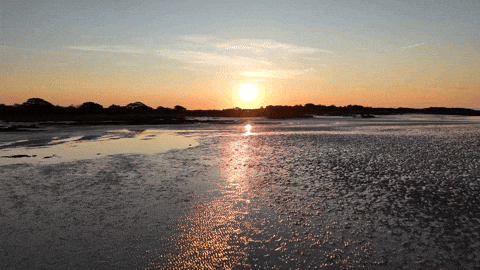
Maine Sunrise I snapped this sunrise photo during our Maine vacation:
Here’s the Google Whisk version:
And here’s the Google Veo video:
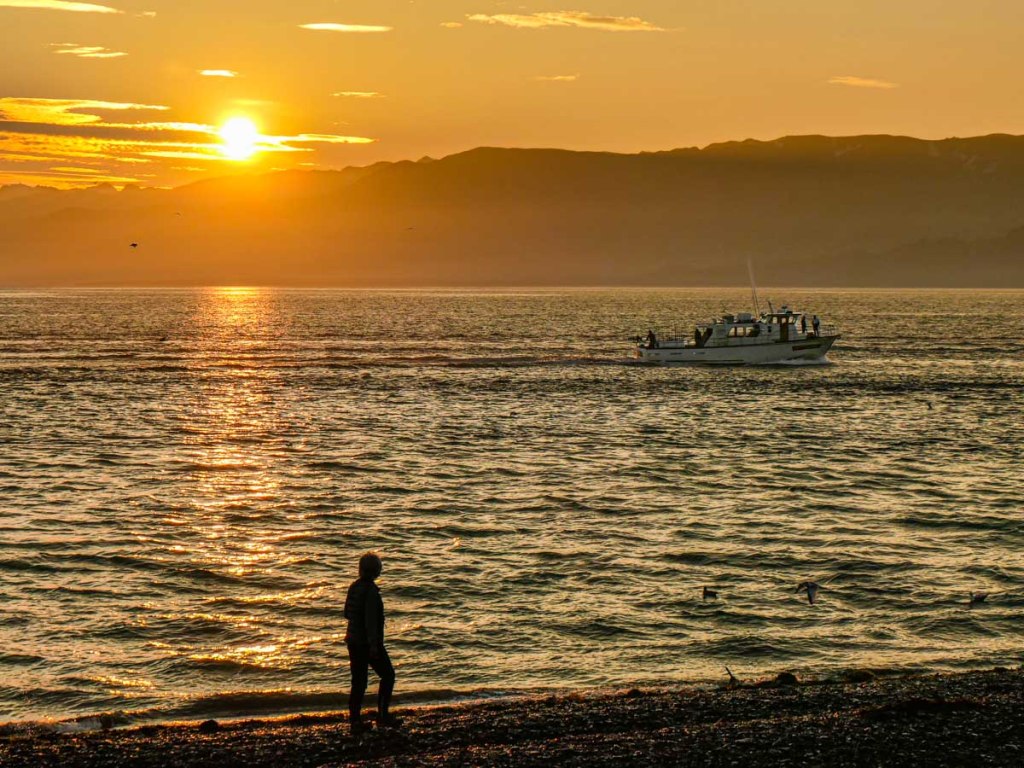
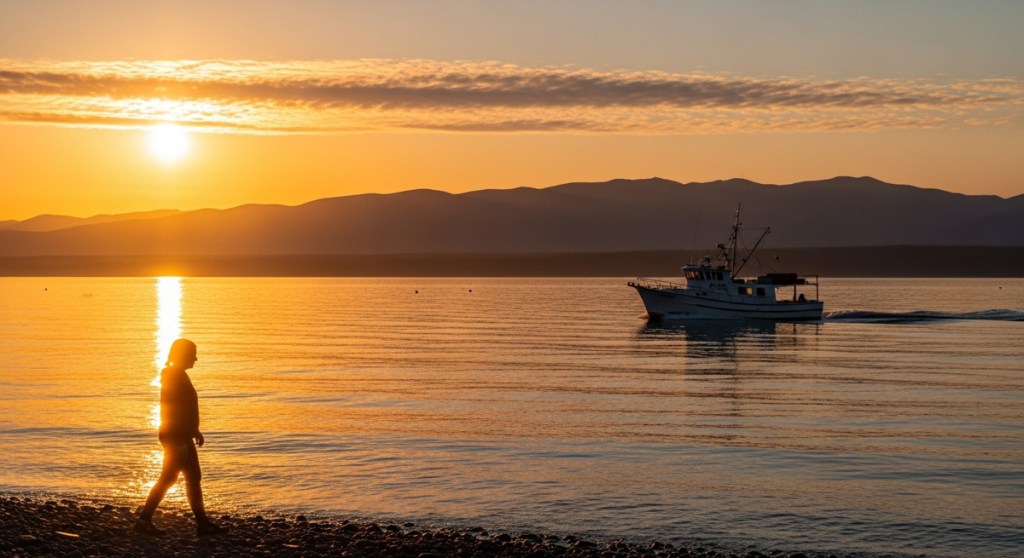
Alaska Sunrise Here’s my sunrise shot from Homer, Alaska during our 2023 trip.
Whisk photo:
Veo video:
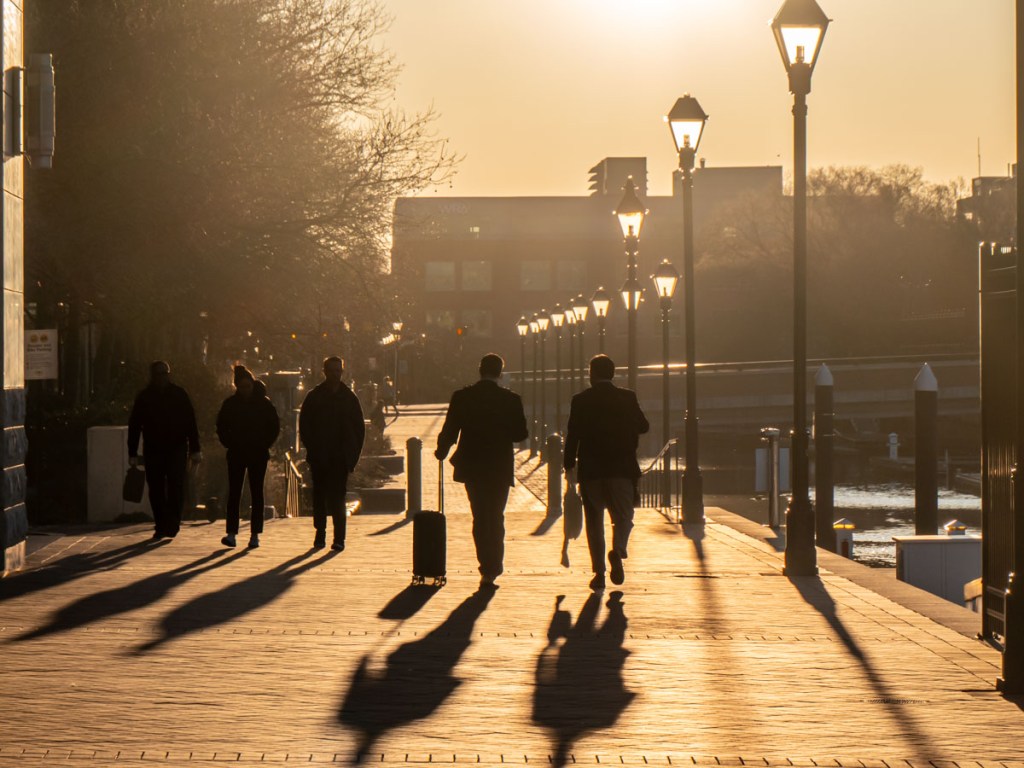
Baltimore Sunrise Here’s my photo of people walking by the water in Baltimore, Maryland.
Whisk photo:
Veo video:
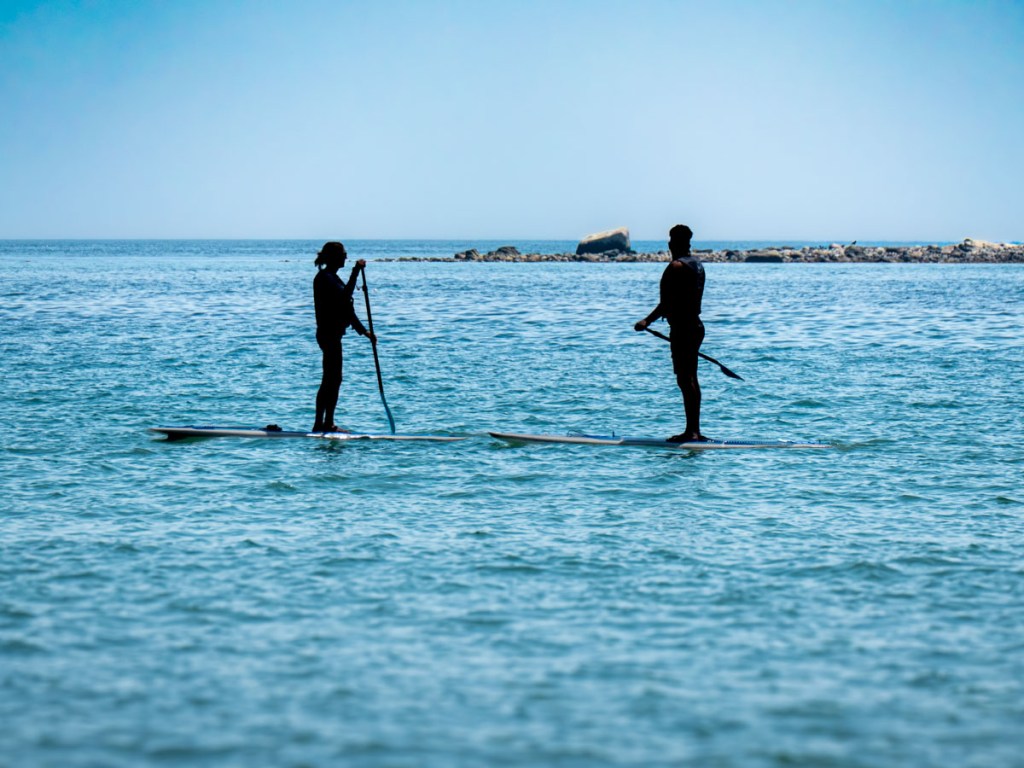
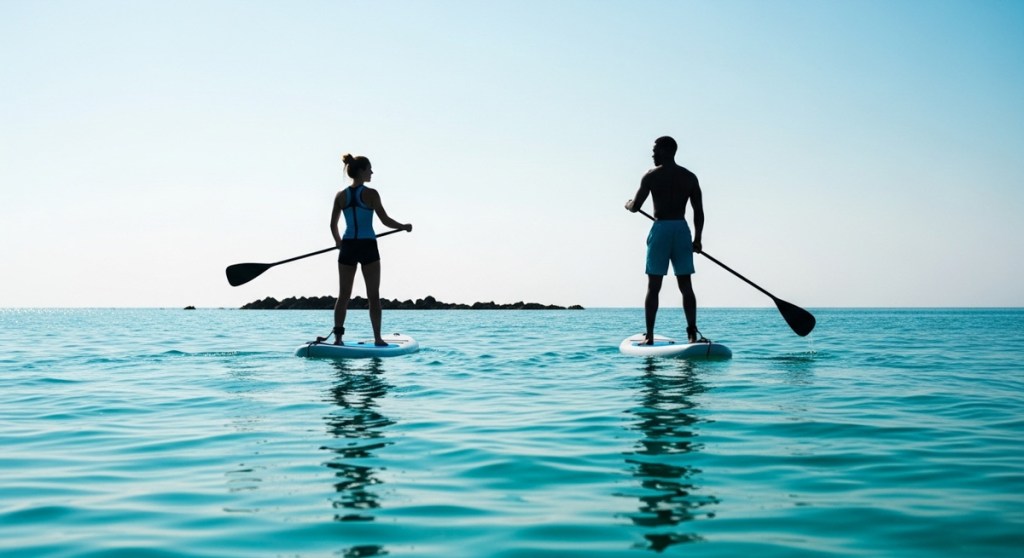
Two Paddleboarders on the Ocean I photographed these two paddleboarders in Maine last year.
Whisk photo:
Veo video:
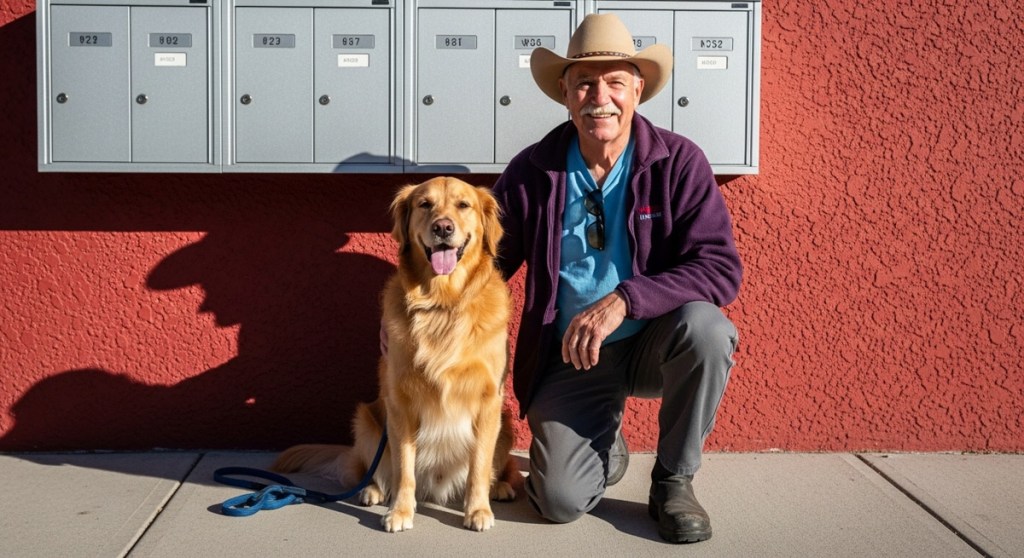
A Man and his Dog During our vacation in Alaska, I took a photo of a man with his beautiful golden retriever. I processed it through Google Whisk and Veo and generated this:
Whisk photo:
Veo video:
Generative AI Provides the Paint and Canvas I find these examples remarkable and clearly disruptive. I’m still adjusting to the massive implications to all this.
Generative AI tools have quickly become our new paint and canvas to bring our creative ideas to life. And the results will only get better.
So, it’s time for all of us to relearn how to paint, even as photographers.
Failure can often lead to success. After I crashed my camera drone, I was crushed. Happily, my drone was not. Then, I discovered a flying trick that every novice should consider. Here’s how it enhanced my aerial footage.
I finally bought a camera drone to start this new hobby I’ve long wanted to try. Then, I got to work studying how to fly it. I trusted my DJI Flip’s intelligent flying modes to protect my investment against disaster, because I didn’t have enough faith in my novice piloting skills. I was worried about crashing my little drone.
But my Flip survived its impact with that tree. So, I wiped the egg off my face and was determined to learn how to properly fly my little drone.
I continued slowly, and my patience finally paid off when I discovered a key aerial storytelling trick.
Fly Slow and Smooth Generating cinematic videos with a drone is all about flying it ‘slow’ and ‘smooth.’ All those establishing shots you can think of from movies… yes, slow and smooth.
And that translates to easier and safer flying.
And if you’re looking to create more motion in your drone footage, that doesn’t necessarily mean you have to fly faster. Instead, just fly your drone lower. Moving over a landscape close to the ground produces more movement than from higher up.
Happily, these flying strategies are relatively easy to accomplish. And just as importantly, they don’t put your drone at significant risk.
So, as I explored flying my drone manually, I intentionally followed the slow/smooth rule and practiced simplistic flying routines.
Up. Down. Forward. Back. Sideways.
The most aggressive maneuver I attempted was elevating my drone as it simultaneously moved forward.
Embrace your Inner Rookie How fast can my drone go? I have no idea. I haven’t tried to find out. Could I always see my drone as I flew it? 100%.
Slow is smooth. Smooth is fast.
And as I flew in the dullest of ways, that’s when my adrenaline levels finally began to stabilize, and the tension melted away.
And guess what? I decided I’m just not going to fly my drone over water. I’m not going to fly it over a mountain ridge. I’m not going to fly between two objects and try to thread a needle. I’m never going to worry if my drone has enough battery power to make it back.
I’m just not going to push it. This isn’t a sport for me. It’s a new hobby with an expensive piece of gear I’d like to keep in one piece.
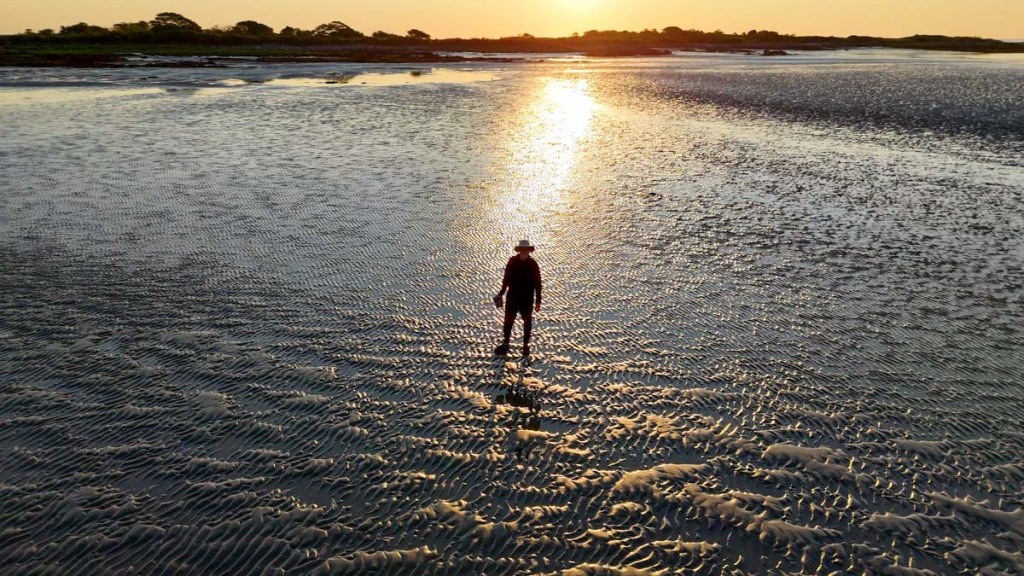
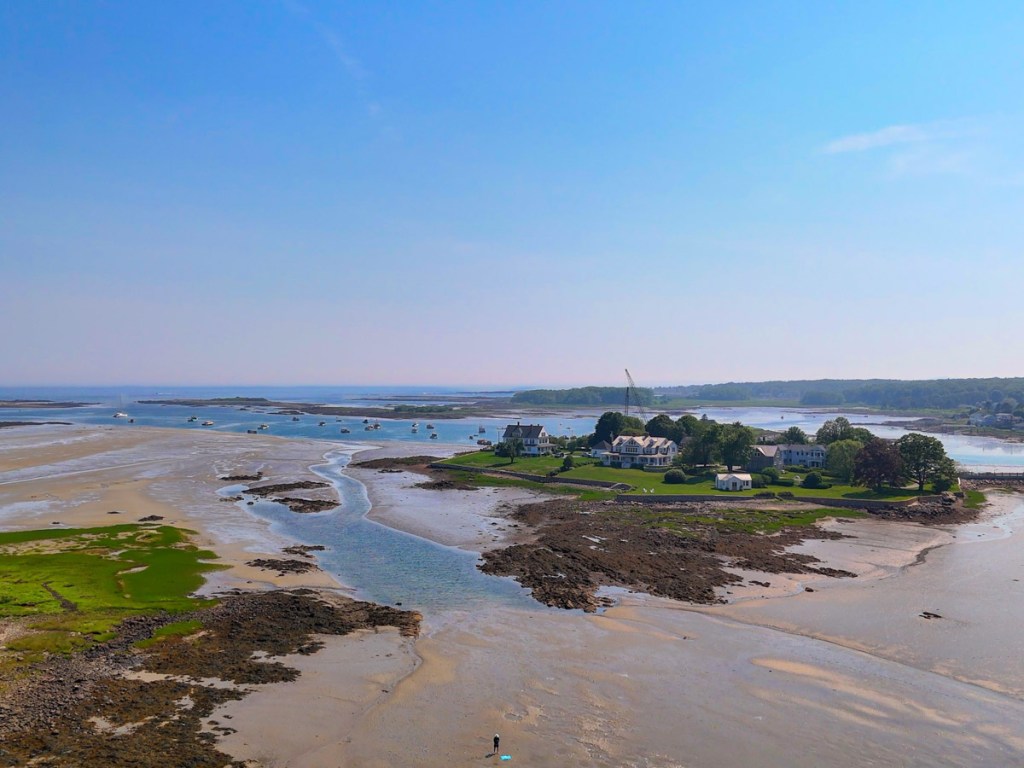
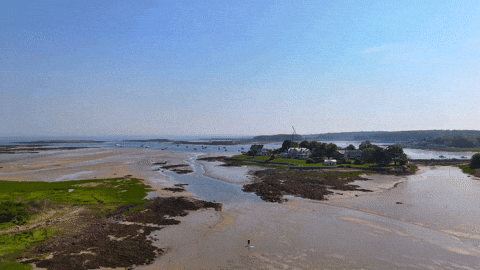
Barrett’s Drone Footage from the Mud Flats of Cape Porpoise, Maine Even with my self-imposed training wheels in place, my conservative flying style still enabled my DJI Flip to capture the incredible beauty of our world with motion. Often, just getting your drone in the air to is enough to recording stunning clips.
And that’s exactly what I did… I think I captured some nifty footage during my training flights on the mud flats of Cape Porpoise, Maine.
Here’s a video compilation of my manual maneuvering along with a few auto QuickShots (courtesy of the drone’s built-in code).
(Yes, my flying style was boring, but my shots were not.)
How to Quickly Edit your Drone Clips I put this edit together using a couple tools:
The DJI Fly mobile app for basic video editing and music
Final Cut Pro for precision edits and speed ramping
I should mention that you can quickly perform a punchy edit just using the DJI Fly app on your phone. There’s even a 1-click editing solution. It’s not perfect, but you can generate and share a dynamic video with your phone in just a couple minutes. Impressive. Most impressive.
When Less is More A little drone can go a long way. I mean that both literally and figuratively.
You don’t have to fly your camera drone like it’s capturing a stunt shot for “Mission Impossible.” I say… keep it all entirely ‘possible.’
And while many pros out there may yawn at my stubbornness to avoid all risk, I’m entirely pleased with my creative results to date.
Others may like showing off their camera drone crashes to the world, I hope to never do that again.
This may be a cool image from high in the sky, but some rookie drone flying mistakes nearly grounded my new hobby. Here’s what happened.
You can only watch so many drone tutorials on YouTube before you simply go for it and put your new camera drone in the air. And let me tell you, it’s completely nerve wracking. It’s not a video game to simply reset when you crash. You’re flying with no net.
There are any number of worse case scenarios to guard against. After you fly a drone for the first time, you immediately understand why the promise of flying cars never materialized.
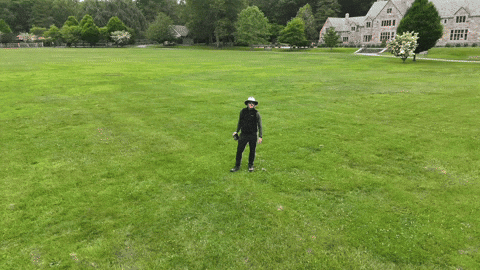
QuickShots are a Joy For my DJI Flip’s first test flights, I stuck to the simpler automated QuickShot maneuvers. These are the auto settings where the drone records preset flying sequences using ‘subject tracking.’I took my Flip to a nearby park with plenty of open space, crossed my fingers and hit the fly button. Happily, these tests were a success, and I brought home some impressive footage.
DJI’s QuickShots’ mode was indeed simple to use, as advertised. But I really wasn’t controlling the drone yet. My DJI Flip was effectively flying itself.
The next step was to attempt manual control.
Then, I Crashed my Drone into a Tree So, I packed my little Flip for our vacation to the coast of Maine in Cape Porpoise. My plan was to use the nearby, vast mud flats as my new training ground.
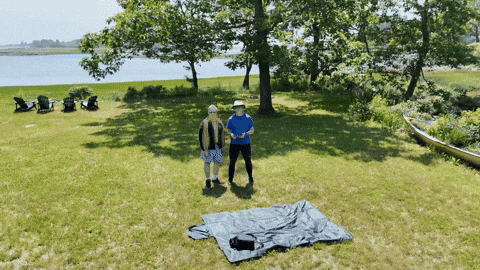
But before trudging onto the mud flats, I wanted to practice a few more QuickShots in the yard next to where we were staying. And that was a mistake. That’s because the distance limits I had set for my previous park flying tests were still in place, and I had forgotten to reset them.Then, when I executed an automated ‘Dronie’ QuickShot with my friend standing next to me, my Flip shot up and quickly began backing up in the air as it auto-tracked us… and it kept backing up… until it rammed into a tree.
The battery catapulted off the drone’s body, and both pieces collapsed to the ground.
No, the DJI Flip doesn’t have rear-sensing capability. No, I didn’t have enough sense to cancel the auto maneuver before it was too late. It all happened so fast.
The crushing sounds of the tree crash and then ground impact were horrifying.
I stood there, frozen. Staring ahead.
The whole incident took mere seconds, and my flying career was over before it really started. Or so I thought.
My Drone has Nine Lives? I hurried over to the wreckage. There was the battery, and then a few feet away…the drone. Both appeared to still be intact. Huh.
I picked them up and inspected each for damage, but I couldn’t find any.
So, I snapped the battery back in and returned to the launch zone. I looked at my friend. Would this thing still fly? I pressed the button.
My DJI Flip effortlessly lifted into the air as if the past few minutes had been magically erased.
Huh.
The best I can figure, the battery’s ejection had lightened the drone’s weight, thus reducing the effect of ground impact. And the drone’s four propellor guards had protected it from the tree.
I turned to my friend, and I said, “Well that’s nine lives right there.”
A Drone’s Weakest Element is the Human Factor It was painfully clear that even in auto pilot mode, my drone required correct human inputs. I thought the tree was far enough away. I was wrong.
Sure, I’m new to drone flying. And the DJI Flip’s intelligent flying modes are designed to help with this limitation, but it’s not fool proof.
And as I later attempted other vacation flight trials, I was painfully aware how often I felt outside my comfort zone.
I Accidentally Sent my Drone into ‘Orbit’ I shouldn’t take credit for this amazing shot above the mud flats, because it was a complete fluke.
I was simply testing the auto ‘Return-to-Home’ function after I manually flew my drone (very cautiously) a couple hundred feet away down the beach line at a twenty-foot altitude.
Return-to-Home or ‘RTF’ is where the drone automatically flies back to its takeoff point. It’s a handy feature. But I forgot to check the height settings for the return flight. This is an important detail to ensure your drone doesn’t hit any trees on the way back.
Happily, there are no trees to avoid on mud flats. Unfortunately, I had accidentally left the ‘RTH’ height setting unnecessarily high.
My Flip suddenly shot up into the sky to reach the preset altitude for its return across the beach. Then, I quickly lost track of it.
I couldn’t see my Flip anymore. I scanned the sky. My little drone was gone. I began to panic.
But I could still hear its distant whine. I looked down at the screen of my RC 2 remote controller. I was stunned and terrified by what I saw. My drone appeared to be in orbit, and it was beaming back this spectacular view of the coastline.
In hindsight, I recognize this is what the Flip is designed to do. But this wasn’t my plan. It was a bit windy out, and my intention was to keep my drone relatively close.
Searching the Heavens for my Intrepid Companion And then, as if on cue, the wind began to pick up. I could hear my Flip’s overhead whine fluctuate as it struggled to maintain its flight control. A gust hit. Then another.
My adrenaline really began to flow. (I swear I could hear Hans Zimmer music playing in the distance.) What should I do?
I felt the urge to grab back control and to gently lower the drone and fly it back manually. But I wasn’t ready. I didn’t have the skills yet. This was supposed to be just an easy test flight!
I would have to trust the code to bring my drone safely home. And that it did.
I stared at the controller’s screen for what seemed like hours, but the return trip lasted barely two minutes. And the wind was less of a concern than I had feared.Soon, I could see my little flying machine descending from the heavens over me.
Phew.
Everything was just fine. But for those few minutes, I felt totally out of control, though the Flip was in complete control (silly human).
We Still Have a Role in a Camera Drone’s Cockpit The good news is I performed my unintended orbit test at a time when nobody else was out on the mud flats. I wanted to plan for the unexpected. And that’s exactly what I got.
The RTH trip was in fact, not that high in the sky. (The DJI Flip is designed to reach a much higher altitude.) I just wasn’t prepared for this moment. And when I couldn’t see the drone, I freaked out.
It’s worth noting that both of my above mistakes (the tree crash and the orbit maneuver) involved incorrectly setting the boundaries of the auto flight modes.
I thought flying my drone manually would be the toughest part of my Jedi flight training. As it turned out, giving up control to the DJI Force too quickly carried its own risks.
I just didn’t know what I didn’t know. Maybe was time to watch a few more YouTube drone flying tutorials.
I was determined to be better prepared for my next all-manual flight tests on the empty mud flats…