How Found Memories from Forgotten Media Can Affect your Own Story
Today’s tech easily enables you to meet your younger self through countless photo and video moments, many of which you may have forgotten about. How does that awareness change your personal history, and what are you supposed to do with all your media files in the decades to come?
What would it be like to time travel and experience your younger self? This is not an impossible dream. Today, we all leave multimedia breadcrumbs for our future selves. Our thousands of user-generated photos and videos is the resulting digital wake in the virtual ocean of our lives.
Your past will always be there for you to see and hear. It’s never further away than your smartphone’s media library.
This clear view into so many moments from your own history will likely anchor many of your memories that would have otherwise evaporated or organically shifted across time.
Is that a good thing? Well, it certainly isn’t ‘natural.’ Our minds aren’t built to maintain a photographic memory.
But thanks to digital tech and cloud storage, we now effectively have that superpower.
It didn’t always used to be so easy.
Digitizing my Parents’ Photo Albums
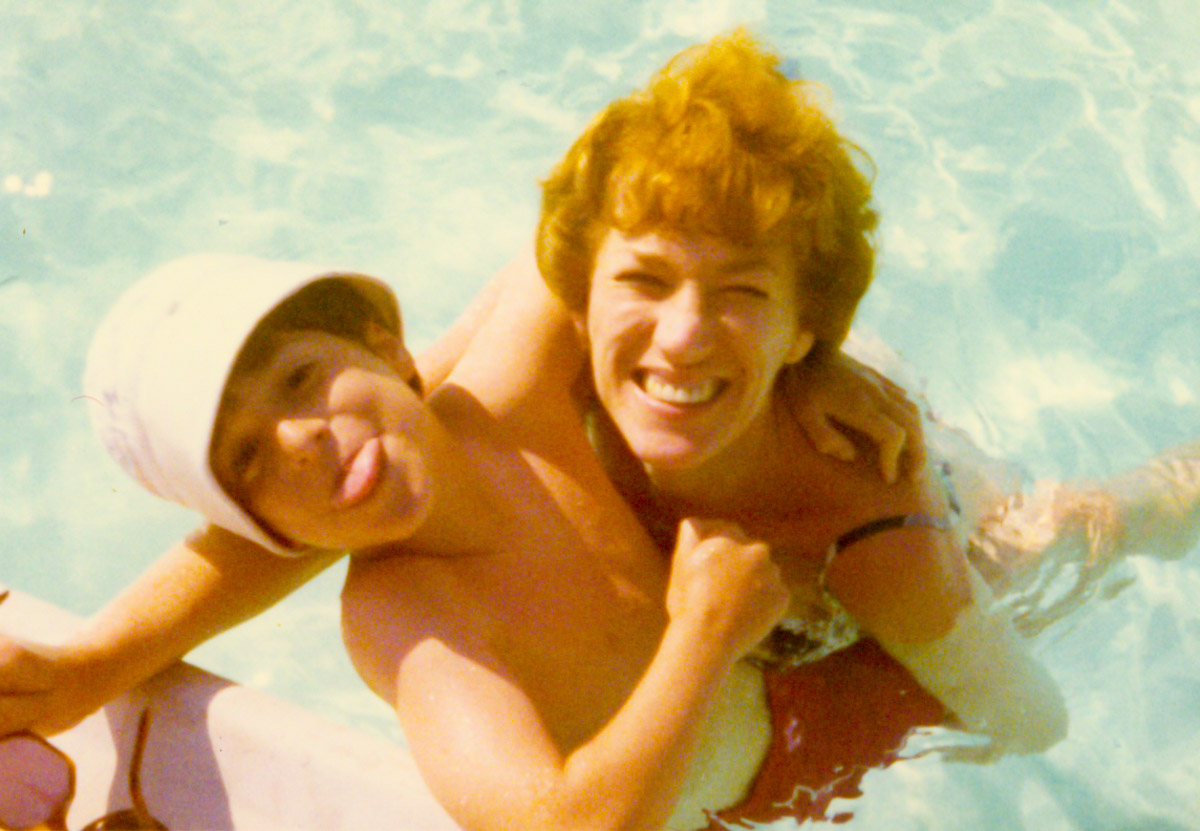
I grew up straddling the technology transition between analog and digital. When I was a kid, it was all analog. Today, trying to access any of my family’s 20th remaining century media is almost impossible.
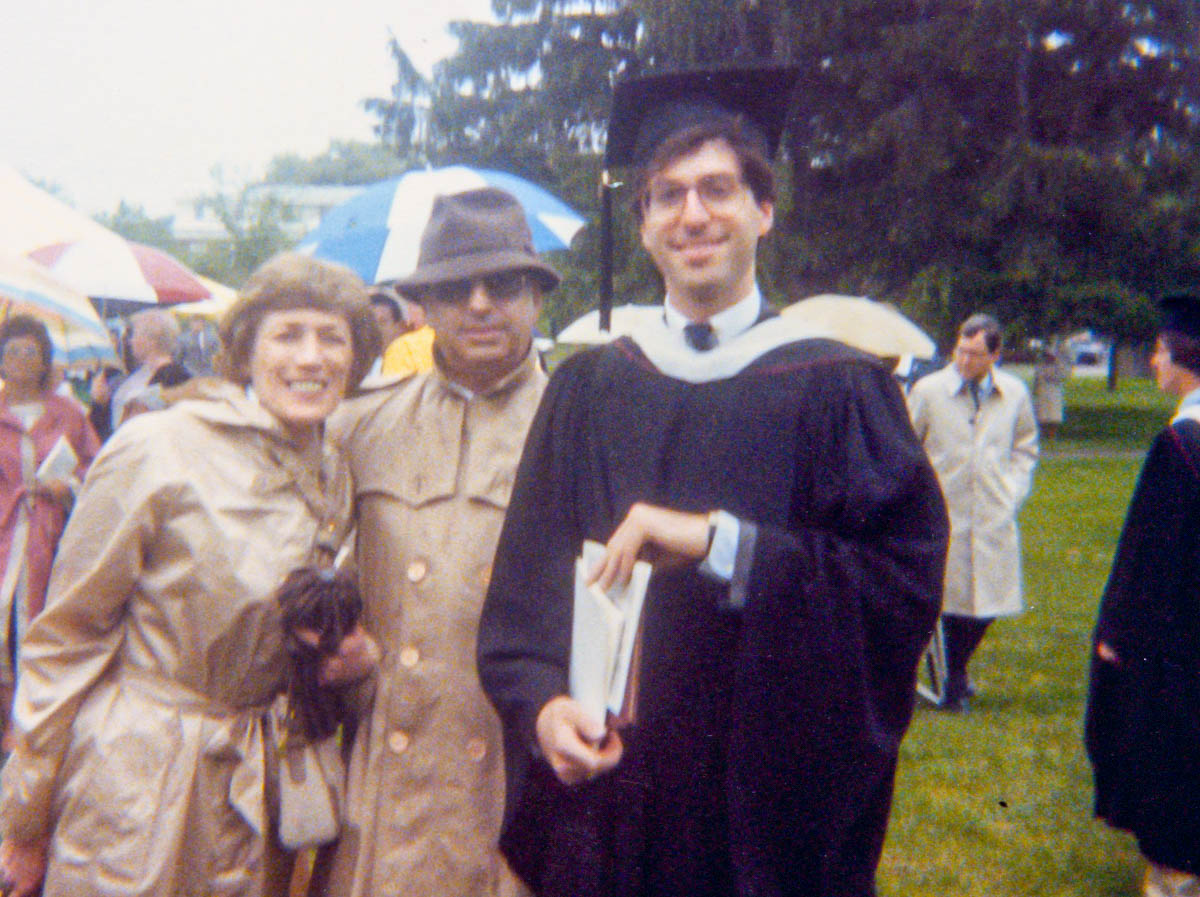 Thankfully, our collection of physical photos, including this college graduation photo with me and my parents, is an exception. (A pile of disorganized photos in a lost shoe box in the back of a closet can serve as a great time machine.)
Of course, old photo prints are easy to scan and convert over to digital duplicates.
For the past couple of years since my father passed away, I’ve been digitizing parts of his old photo collection, which includes some of my grandfather’s pictures. (This multi-generational project has been complex and time consuming. So, I’ve been chipping away at it.)
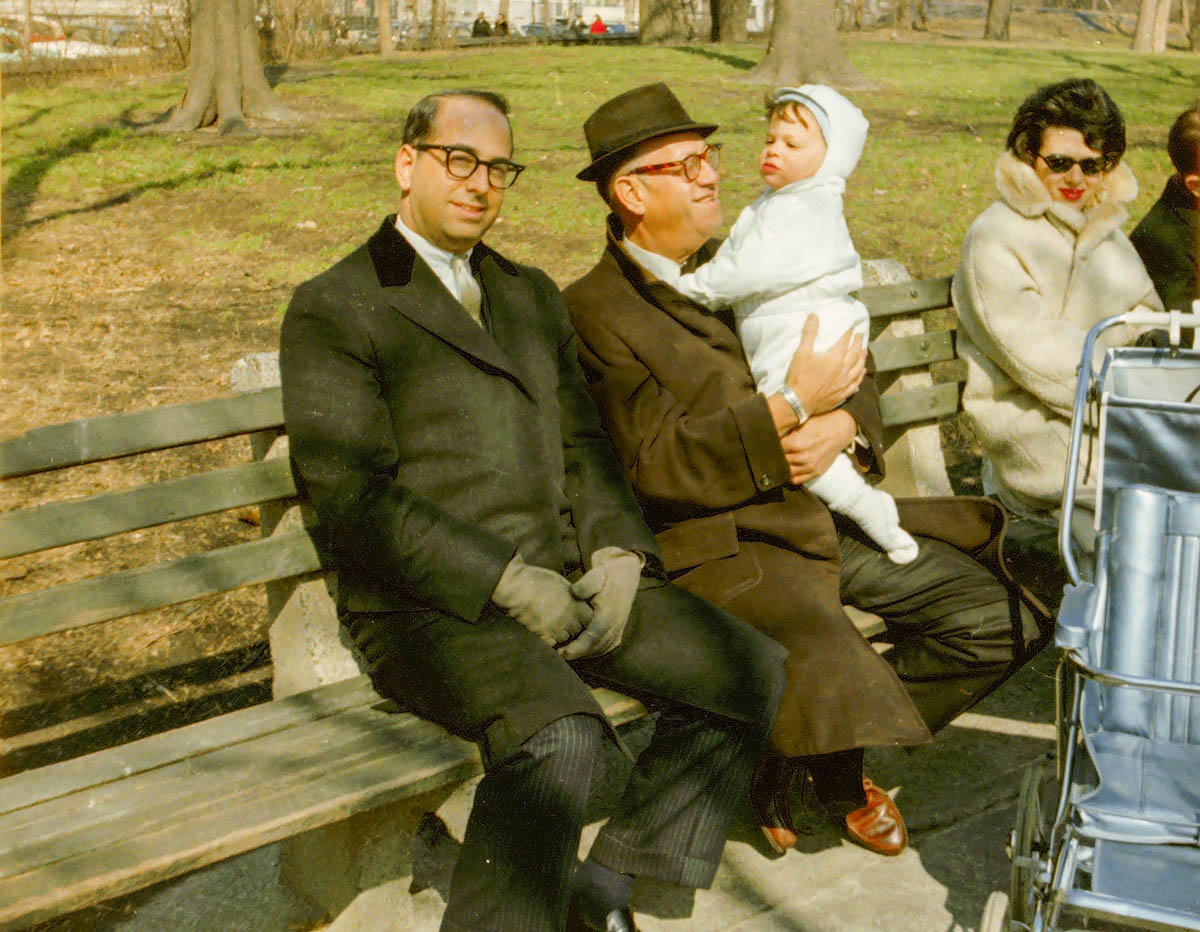 Yes, that’s baby Barrett with my dad and grandfather in Central Park.
When I brought home all my dad’s photos, they included albums that my mother had originally curated. And those collections contained my own history from birth through college.
Yes, I knew these albums existed, but I had never taken the time to digitize most of the photos. I figured I could do it ‘next time.’ But my mom passed in 2006 and then my father in 2022.
So now I’m finally dealing with it.
 I’ve realized there is no next time. No next time to save this cool photo of my mom and me. If I put these pictures in boxes on a basement shelf, that will likely be their final resting place.
Or perhaps they’d be uncovered by ‘Lester: The Next Generation.’
And I absolutely don’t want that for our son.
The good news is every photo doesn’t need to be converted. It’s just the ones that help fill out the story I’m curating for my family’s history… as well as my own. What was important then, may no longer have relevance.
So, you have to put a critical eye to what’s digitized and what gets discarded.
Finding Forgotten Audio Moments from the Past
An old photo can tell you a lot. But it can’t compare to experiencing a piece of old audio or video. Now, that can really bring the past to life.
While going through my father’s things, I uncovered an audio cassette tape my parents had recorded when I was in high school to document their vacation to Turkey and Greece. (I was away at boarding school.) These recordings were designed to accompany the photos my dad had shot (and displayed on his massive slide projector).
I don’t know that I ever listened to this tape. Of course, I wondered what it contained.
So, I pulled out an ancient cassette player I had stashed in our basement and my long-retired MacBook Pro with an analog input. I tethered them together with an audio cable with mini connectors and completed my popup sound conversion station.
I crossed my fingers, and happily, my Macgyvered solution worked. And as I clicked on ‘play’ and the still-functioning cassette began to turn, I heard my parents’ voices as they went through their travel log. It was as if I were sitting right there with them again at our dining room table. It was remarkable.
I successfully digitized my parents’ conversation… and I felt a bit like Doctor Frankenstein.
Hearing Myself as a Kid Again
As I celebrated my time machine, I knew this tenuous technical tether to my past wouldn’t hold. (Either my cassette player or ancient Mac would conk out.) I knew I had other deteriorating cassette tapes representing early Barrett history in our basement. They contained nothing earth shattering, but I had felt their mere existence with my younger voice was worth holding onto. (Yes, I know my logic is debatable.)
I started generating audio recordings when I was a kid. It all began when my mom bought me a Sound Design cassette recorder when I was seven years old. That gift was life changing. And it put me on a path that eventually led to my career in video production.
So, I finally saved my old audio recordings from oblivion.
I listened to myself as a silly kid. I heard my teen self in high school, and then college. I even had audio as a young adult.
Whoa. Hearing myself throughout these decades was a huge head trip.
Facing your Younger Self
We know that life experience affects us all.
I’ve always thought of myself as essentially the same person across my life. And I believe that largely holds true, but each version of Barrett I listened to was slightly different. And I’m not just talking about age. There were subtle differences that only I would be able to pick up on.
My phrasing. My energy. My attitude. Yes, of course, we change over time, and I was witnessing this firsthand through my popup time machine.
I felt like I was listening to multiple Barretts from different multiverses. Many of the moments I heard I don’t even remember. (It was all a bit freaky.)
Do You Want to Remember Everything?
Which leads me back to the slingshot effect your archival media can have on your brain. For better or worse, your memories will get jolted with an instant upgrade. It certainly happened to me.
So, if you uncover and revive long lost audio and video files from your past, you should proceed understanding that you may not find what you remember. That should be a good thing. But you never know…
As we all travel into the future, we will remain tethered to countless digital memories and moments from our past. It’s all there. Nothing to forget.
But it’s really too much to remember, and why would you want to?
Sure, the many access points to your past via your ever-expanding media library have some value for occasional reference.
And experiencing a deep-dive ‘review’ like I did helps to offer perspective and center yourself.
Anchor your Memories that Matter Most
Otherwise, the opportunity is not to swim in a sea of disorganized digital memories. Instead, it’s to mindfully select which pieces belong in your story and then put them in their rightful place as you travel through life.
It’s just like building any valuable album of memories, which is to anchor the ones that really matter.
The trick is not to wait for years or longer to do this. You are the author of your own story. And you can best curate it as you experience it.
Actively Curate your Own Story
Imagine being able to reference all the personal media highlights from your past. Consider how many of the smaller moments are the sweetest ones. Think about how many might have been lost if you didn’t curate them along the way.
This takes a lifetime of ongoing attention and some work. But it’s your story.
Yes, it can feel overwhelming. But doing a little at a time will help.
And it’s never too late to get started.