At Home with Tech

Unlock the power of all your technology and learn how to master your photography, computers and smartphone.

Category: Tech Fixes

Avoid this Surprise When Installing Your Google Nest Learning Thermostat Gen 4

Getting 12 years out of any piece of tech is more than anyone should expect. That said, if it’s still working and doing the job, why would you want to replace it? (Unless you simply need the latest and greatest.) 

Well, you’d pull the plug when the manufacturer forces you to. If the old unit’s tech is so obsolete, it can’t be maintained by the manufacturer’s current standards. And that’s what’s happened to my trusty Nest Learning Thermostat (2nd gen) from 2013.

Goodbye Nest Learning Thermostat Gen 2
In tech years, it’s like a century old. A lot’s happened, including Google buying Nest to enter the smart home market. 

So yes, Google has walked away from its older Nest Learning Thermostat population. The official Google language is “end of support.” What that means is 1st and 2nd-generation models can no longer be reached remotely via the app on your phone as of October 25, 2025. (They’ve been “unpaired and removed” from the Nest app or Home app.) 

Poof.

It’s Time to Buy Gen 4
Yes, you can still operate these ‘relics’ manually, but I’ve always spent more time interfacing with my Nest Learning Thermostat through the app on my iPhone.

Most significantly, these units are no longer supported, which according to Google “may lead to decreased performance with continued use.” So that’s code for… it’s just a matter of time till they stop working altogether.

Look, I get it. No web-connected piece of tech is going to last forever.

So, if you want your Google Nest Learning Thermostat ecosystem to remain reliable and fully operational, you have no choice but to upgrade to the current 4th generation model, which costs $279.99.

Ouch!

Fortunately, Google has softened the blow by offering a $130 discount for current 1st and 2nd gen owners. So that effectively drops the price point to $149.99 plus tax. (Shipping is free.)

Registered owners should have received an emailed discount code towards the purchase of the current 4th gen model.

Three Color Choices
So Barrett went ahead and bought himself an early holiday present with his discount code. (Thank you, Google.) 

My hardest decision was deciding which color to get. I decided on Obsidian with a black base. (I felt it would present a cleaner, unified aesthetic in our living room. (The other choices are silver and gold with a white base.)

My Installation Surprise
Happily, installing my new 4th gen unit was the essentially the same as my old 2nd gen model. 

The only relevant difference was the size of the circular base plate, which you screw onto the wall. (The thermostat clicks onto the base plate.)

Here’s the problem: 

The new base plate is slightly smaller than the old one. And that tiny footprint difference can be a really big deal.

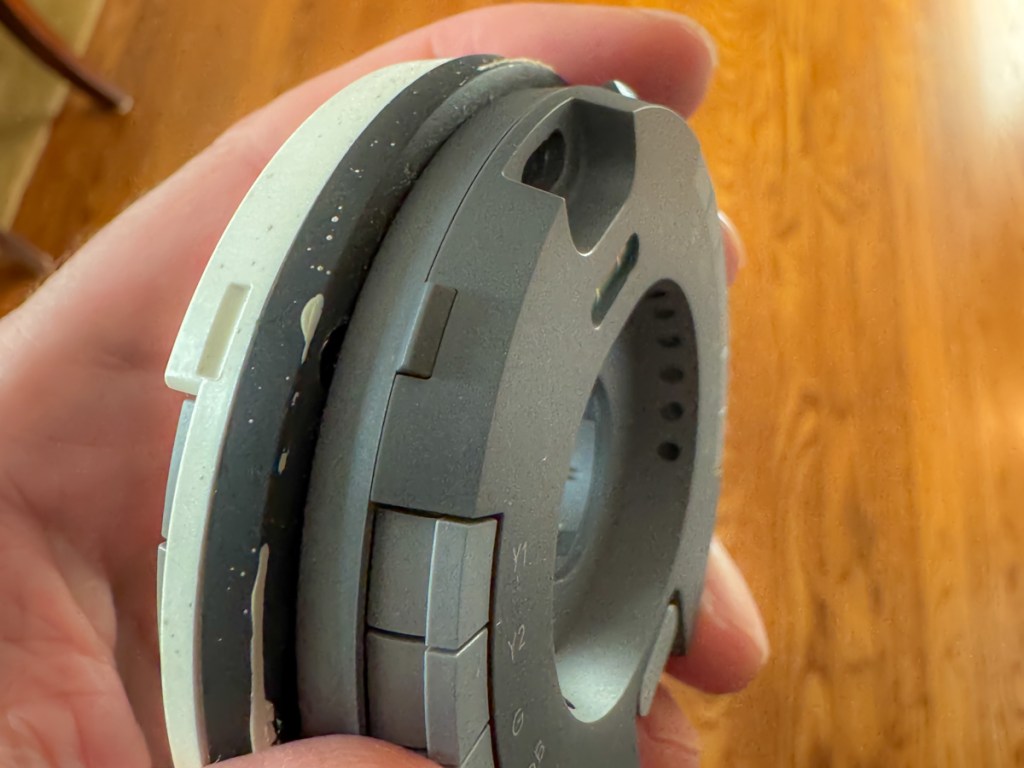
Why? Well, the new base plate will reveal a little more of your wall… 
that might be unpainted!

Surprise!

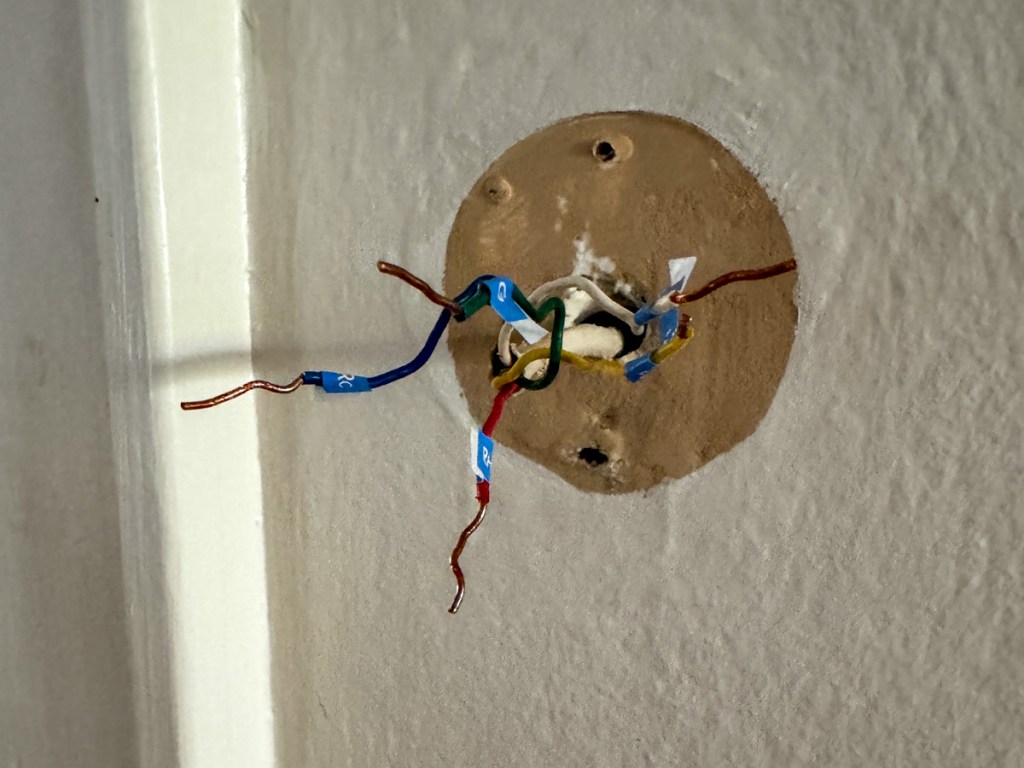
Yes, that’s exactly what happened to me. I realized there would be dark, thin paint ring behind my new, gleaming Google Nest Learning Thermostat that revealed our living room’s paint color from years ago.

Granted, the 4th gen thermostat’s beautiful face is bigger than my gen 2’s screen. It’s plenty big to effectively block the view where the thermostat’s smaller circular ‘neck’ touches the wall.

But I would know, and if you looked from an angle, you’d definitely see the old paint. Ugh! 

Sure, Google has thought of this and provided a white trim plate to use that would cover up this kind of problem.

But I didn’t want to use the trim plate. I liked the clean look of the black, circular orb perfectly protruding from my wall like a futuristic Cylon interface.

I just need to get rid of that thin ring of old paint.

I Had to Put on My Painter’s Hat
So, I hurried downstairs and rummaged through my basement to see if I still had a little bit of our living room’s current paint in a can somewhere. I eventually found it, picked up a brush and performed the paint fix.

This of course delayed my installation process, as I had to wait for the paint to dry before continuing. But it was clearly a step worth taking.

So just remember that you might need to bake that extra time into your own installation plan. 

Cool New Sensor Pucks
If you’ve been living with a 1st or 2nd generation model, you may not know about Google’s little wireless ‘satellite’ temperature-sensing pucks to pair with your main thermostat. (I didn’t.)

These “Nest Temperature Sensors” (now 2nd generation) can be placed throughout your home to help create a more even temperature throughout your rooms (effectively simulating some of the benefits of a multi-zone HVAC system).

When you buy a 4th gen Google Nest Learning Thermostat, it also comes with one Nest Temperature Sensor. (You can purchase more separately.)

With multiple sensors, you can schedule which sensor controls your thermostat at different times of the day. You can always default to the sensor in your base unit. And you can also average between your sensors.

I placed my temperature sensor in our sunroom, which tends to be cooler during the winter months than the rest of our house. Hopefully, the sensor will convince my base unit (in our living room) to keep providing a little more warmth in the early evening when my family tends to hang out in our sunroom. (That’s how I programmed it.)
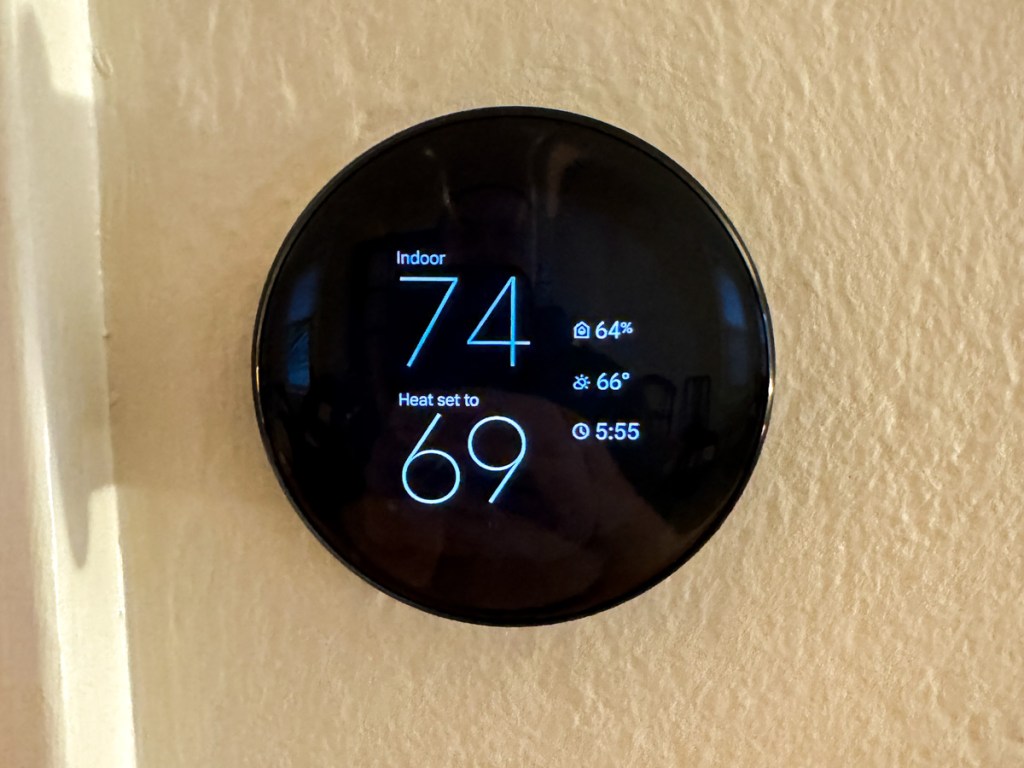
Upgrade Complete!
I’ve always enjoyed my old Nest Learning Thermostat as the center of my smart home experience. And now that I’ve upgraded, I’m pleased that I’ve refreshed my relationship with Google’s gen 4 model.

I hope it takes me all the way to 2037. But with the pace of change these days, something tells me we may be discussing this again a tad sooner…

How to Hear Important Texts on a Muted iPhone with Emergency Bypass

I’m embarrassed to report that my iPhone almost interrupted a video shoot at work recently. My device inexplicably projected a singular text ping during the recording. I was standing in the back of our studio, but it was loud enough for the video producer ten feet in front of me to notice.

He shot over a slightly concerned glance. (Yes, of all people, I’m supposed to know better.) I rolled my eyes in apology. Fortunately, we were between takes, and nobody else noticed. (We both smiled.) 

No real damage was done (other than to my tech ego). But how could I make this 101-tech-mistake that any kid can easily avoid?

Yes, of course, my producer had previously reminded everyone in the studio to silence their phones before we started. But I took no action, because I believed my iPhone was already muted. In fact, I had already taken steps to permanently silence it. So, I proudly thought I was way ahead of this moment.

And yet, I wasn’t.

Do You Really Know How to Silence Your iPhone?
So, how did I find myself in the center of this tech embarrassment? How does anyone for that matter? It’s not like it’s hard to mute your phone. 

But isn’t there’s always someone in the room who can’t seemingly do that? 
(present company included) 

Well, this kind of mistake is often less about tech failure (I mean… human failure) and more about good intentions.

As I mentioned, I had already set up my iPhone to operate in a totally muted state. I took those steps long ago… I just couldn’t handle all the disruptive sounds my phone projected (however cute or lyrical).

But more recently, I made one other iPhone setting change. I selectively activated the ‘Emergency Bypass’ mode for our teenage son’s texts to me.

What is that exactly? 

Text Tone: Emergency Bypass

This setting disables audio restrictions regarding how your phone reacts to certain people in your Contacts app. If you don’t want to miss an incoming text from someone, Emergency Bypass helps to ensure you’ll hear it, even if your iPhone is muted.

Our son doesn’t text us all that much, and when he does reach out, I want him to get through. It’s usually important, requiring a timely ‘parental’ response. 

Here’s how to set up Text Tone: Emergency Bypass on your iPhone:

  • Open the Contacts app
  • Select your important person
  • Go to Text Tone
  • Turn Emergency Bypass to ‘On’

This hack is amazing. I did the same for my wife’s phone number (more on this later). Now, whenever I hear a text come in from my otherwise silenced iPhone, I know it’s either from my wife or our son.

I think you can see where this is going.

Ringtone and Alerts – Change with Buttons

Yes, the Text Tone: Emergency Bypass setting is a powerful setting to help you stay connected to those who matter most. But it can still expose you to an embarrassing moment if you need to entirely lock down your phone’s sounds and forget that you really haven’t.

So, I realized after my little ‘ping-gate’ episode that I needed to adjust one more iPhone setting to quiet my phone further, even when my son or wife reach out. 

Here’s the fix to the fix:

  • Go to Settings
  • Sounds and Haptics
  • Ringtone and Alerts
  • Change with Buttons- Tap to Green

Now, with this ‘Change with Buttons’ setting activated for ‘Ringtone and Alerts,’ you can easily toggle down (and then back up) the volume from your iPhone’s pings and rings with the side buttons.

The manual control enables you to temporarily shut off the sounds from your emergency bypass list.

Only then can you be sure your iPhone will really behave in the quietest of moments. (Just don’t forget to turn up the volume again after your mandatory session of silence!)

One Ping Short

Yes, despite my advanced solutioning for how my iPhone’s little speakers operate, I had still fallen one ping short. But I’ve learned from my mistake and made the appropriate patch in my iPhone’s Settings.

I later texted my wife about my little audio incident at work. (It was, in fact, her own text to me that had broken through.) She wrote back and asked helpfully if I knew how to silence the notifications on my phone. 

I blinked a couple times as I took in the layers of irony surrounding this last chapter of my story. 

And then I smiled.

Silence is Golden
My cautionary tale is just another reminder that you can’t always set it and forget it when it comes to your tech. And maybe when someone tells you to mute your phone… you simply do that.

Still, with your iPhone running completely silent 24/7, that emergency-bypass sound setting can be essential. I still highly recommend trying it out. 

You just need to remember how to control it. 

Here’s Why Attaching a Bumper to Protect your Apple Watch is a Smart Idea

A long, diagonal crack mysteriously appeared on my Apple Watch screen. No, there wasn’t an ‘incident’ or moment of impact that I could recall. Yes, it was shielded by its OtterBox integrated bumper and screen protector. 

I could feel that the crack went deep. But I didn’t know how far down it went and whether it reached the surface of my Apple Watch Series 9.

Yes, I was concerned.

Apple Store ER Visit
So, I visited my neighborhood Apple Store and booked an ‘instant’ appointment with an Apple Genius. (Do they call them that anymore?)

My Genius walked over to me like a doctor entering an examination room. He asked me to take off my OtterBox’s bumper. I quickly realized I couldn’t. It was stuck on. Really stuck (like an alien face-hugging Xenomorph). I asked if he could help. He had trouble too.

It took the Apple Genius a couple minutes, and he needed to use a special Genius ‘tool.’ But eventually, he pried the bumper off. The integrated screen cracked further along the way, but it eventually revealed my Apple Watch’s screen… in perfect condition.

Phew!

But a fair amount of ‘particulate matter’ had accumulated in all the nooks and crannies. My Apple Genius happily polished it up for me and then handed over my Apple Watch. 

Time for Another Bumper?
My naked Apple Watch rested in my palm, gleaming. So now what?

No, Apple doesn’t sell bumpers or screen protectors for Apple Watch.

However, my Apple Genius mentioned how much he liked the OtterBox brand and that I could probably buy a replacement bumper online.

I strapped on my Apple Watch as it was meant to be worn… without any third-party protection. But I must admit… I do occasionally hit my wrist against doors and walls. So, my experience may fall outside of Apple’s definition of ‘normal.’

I walked out of the Apple Store with my next mission: Buy a replacement bumper. 

In Search of a Better Bumper/Screen Protector
I jumped back online and searched OtterBox’s website. I didn’t want to buy the exact same OtterBox ‘Eclipse’ bumper/screen combo. Not because it only lasted for barely more than a year. I didn’t appreciate how difficult it was to remove.

OtterBox didn’t offer another choice. So, I expanded my search.

There aren’t many manufactures in this market, and even fewer from brands I recognized. The options on Amazon mostly fell in the sub $10 price point. Sometimes, you’d get two bumpers for ten bucks… even with the built-in screen protector.

How good could any of these really be? 

And I couldn’t find consensus with reviews… the few that I could find. It’s like this was a forgotten/abandoned product category.

Perhaps Apple is right… Apple Watch doesn’t need protection.

Still, I knew that mine did. 

OtterBox EXO EDGE
After my exhaustive search through uncertainly, I eventually ended up back where I started with the one brand I knew.

OtterBox also makes the EXO EDGE bumper without a screen protector. I figured the simple bumper by itself would be more structurally flexible without a rigid screen protector on its top.

So, I gave it a shot… Click.

And in fact, the EXO EDGE bumper does have a bit more give and take. It popped easily onto my Apple Watch. More importantly, I expect it will be simpler to remove when the time comes.

And here’s my Apple Watch with its new EXO EDGE bumper
(and Nomad leather band).

No More Screen Protection?
Case closed, right?

Well, what about the screen? It’s now exposed to any number of dangers with no net. 

Yes, I’d prefer to also have a screen protector on my Apple Watch, but I don’t want to use an integrated solution that can cause damage when removed.

My EXO EDGE bumper should offer sufficient protection from most scenarios. But no, it won’t protect against a sharp object at 90 degrees moving directly towards the screen.

You Can’t Protect Against Every Situation
I could seal my Apple Watch in bubble wrap and duct tape. Or perhaps I should just keep my Apple Watch in my pocket all the time. But, of course, that’s all absurd.

I’ve taken reasonable precaution to protect my Apple Watch’s body and screen with a simple OtterBox bumper. We’ll see how far this sensible approach takes me this time.

This topic falls under a larger question I sometimes have regarding the practicality of manufacturing expensive, shiny surfaces that require constant protection. (Wouldn’t it be great to drive a car with a tough, rubberized exterior?)

Alas, I know you’ve just got to travel your life’s path without worrying about every possible stumble.

But it’s okay to be smart and apply certain protections.

And just try not to trip.