At Home with Tech

Unlock the power of all your technology and learn how to master your photography, computers and smartphone.

Tag: Adobe Lightroom

Consider Adding in Blur when Editing your Photos

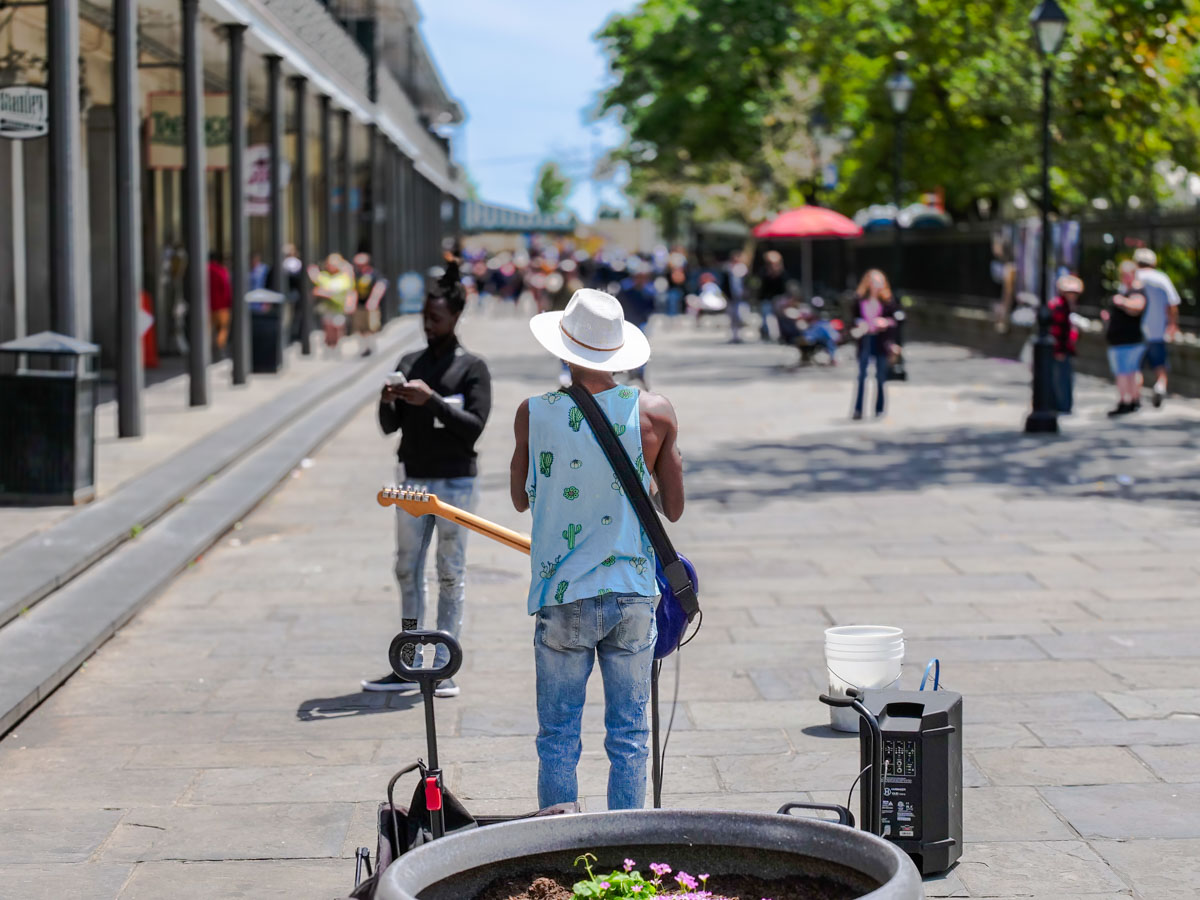
Where once you could only find your background blur when you snapped a photo, now you have the luxury to create and position it later when you edit the image. I did that with this photo I took in New Orleans.

Unwanted blur in my photography was always my kryptonite. Getting a clean freeze of any motion drove my creative process. Finding background blur (what the pros call ‘bokeh’) was always a ‘nice to have’ upgrade.

But when Apple added ‘portrait photo’ mode to its iPhone cameras, that commoditized bokeh to the point where anyone could easily create background blur. It’s a nifty software trick that generates a narrower focus point on just the subject in your photo’s foreground.

And this type of software muscle can help you control the focus point in your photos even further. In fact, it gives you an amazing amount of creative control after you’ve snapped your photos.

It’s also a tool for me to fix or hide a problem in plain sight within a photo. Here are a few examples.

Blur Out the Background

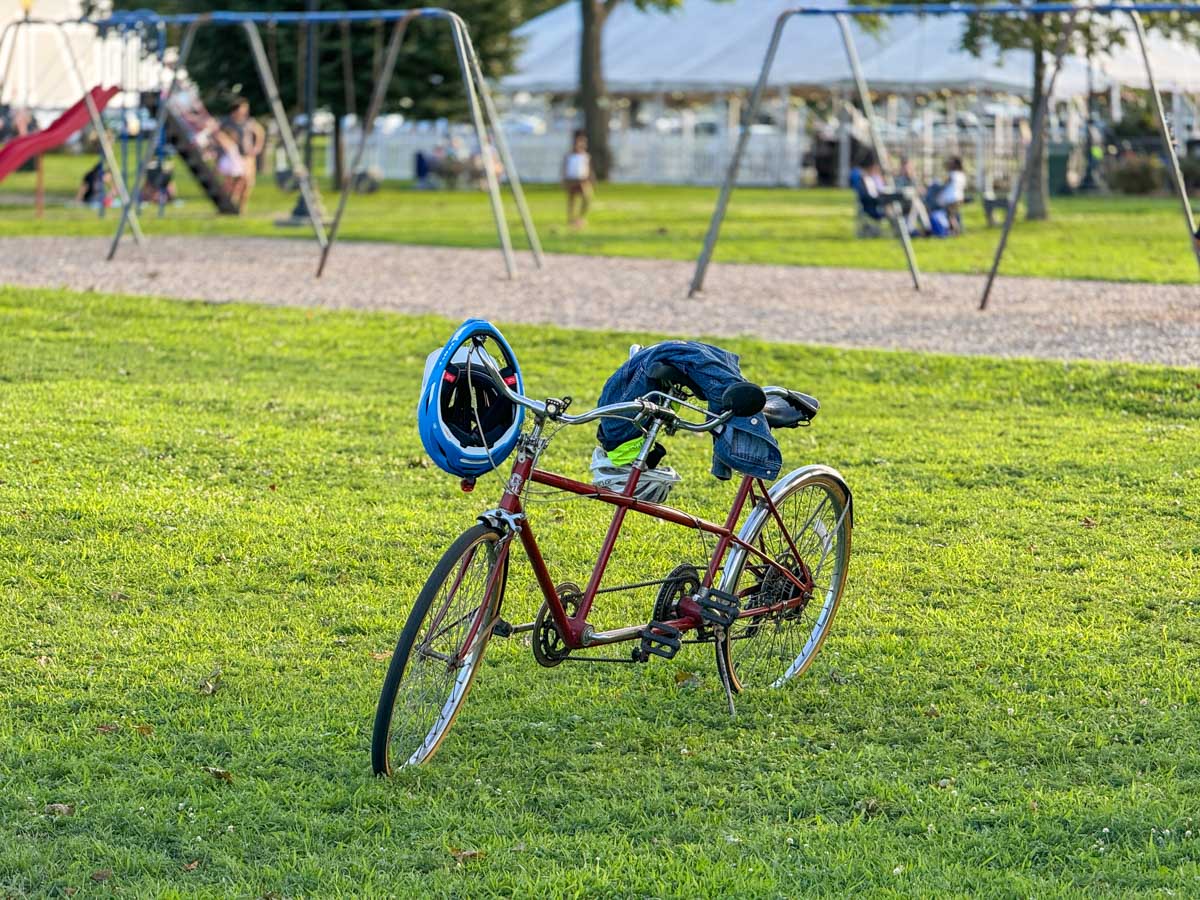
My family and I were taking a walk at Calf Pasture Beach in Norwalk recently, and we passed by this tandem bicycle. Something about it appealed to me. So, I pulled out my iPhone and got the shot. It wasn’t in portrait mode. So, my iPhone couldn’t quickly blur out all the people in the background. But it was easy to do that in post using Adobe Lightroom.

Blur Out the Foreground

I didn’t like the person swimming in the foreground of this shot, because I want the viewer to focus on all the people fishing on the jetty. So, I simply adjusted the focus towards the background.

Blur Out an Unwanted Element in the Middle

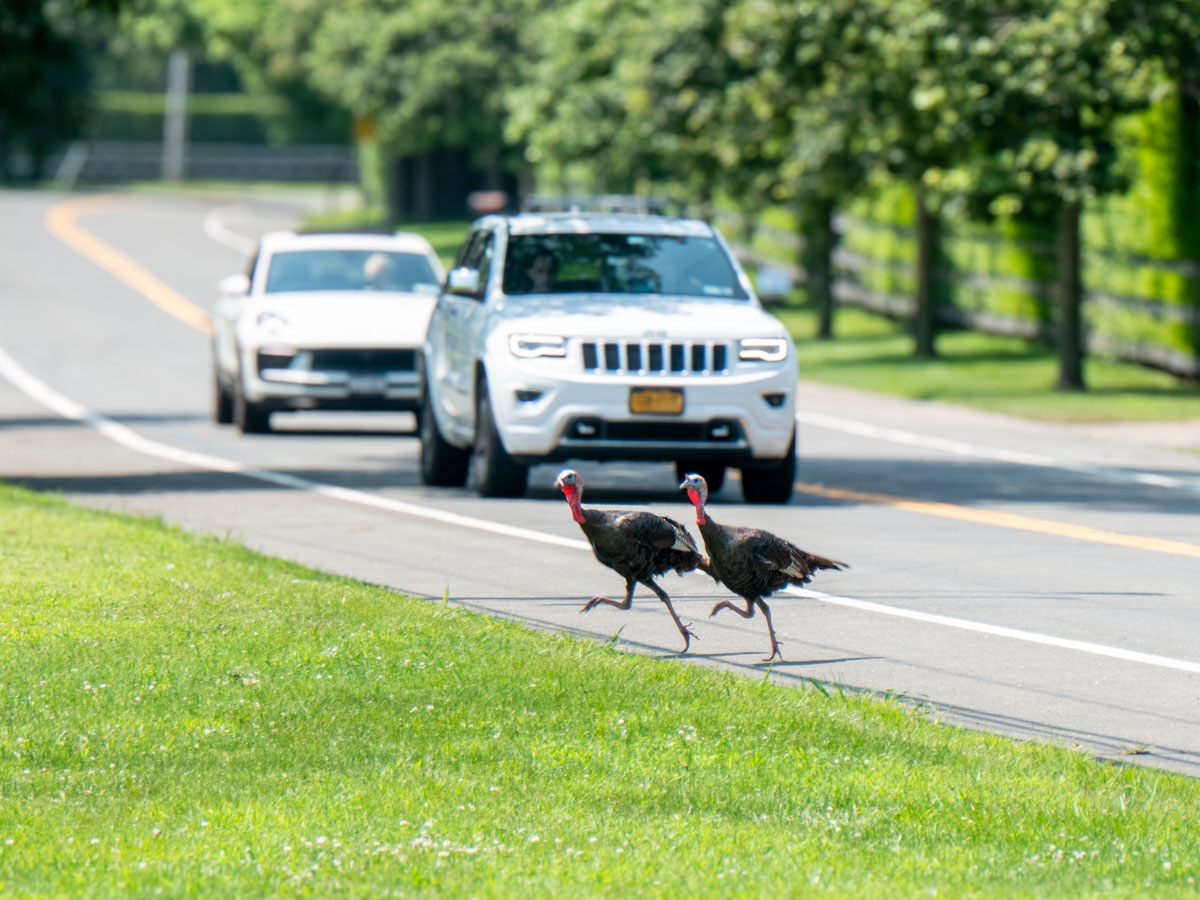
I snapped this shot while on vacation near Orient, NY. I found the two turkeys crossing the road right in front of a car. (Silly turkeys!) I love the moment, but I didn’t like the license plate detail being so prominent. Sure, there are ways to mask it, but the plate would never look totally natural. Here, I avoided the problem entirely by simply narrowing the photo’s focus point and blurring the entire car.

Direct your Viewer’s Attention

If you’re not just trying to fix a problem, you can be free to get creative and add in some blur to help define what’s most important in the shot.

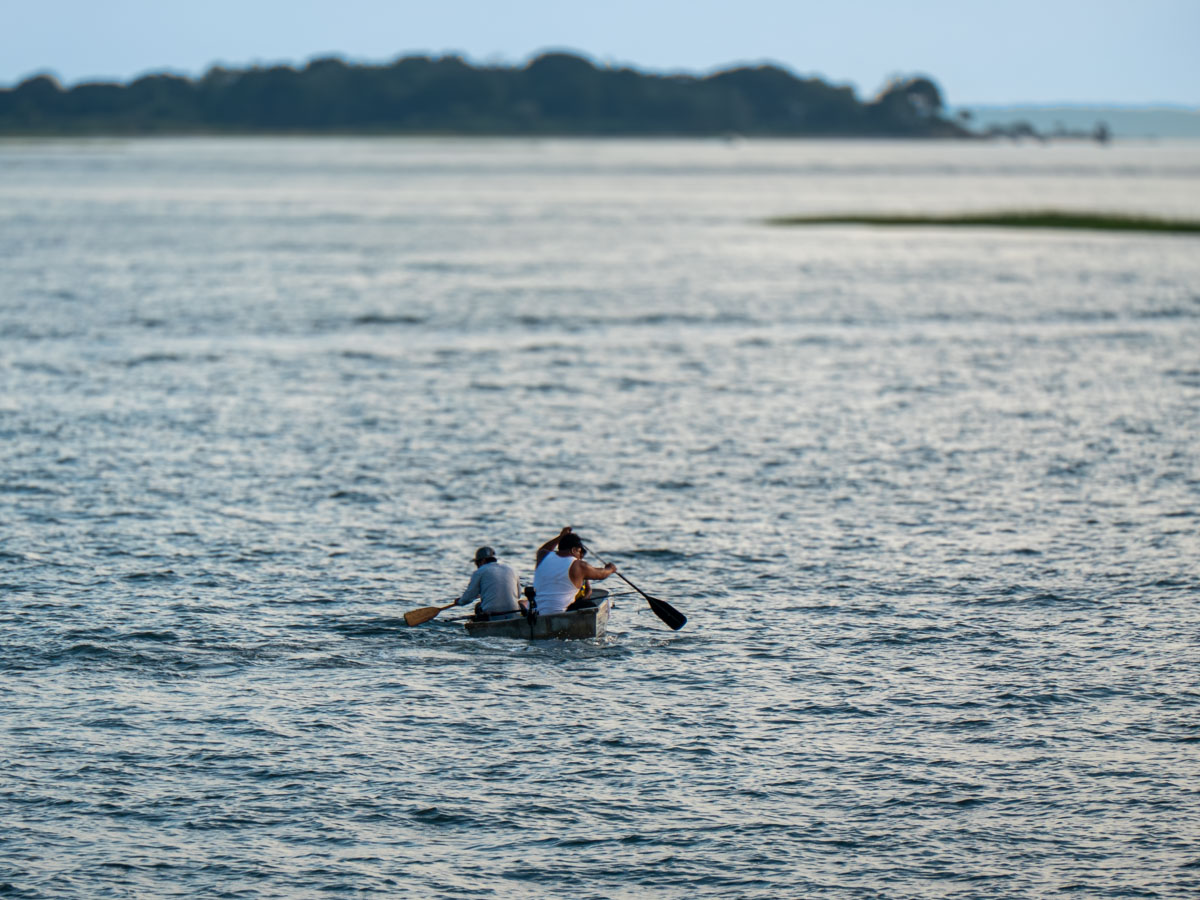
I liked adding blur to the background of this shot to help you focus more on this tiny rowboat heading out into the enormous ocean.

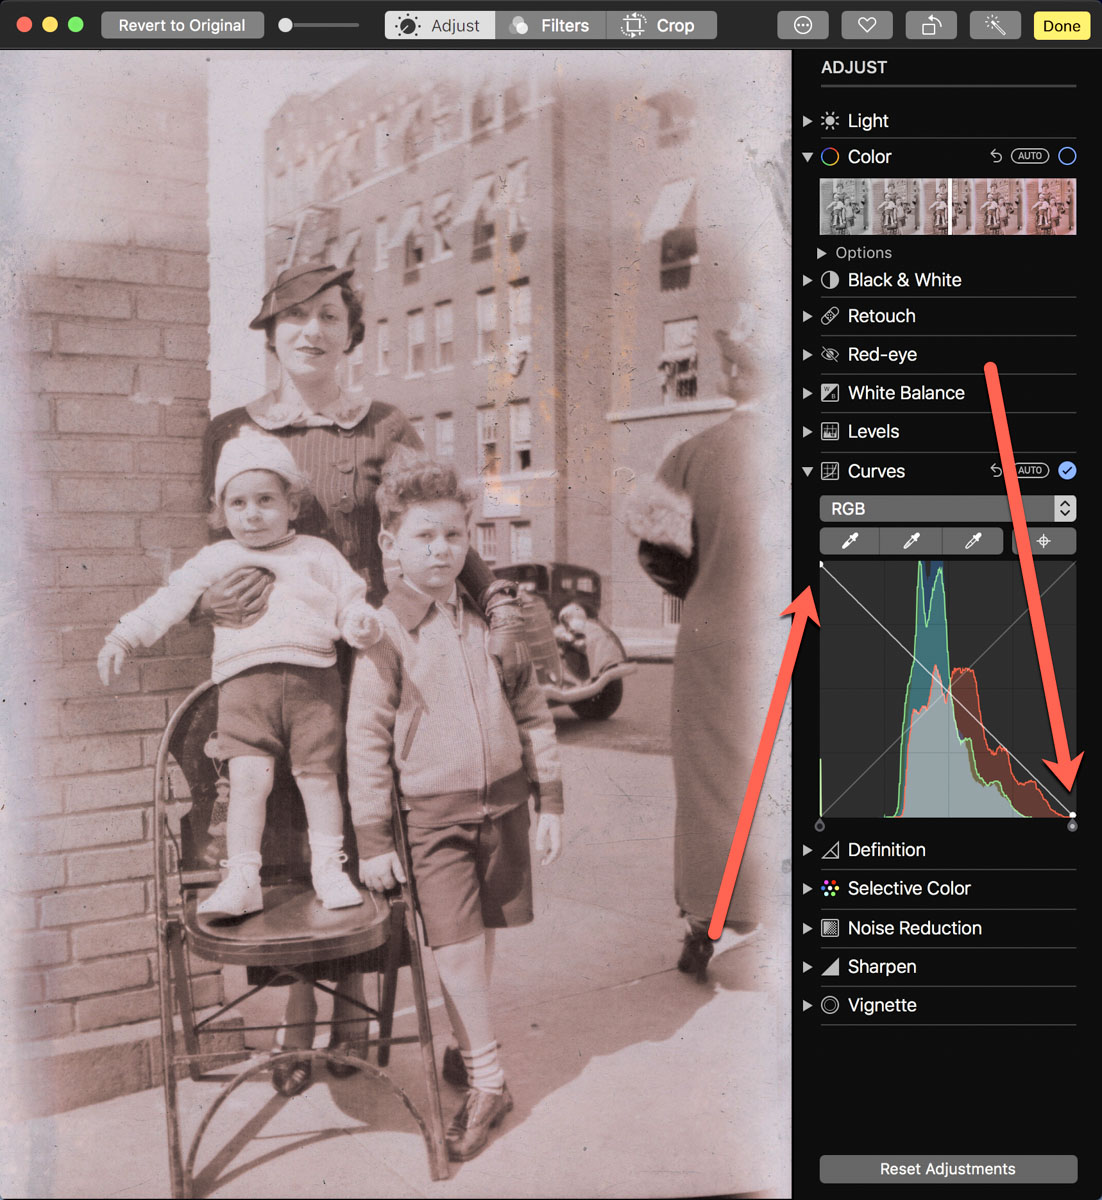
How to Adjust the Focus Point in your Photos
I add in my photo blur using Adobe Lightroom’s appropriately named ‘Lens Blur’ feature. I prefer using the ‘Cat Eye’ Bokeh setting. Then, you simply use the ‘Focus Range’ slider to adjust. (Note: You don’t have to be working with a ‘portrait’ photo.)

You can also adjust the focus point of an iPhone’s portrait photo. In the Photos app, go into edit mode. Then, simply tap on the subject you want to focus on. (Note: You don’t get the same kind of control as Adobe Lightroom offers.)

Use Blur to Give your Photos more Clarity
Don’t fear the blur. Use it!

Whether you want to add more creative flair to your photography or minimize an annoying element, generating some targeted blur can be just the solution you need.

Has AI Revolutionized or Shattered the Art of Photography?

I believe the answer to this question is both. And that’s not necessarily a bad thing. Here’s why.

In the not-too-distant past, being a great photographer meant you needed foundational technical skills, a great eye and a little luck. And it didn’t hurt if you had a higher-end camera with a fast lens that could properly freeze the moment and soften the background with some nice bokeh.

It was all about getting ‘the shot.’ And you knew it when you snapped it.

Today, software, AI and some nifty tech tricks have changed the entire equation. Now everyone can be a ‘great’ photographer.

The iPhone’s Powerful Camera Skills
If you’ve got a recent smartphone in your pocket, you’re off to a solid start. Today’s iPhones are amazing cameras.

  • The camera lenses on the back give you enough zoom flexibility for most framing needs.
  • The ‘live photo’ setting gives you a full 3-second moment instead of a fraction of a second. Then you can later choose the best frame from those 3 seconds.
  • The software in ‘portrait mode’ automatically blurs the background for you, and you can adjust the level of blur after the fact.

If you’re just pointing your iPhone in the right direction, you’re probably going to capture a pretty good photo. It brings a new clarity to ‘point and shoot’ photography.

Fix It in Post
Then there’s the art of editing your photos. People have been polishing and adjusting digital photos for years with tools like Adobe Photoshop. But that takes a fair amount of training and practice.

Of course, today there are a host of one-click photo-enhancement solutions and filters that you can use with your computer or smartphone.

Easy.

So, what you originally shoot is only the beginning of your photos’ journey.

AI to the Rescue
Now, AI can help us do even more by removing objects from a photo in one click.

I’ve begun to do that using Adobe Lightroom. It’s amazing with its ability to instantly backfill the environment behind a removed item.

It’s not perfect for every scenario (at least not yet), but I would have thought of it as science fiction not so long ago.

Prompt Generation
And then there’s AI’s new “text to photo” superpower. You don’t even need to pick up a camera anymore. Just type in the photo detail you want to generate.

I’ve been practicing this with Adobe Firefly, and you may have noticed that some of my recent blog headline photos are Firefly-generated (as is the photo for this blog post).

Again, it’s not a perfect technology… not yet. But you can already generate amazing imagery using a variety of software and web tools by just… typing it in.

This is indeed progress. In fact, it’s startling. It’s amazing. It’s already revolutionized the entire art of photography. I am a better photographer thanks to all this innovation.

Or am I?

New Rules
I’m certainly creating better photos (some of which never even came out of a camera).

I don’t think my on-the-ground photography skills have specifically improved (well, perhaps a little).

I’ve simply learned how to use the new tools that make my photos look better after I snap a shot. I’m building a new photography skillset that focuses more on photo enhancement and manipulation.

I’m sure a purist would call that breaking all the rules of what photography is supposed to be.

Yes, the rules are clearly being rewritten by AI. And I suppose the question is whether the dramatic disruption of this art form is such a bad thing.

It’s a Revolution
I think the answer is mostly… “No.”

Bokeh is bokeh. It doesn’t matter how you get it. If you think someone’s cheating by creating bokeh in one click instead of relying on years of practice with the right camera lenses… get over it.

Sure, maybe your skillset has just been replaced by a piece of software. That’s life. That’s evolution. You need to stay ahead of the curve. This is not a new way to live.

Fact vs. Fiction
But as we all become experts in photo manipulation, of course, we need to be careful not to cross the line of misrepresenting reality.

Maybe it’s not such a big deal whether you choose to erase someone in one of your photos. But I would say we all have a responsibility not to flagrantly warp reality. We all increasingly have access to the tools that can do exactly that.

So, I would say we should keep it real. Fact. Not fiction.

And of course, we all know that famous quote from “Spider-Man.”

“With great power comes great responsibility.”

Yes.

How to Quickly Turn a Scanned Negative into a Positive Image on a Mac

If you think a 90-year-old negative is a lost cause, think again. Here’s how to bring it back to life.

Sure, photo negatives aren’t cool anymore. They represent 19th century technology. Most of us aren’t housing a roll of Kodachrome in our camera bags these days. I get it.

But there’s well over a century of family history locked away in millions of shoe boxes in the back of closets… all in those negative strips. There should be a way to rescue them.

Correction:
There should be an easy way to rescue them and quickly bring the negative images back to life into positive form.

I’ve been traveling that complex journey for the past months since I’ve taken ownership of all of my family’s photo archives (shoe boxes) after my father passed away.

Digital Conversion
So, I bought a slide and negative converter to handle the bulk of the work.

It’s fast. It’s a one-click solution. The results are mostly solid.

But the Wolverine couldn’t capture the full real estate of the larger negatives dating back to the 1930s (2 ½” x 3 ¾”).

I turned to my old flatbed scanner to handle the large negatives. But then I needed a way (an easy way!) to transform each negative into its positive doppelganger.

Adobe Solutions
There are any number of tutorials on YouTube that demonstrate how to do that in Adobe Lightroom or Photoshop, and they all promote the concept of how easy and fun it is.

‘Fun’ is code for it’s not really that quick. Sure, it may be relatively easy, but it still requires about five minutes of fiddling to bring the image to life in the positive universe.

A few minutes may not seem like a lot of time, but fiddling is not a precise exercise, and five minutes can easily turn into fifteen.

Apple Photos (OS X):
As a Mac user, I wanted to see if I could find a native solution without having to rely on the muscle of Adobe. The good news is I found a couple good options.

If you already use the Apple Photos app on your Mac, you can do the conversion right there. It’s not quite one click. But it’s straight forward. Let’s give it a shot using a negative of my grandmother Rae from 1935 with my father and uncle. (My dad is the tiny one!)

  • Upload your negative into Apple Photos.
  • Select it.
  • Click on ‘Edit.’

Select the ‘Curves’ drop down.
You’ll see a histogram of the photo with a straight white line positioned diagonally from bottom left to top right.

To invert the negative image to its positive version:
Click on the bottom left of the line and drag it all the way to the top left. Then click on the top right of the line and drag it to the bottom right.

Voilà! Your negative image is now inverted and displays in positive form.

Then, you can continue to tweak the image from there as you choose. (And that’s where you can go down the rabbit hole of tweaking.)

Using Apple Photos to perform this trick is actually quite similar to Adobe Lightroom’s interface.

Preview App
You can also use Apple’s ‘Preview’ app to bring your negatives back to the positive universe.

It’s a near-identical exercise:

  • Select ‘Tools.’
  • Then ‘Adjust Color.’

Can You Invert a Negative Image in One Click?
Okay. None of these options are one-click solutions. So, Is there one? I figured any number of online photo management websites must have a negative-reversal filter built in.

I checked out Shutterfly, Google Photos, Amazon Photos and Canva.

Nope.

Yes, there are apps out there that promote the ability to reverse a negative in one click. But after giving it some more thought, I just didn’t want to add yet another piece of software into my workflow.

So, I canceled my adventure down this particular rabbit hole. Enduring a few clicks to turn a negative into a positive image will suffice.

Diagonal-Line Maneuver
The truth is I already do most of my photo management work in Adobe Lightroom. The diagonal-line maneuver in the Tone Curve section works just fine (just like with Apple’s ‘Photos’ and ‘Preview’ apps).

The good news is there’s a choice on the software to use if you don’t want to take the Adobe path.

And now I need to get back to work on my time machine. There’s still almost a century of negatives to go through.

I’m bringing the past back to life, one image at a time.

I’d say maybe that’s worth the five minutes.