At Home with Tech

Unlock the power of all your technology and learn how to master your photography, computers and smartphone.

Tag: hiking

Hiking the Harding Icefield Trail in Alaska

One destination during our Backroads’ vacation was Kenai Fjords National Park where we hiked next to the spectacular Exit Glacier. I used a dependable trick to help me frame my camera shots…

My family and I have returned from our bucket-list vacation to Alaska, and as you might expect, it was an absolutely transformative experience.

First off, let me answer your first question. No… my wife, 13-year-old son and I did not take a cruise. We took a less conventional route and signed up for a really fun Backroads adventure, featuring a healthy dose of hiking, biking and kayaking. We also boarded a small cruising vessel to explore part of Prince William Sound.

Our trip began in Anchorage and across six days, we traversed the rugged terrain with two other families and three Backroads’ leaders.

Our Itinerary
Alaska is a massive state, and we were only able to explore a small sliver… the magical Kenai Peninsula.
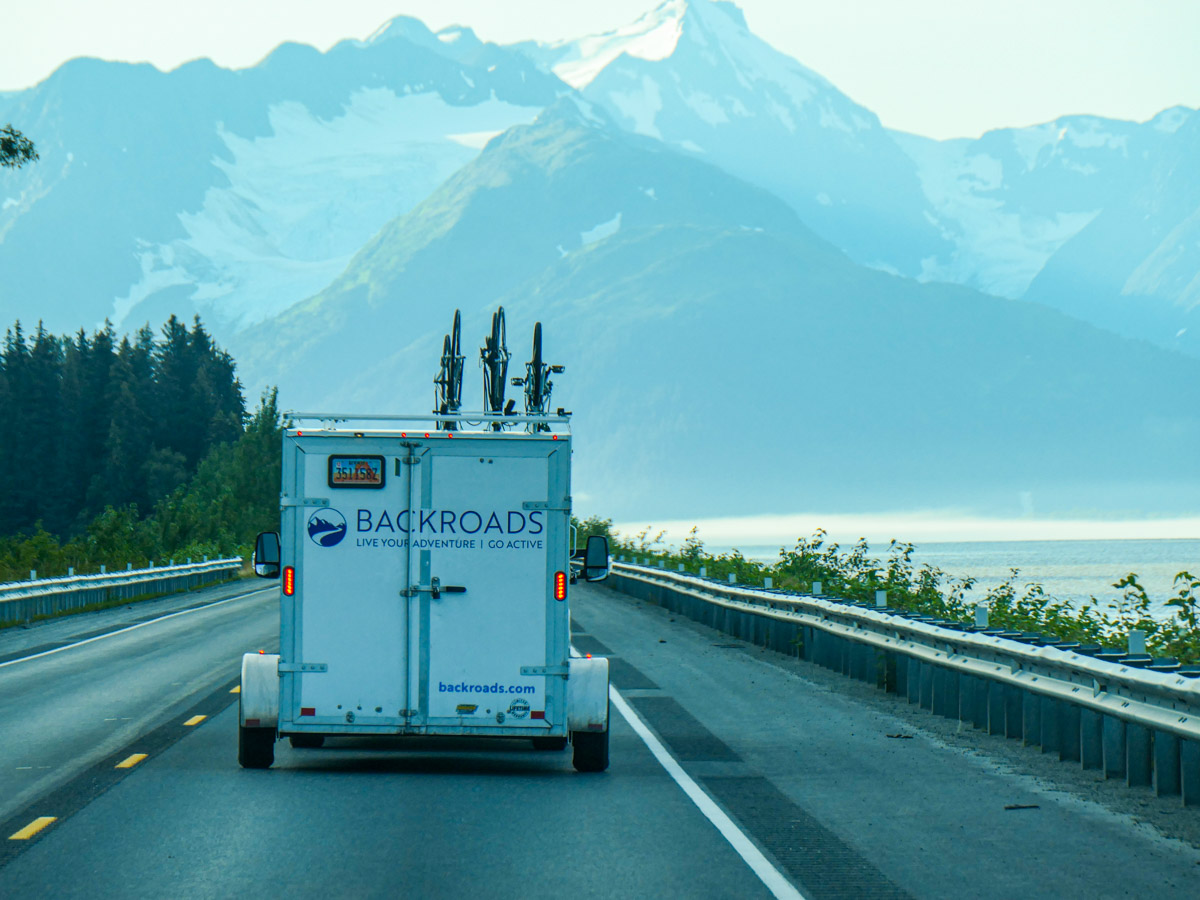
Our Backroads’ van transported us to Girdwood, Whittier, Seward and Homer. For context on the distances, our return ride back to Anchorage took around five hours.

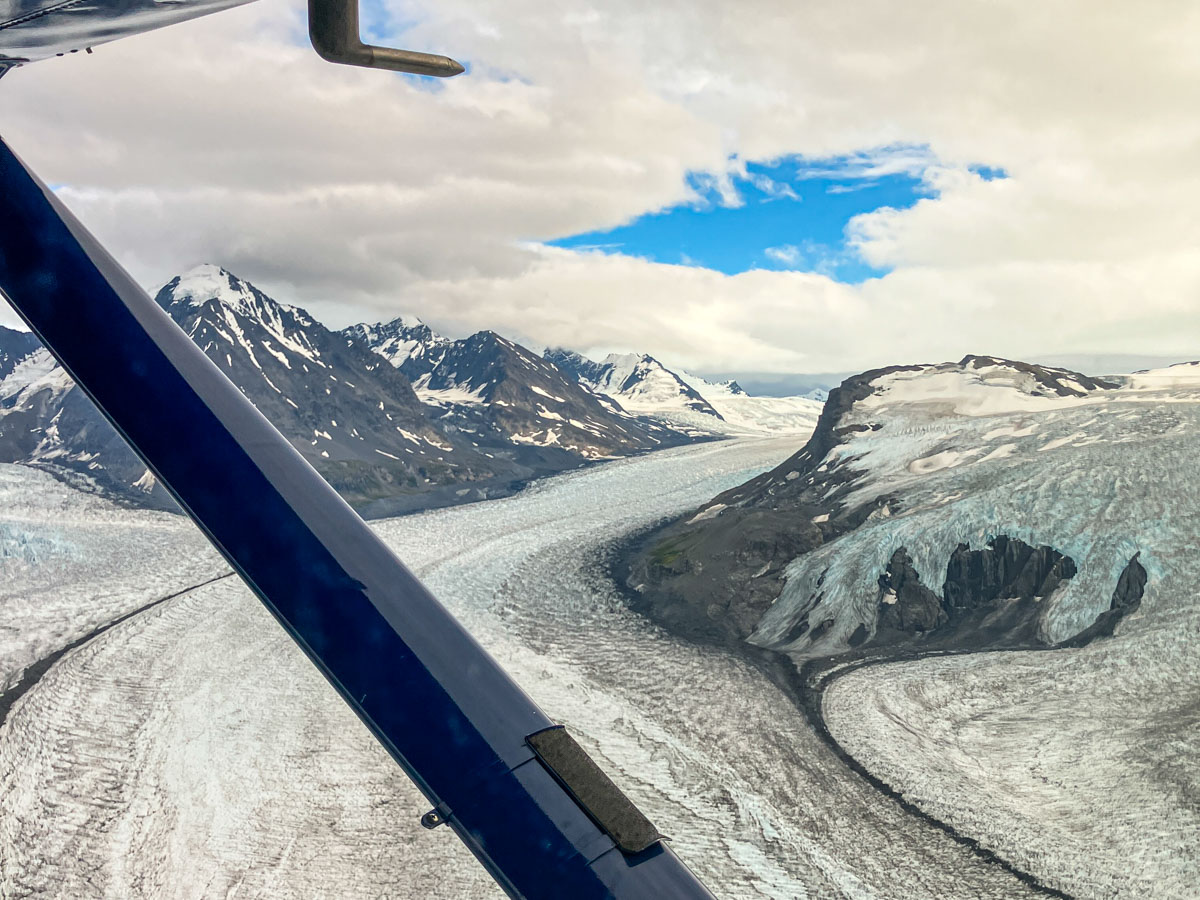
We also scheduled a day on the front end and two at the back for our own family time and a high-octane experience that involved strapping ourselves into a tiny Cessna plane for a up close and personal view of several glaciers.

Weather Conditions

The weather during our Backroads’ itinerary was perfect. (We were expecting at least a bit of rain.) The crisp August temperatures ranged from high the 40s in the mornings to the low 60s in the afternoons (colder on top of mountains). Perfect for me!

Yes, it was a rustic trip, but we stayed in nice lodging and ate in great restaurants. (I mostly focused on consuming fresh local salmon and halibut. Yum!)

My Camera Gear for Alaska
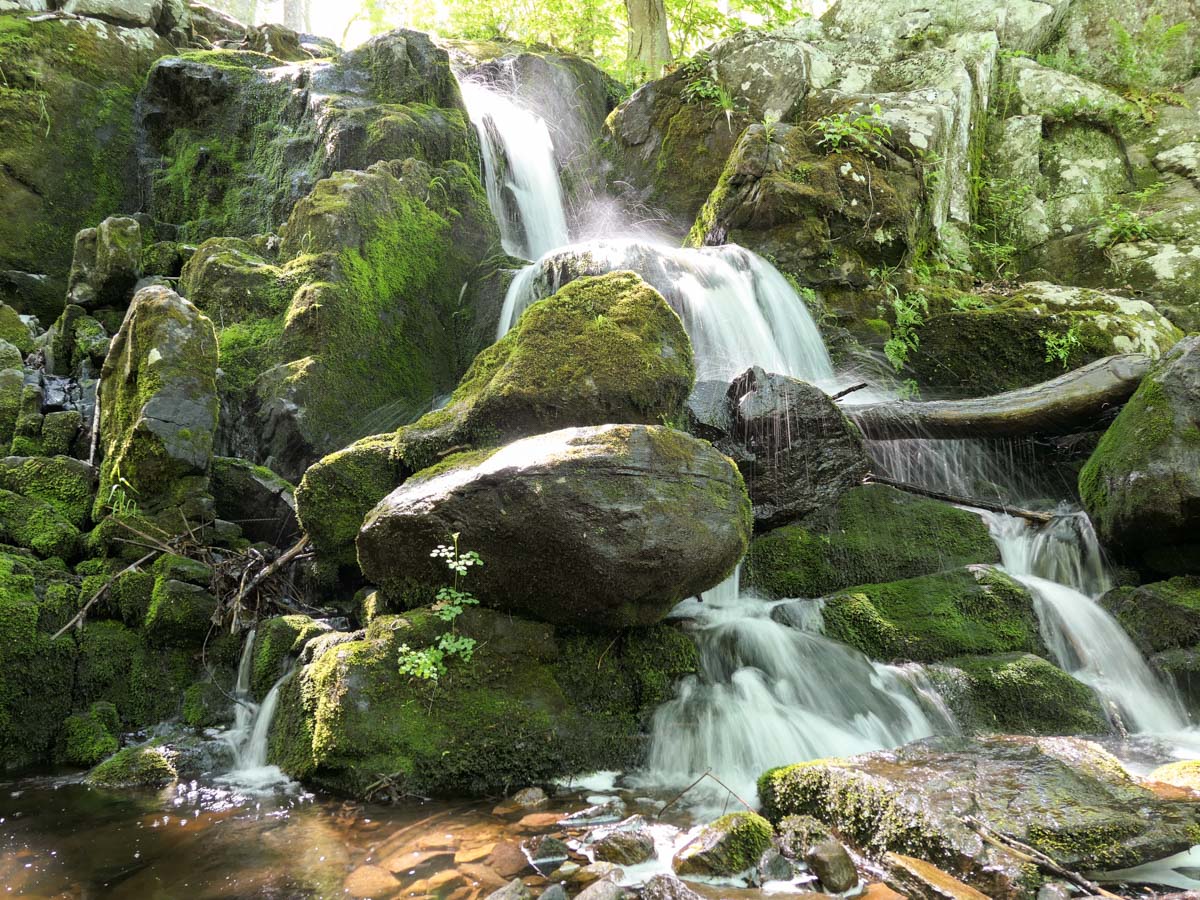
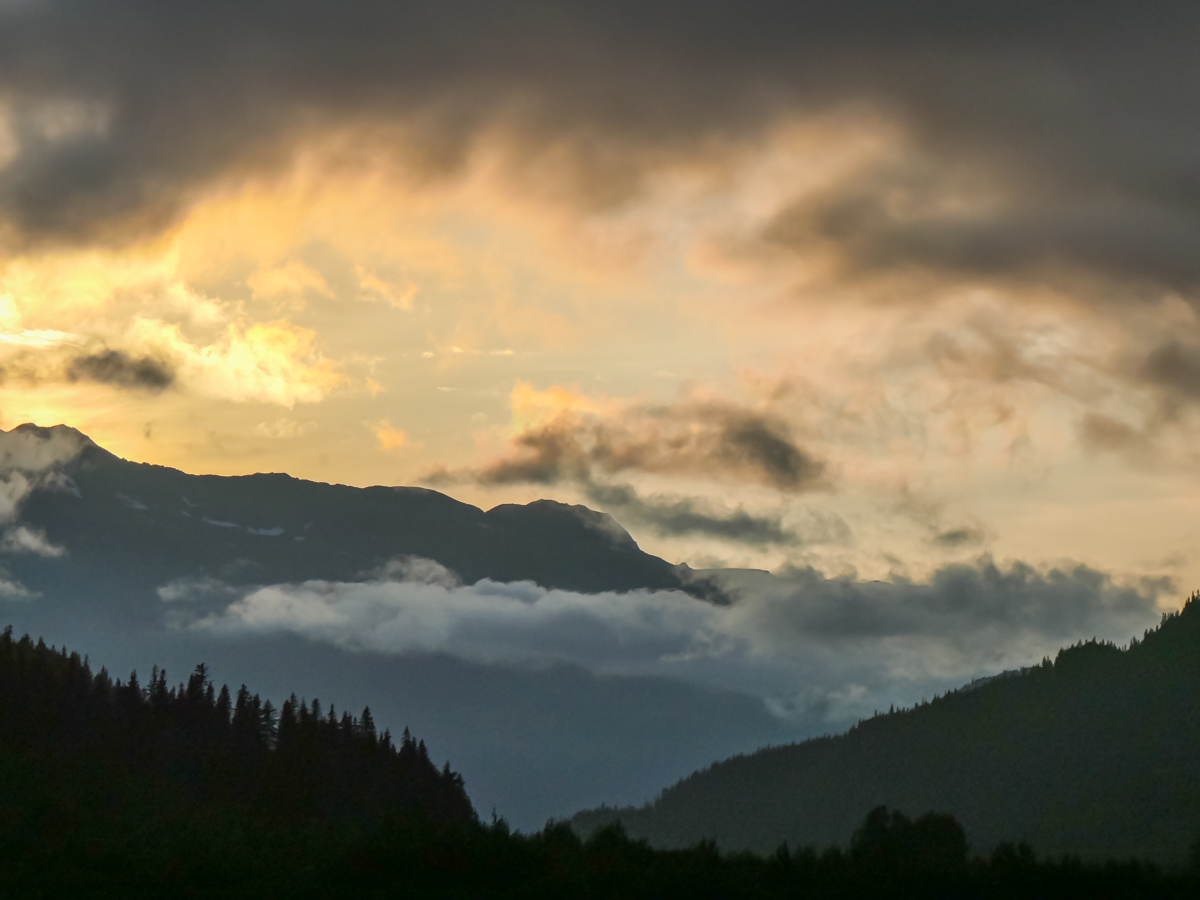
There’s a lot to unpack from our amazing experience, but I’ll begin today with sharing a few more photos. Of course, I brought along my camera gear to capture Alaska’s natural beauty, such as this sunset I snapped while we were staying in the Resurrection River Valley.

I was mindful to keep my ‘rig’ light. I had my GoPro HERO11 Black for the wide vista shots and I carried my compact Panasonic Lumix ZS200D, which sports a 15x zoom lens (24-360 mm) when I needed more reach. Both lived in a small fanny pack that was strapped to my waist the entire trip.

I even pulled out my iPhone when I needed to quickly capture a fleeting moment (like a Moose quickly passing by).

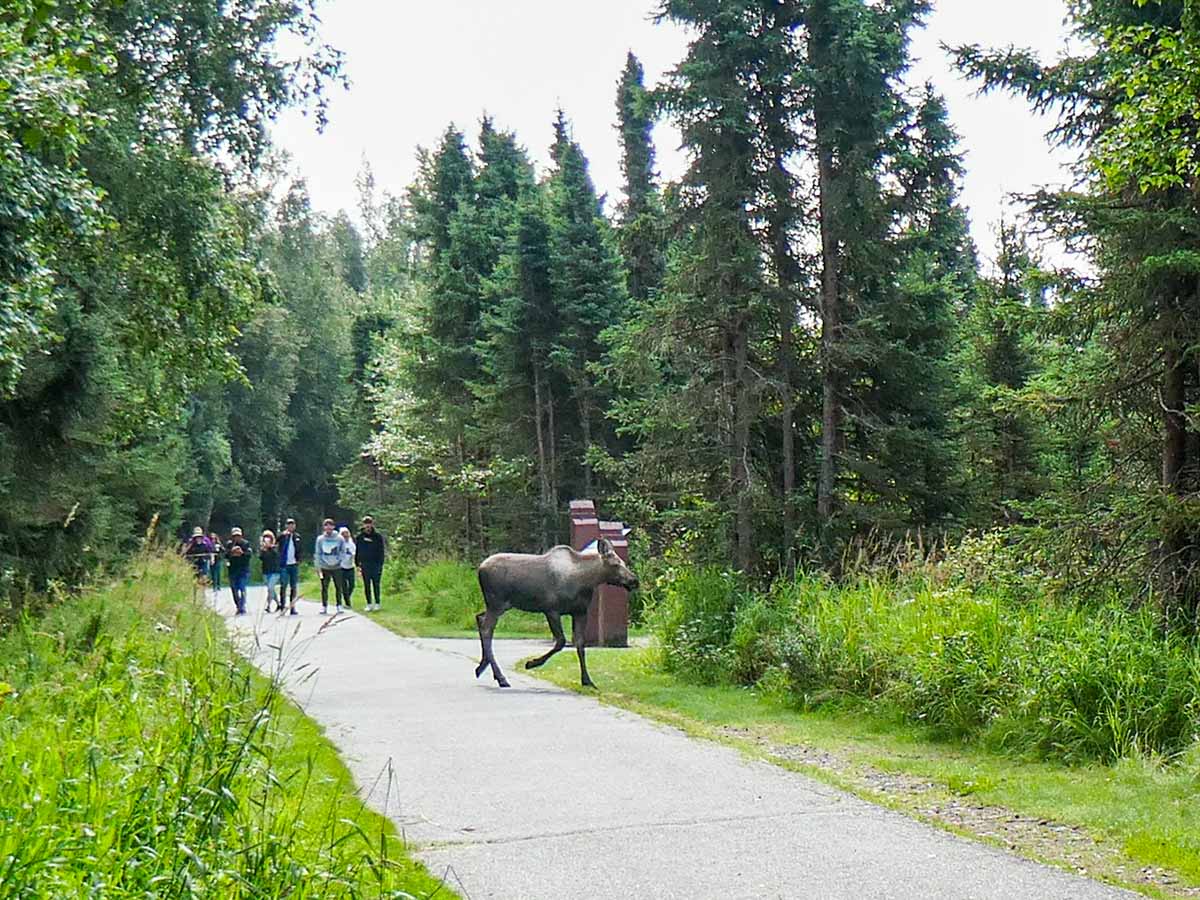
Photo Tip: Frame Context into your Shots

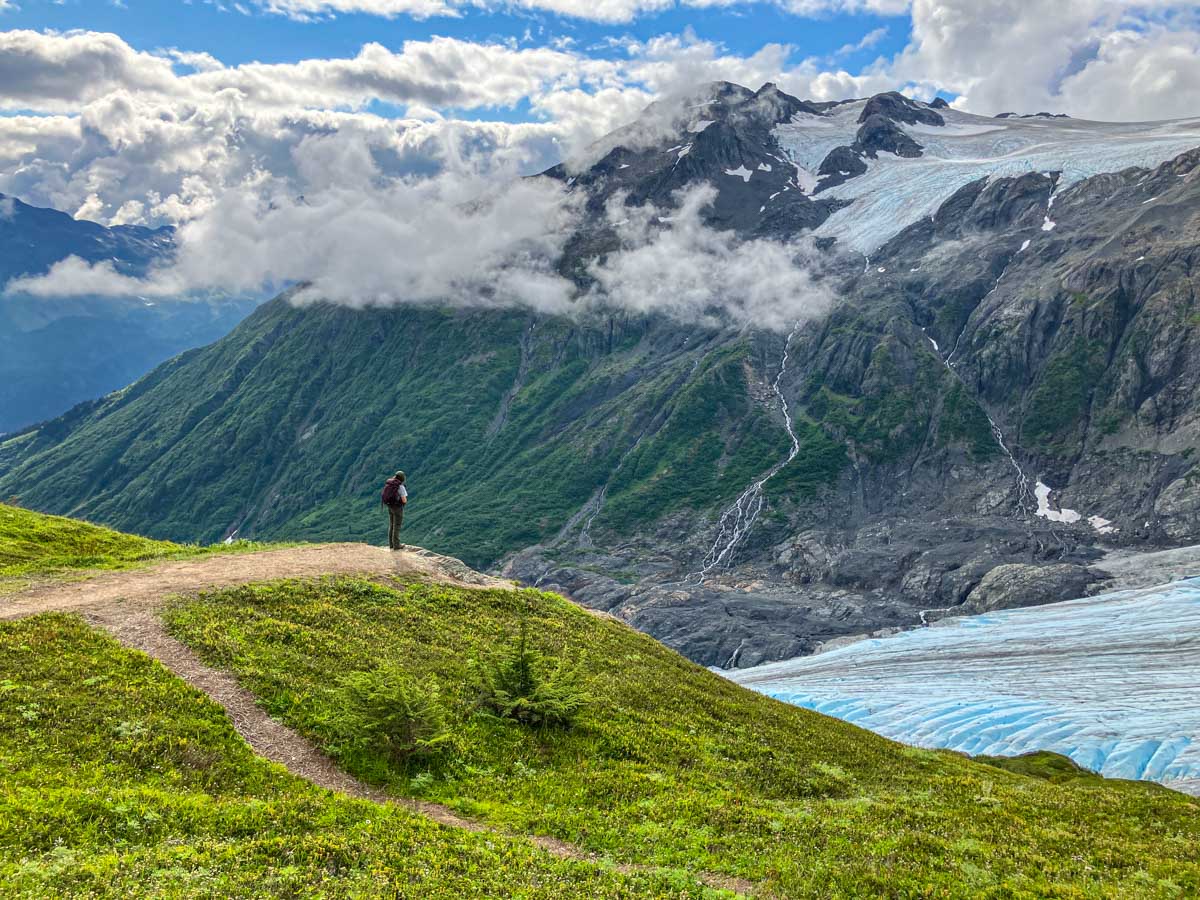
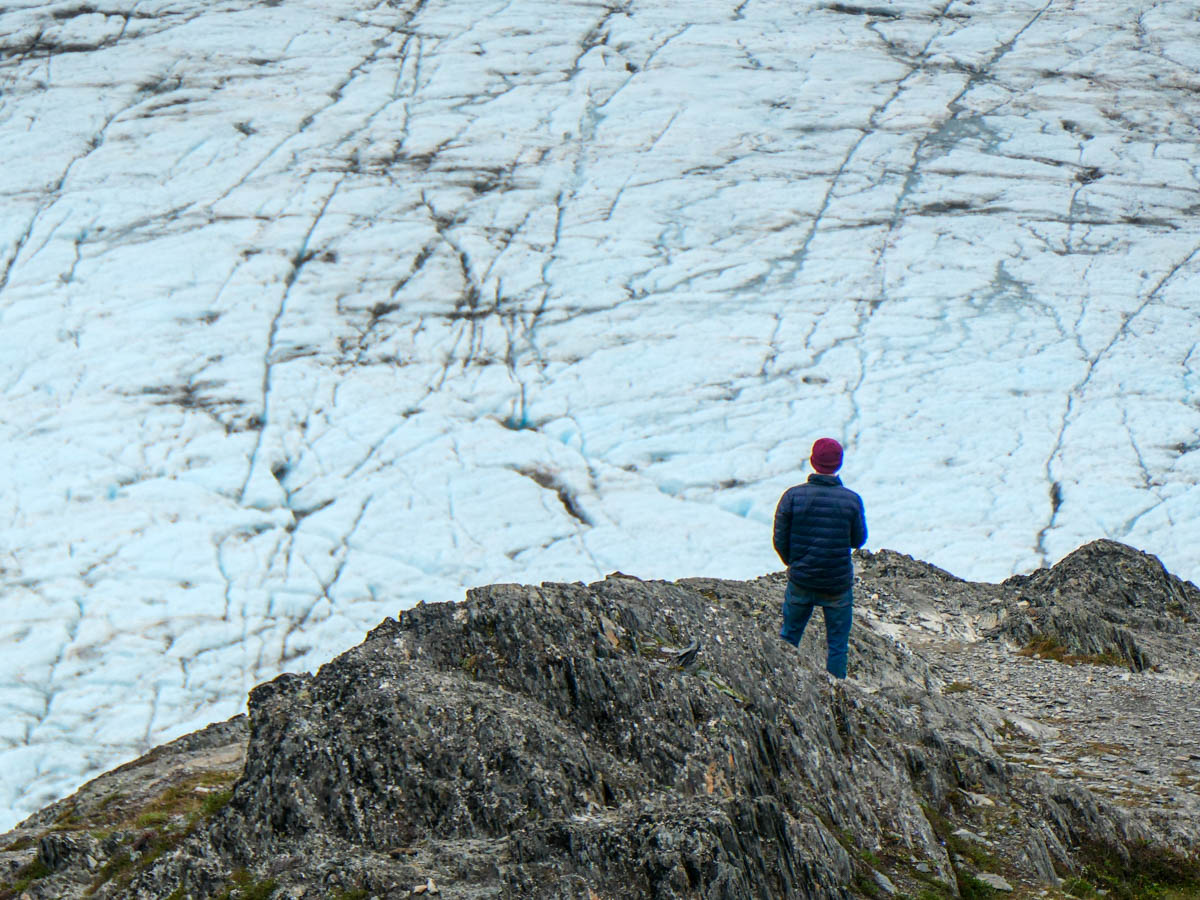
My biggest challenge was capturing the scope and scale of everything I saw. One solution I used was to include foreground elements in my scenic shots. This provides context for the background’s enormity. Whenever I spotted people in the distance, I knew those moments would be my best opportunities.

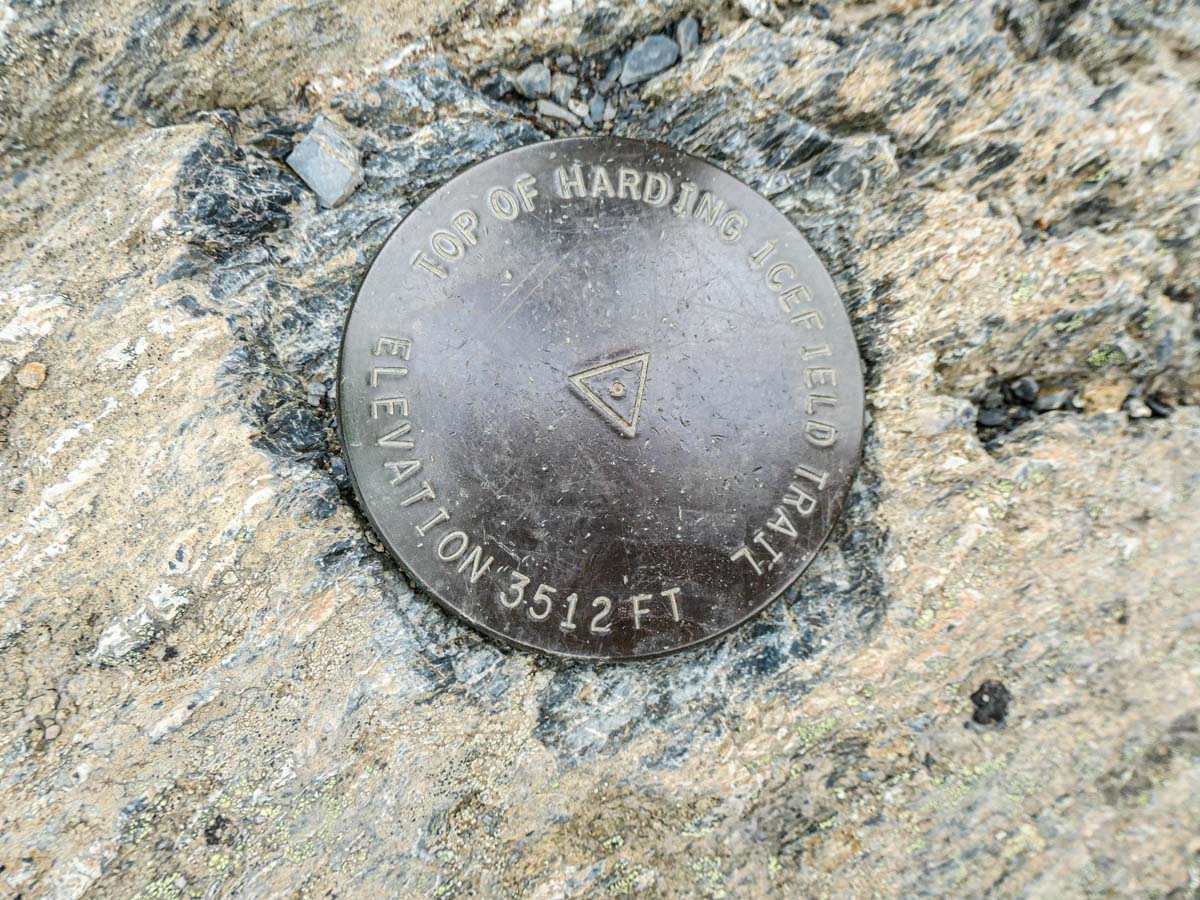
This visual tactic was especially useful when we visited Kenai Fjords National Park on Day 3 and did a hike up the Harding Icefield Trail (3,512-foot elevation) next to Exit Glacier.
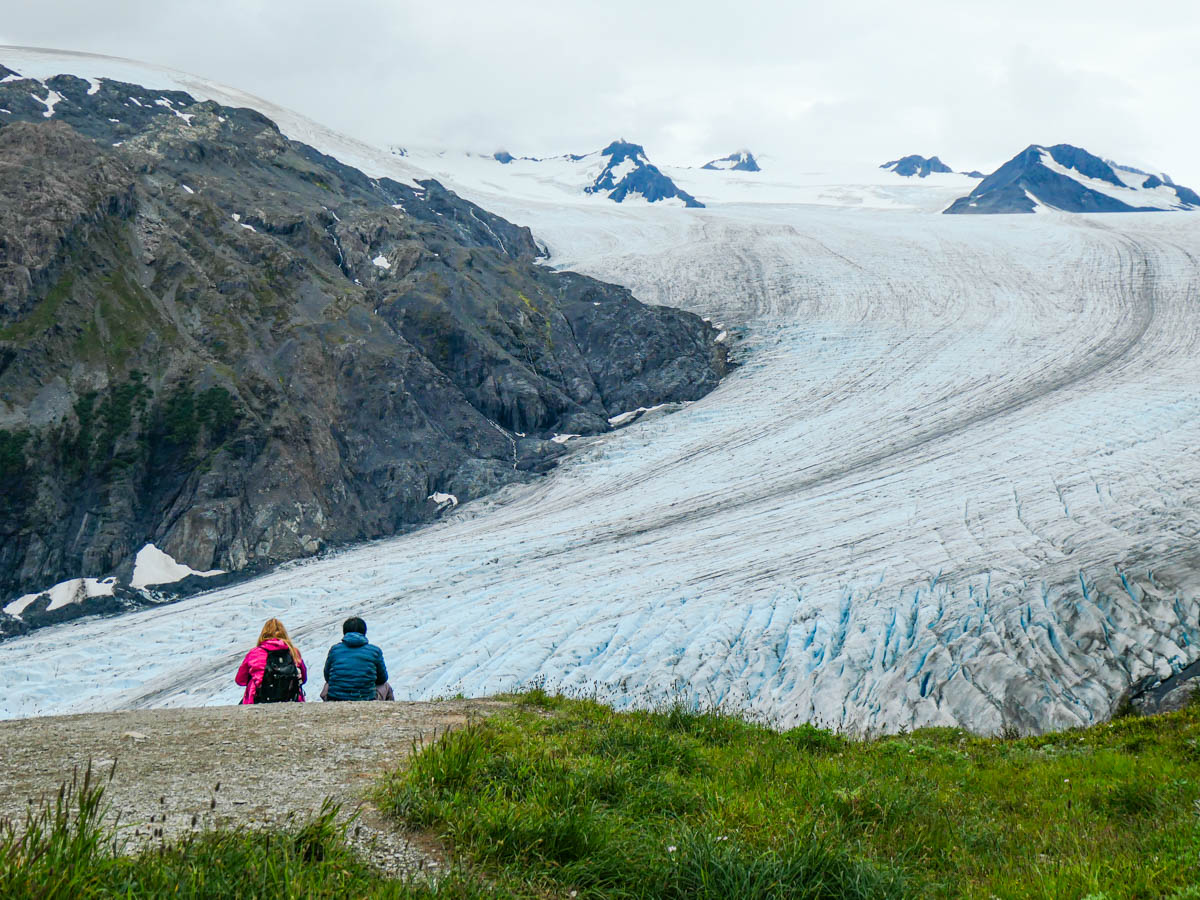
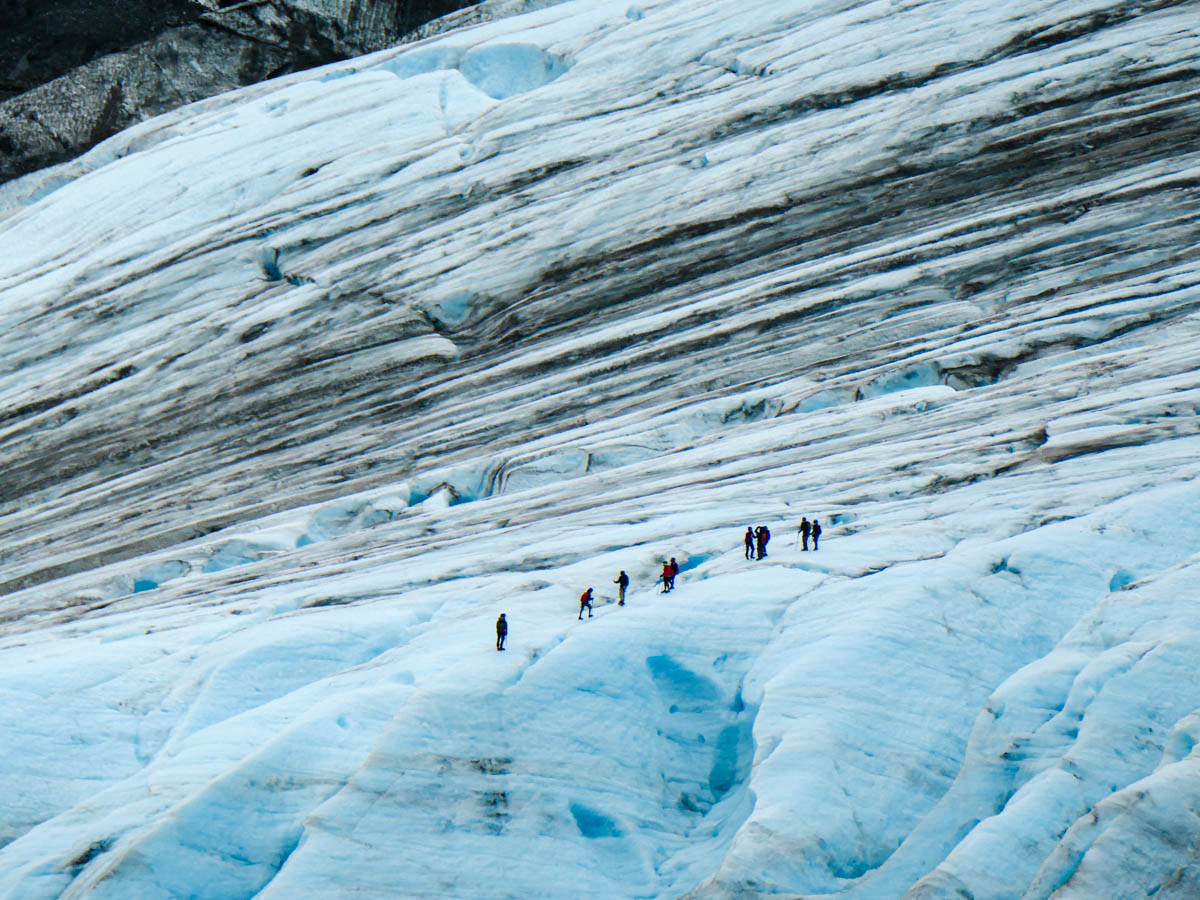
Along the way, we spotted another group of hikers who were walking literally on Exit Glacier! Thankfully, this was not part of our Backroads’ route, but it did make for a great photo opportunity!

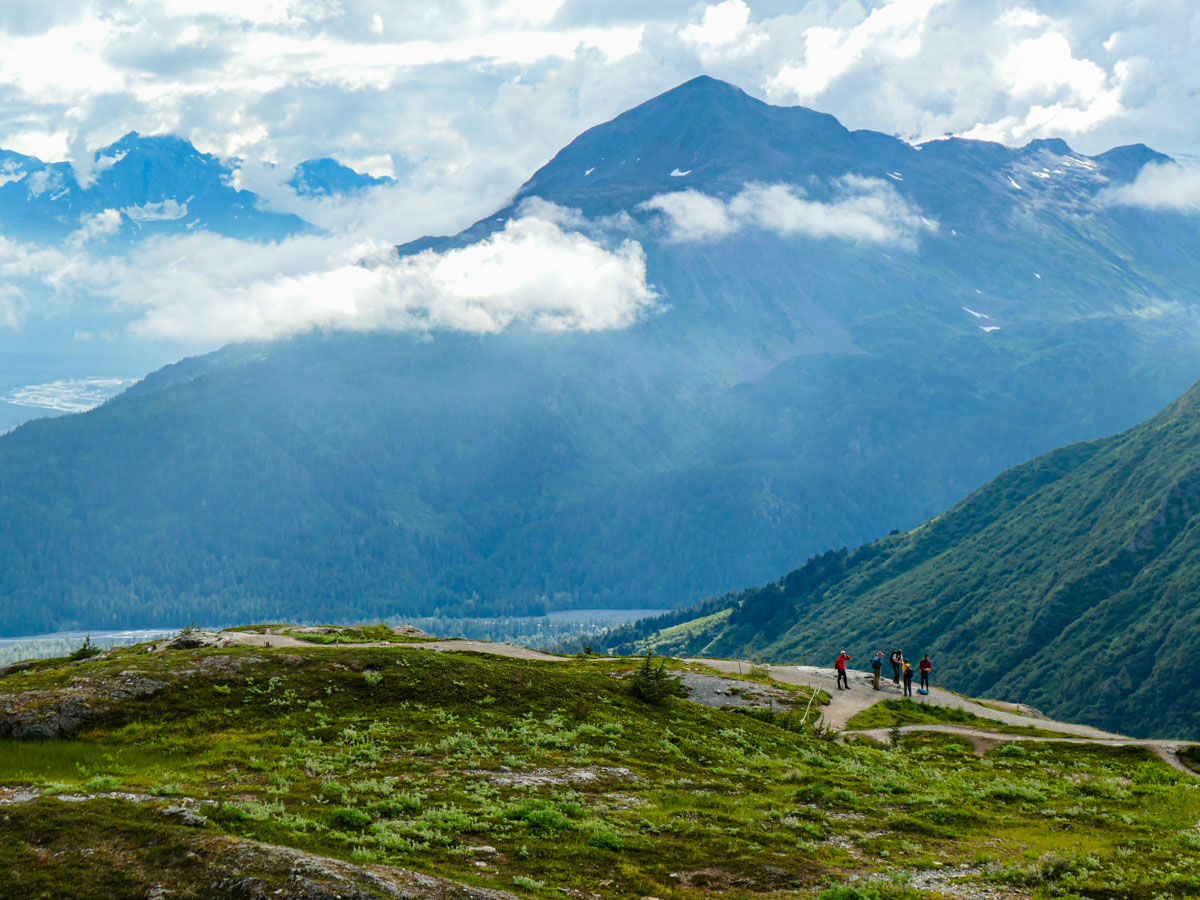
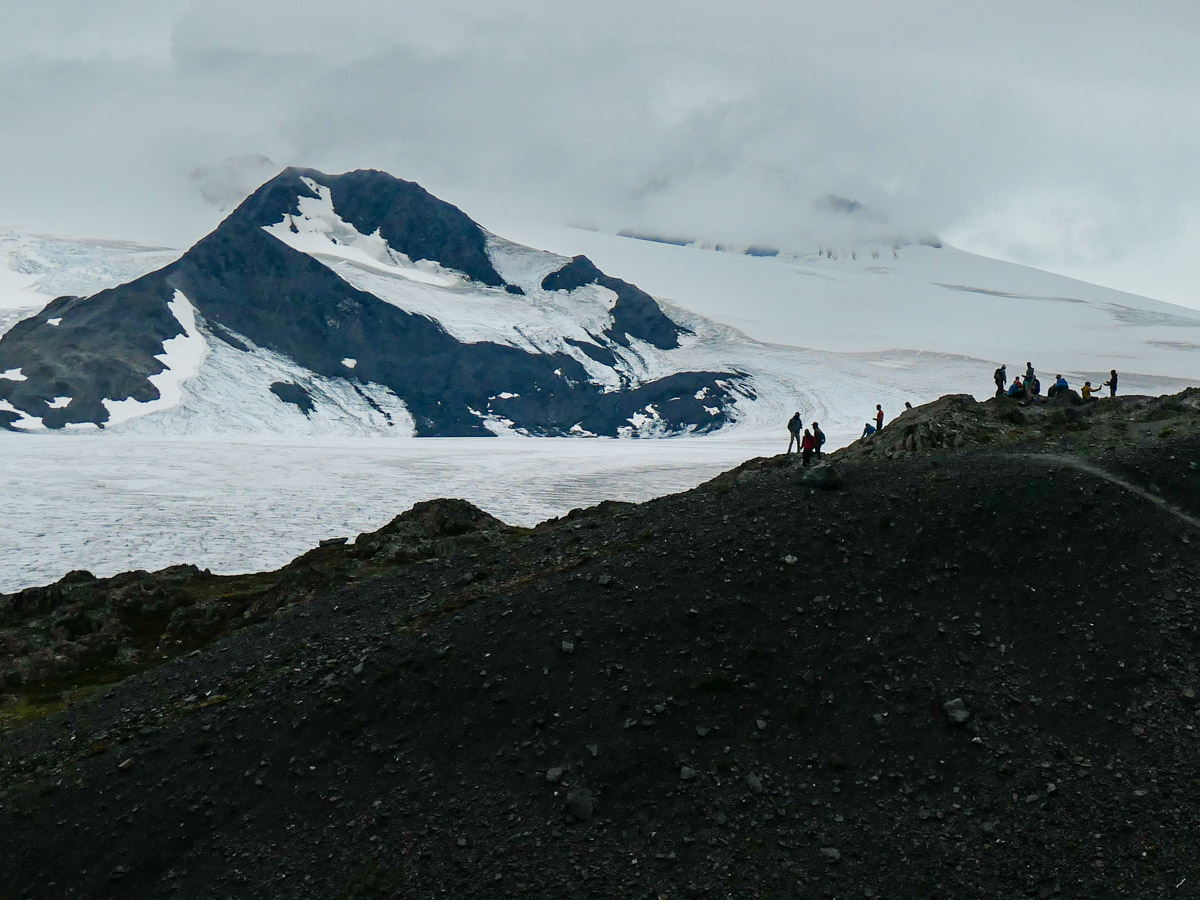
At the top of our own hike (on solid ground), we looked out over the front part of the spectacular Harding Icefield (over 900 square miles).

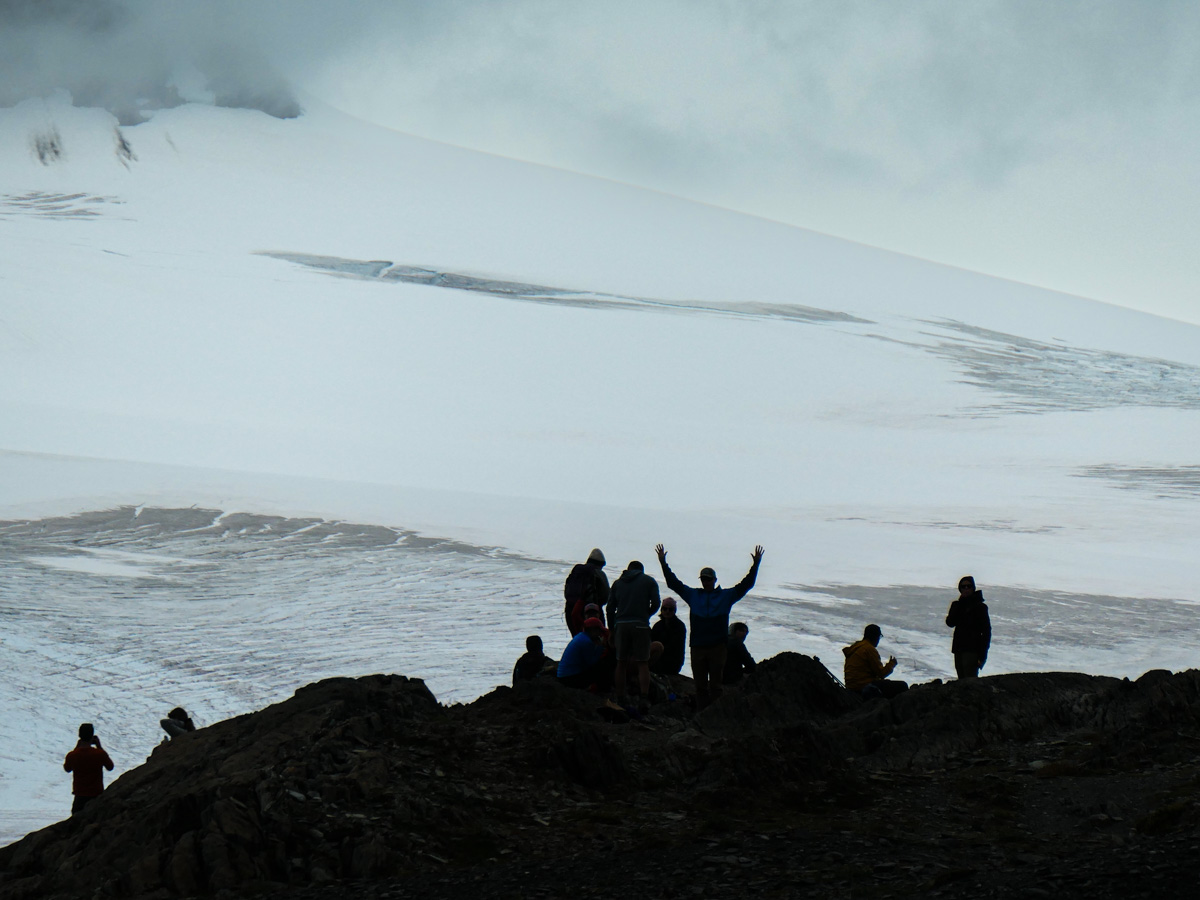
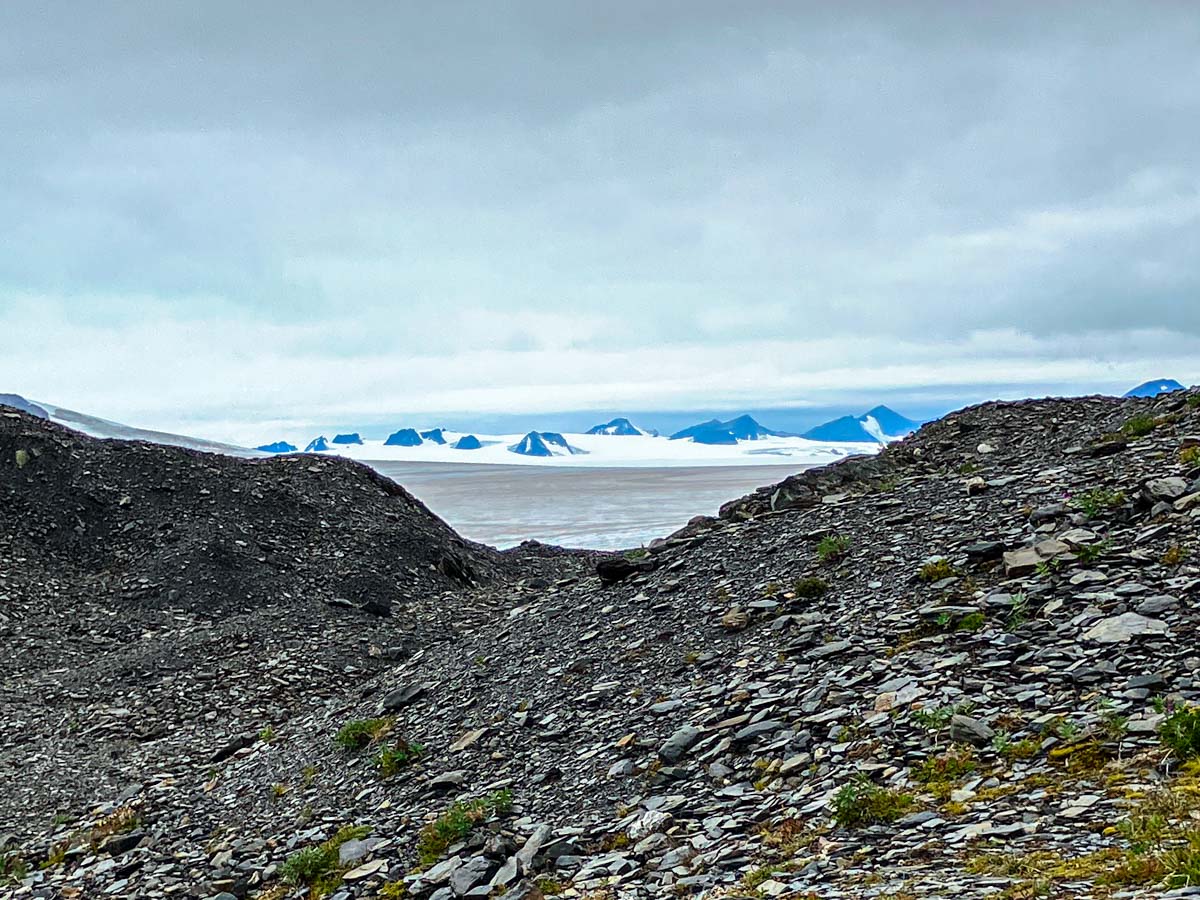
Regaining Perspective

Our journey up to this top of the world was both inspiring and humbling, as we are clearly just little specks in this vista of reality. But I’m still honored to be a tiny piece of it all. It’s an important reminder that anyone can benefit from.

I pondered this as I began my descent, and I wondered what revelations the next days would bring.

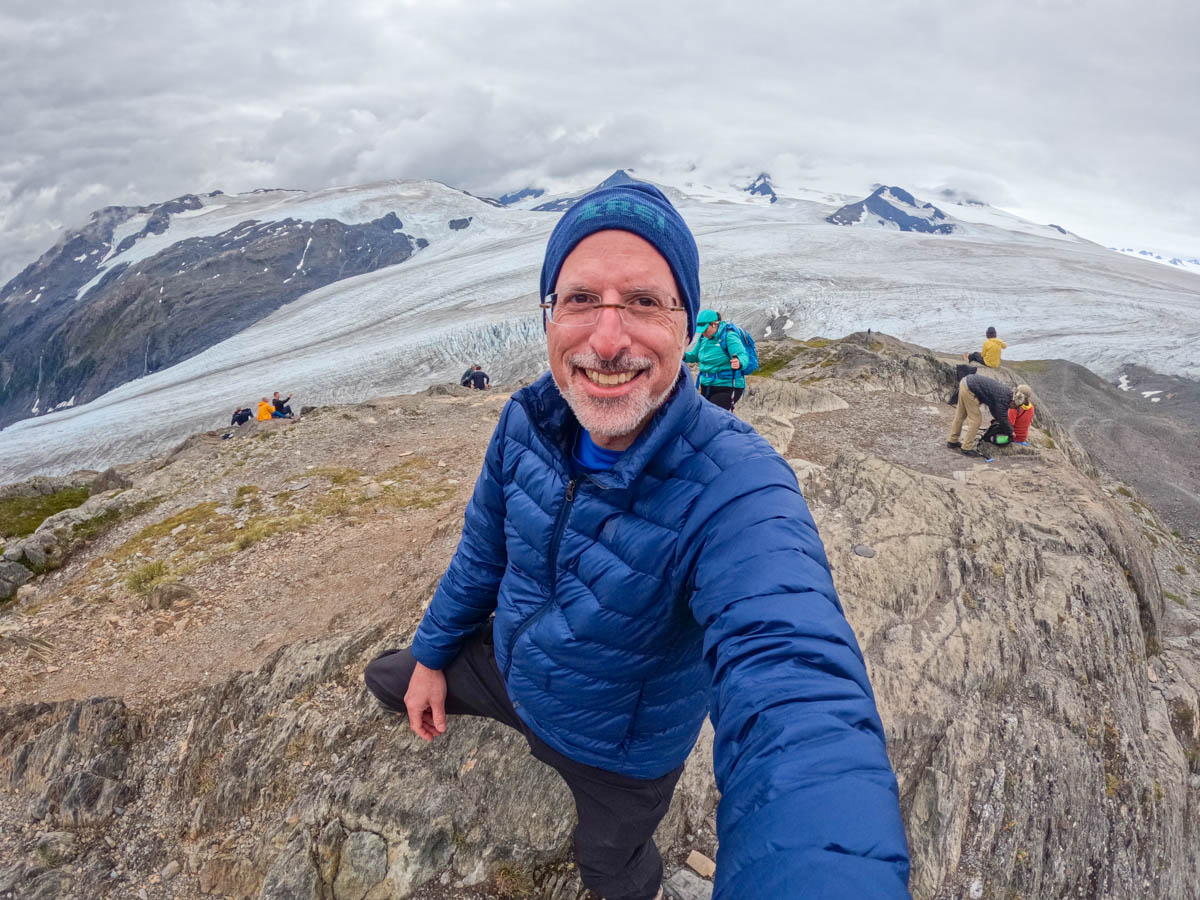
Our Backroads’ adventure was not yet finished…

Can You Hear the Song of the Sirens in this Waterfall Video?

If you should come upon a waterfall during a hike and feel drawn to it, you’re not alone. Here’s what happened to me.

My wife, son and I regularly go on hikes in Connecticut with two other families. I’ve found this group weekend activity to be particularly stabilizing during the pandemic. Plus, we really enjoy hiking.

I always take a camera if just to capture a group selfie in the forest. I originally relied on my GoPro with its wide angle lens, but more recently I’ve simply been using my iPhone along with my Apple Watch’s ‘Camera Remote’ app.

This pairing allows me to walk away from my iPhone that I’ve mounted on my little Joby tripod. I can then join the group shot and look at the frame from my wrist. Finally, I remotely snap the photo by simply tapping my Apple Watch (with a 3 second countdown).

Of course, there are any number of other forest photos to capture, ranging from the macro to the panoramic. Nature is always there for you. So if you miss a shot, you’ll get another chance the next time.

The Lure of a Waterfall
That said, there are not that many waterfalls. So if you pass one, you probably should spend some time with it. And yes, that includes framing a few shots or video clips. Not that you’ll need to force yourself to do this. Waterfalls have a magical quality. I find it hard to look away.

  • The movement of the water
  • The power of its flow
  • That mesmerizing sound
    (There must be invisible creatures singing within the water streams.)

Usually, I see people taking shots of the complete vista. But for me, that’s not enough. Waterfalls are sirens. They call to me…

“Come closer… closer. Step on that slippery, wet rock. Stretch your camera next to my mist. Forget the danger.”

And so I do. It’s intoxicating. I want to touch that magic and somehow capture it all with my camera.

But I can’t. Not really.

To do the job right, you need to really take your time. (That can extend beyond the patience of your hiking mates.) And if you’re going to put your gear in harm’s way, you should have some waterproofing to protect against the spray.

My Encounter with the Prydden Brook Falls
Recently, our little hiking pod was back on the Zoar Trail in the Paugussett State Forest in Newtown, Connecticut.

And into the back half of our 7.8 mile hike, we came upon the Prydden Brook Falls.

This waterfall is stunning, especially in the afternoon as the sun highlights all of the droplets dancing in the air. I’ve taken pictures of this enchanted space before, and explored slower shutter speeds to create a silkier water effect.

Editing Together the Songs of the Falls
This time, I needed to get even closer. Everyone else snapped away from afar, and I waited until they got their shots. Then I almost blindly stepped in. I had my little DJI Osmo Pocket camera with me, and I began shooting video clips from different angles.

It was an entirely imperfect exercise. I didn’t have the right ND filter to prevent the brights from blowing out. I could barely see what I was shooting as I stretched in as far as I dared. (I hadn’t entirely lost my mind.)

When I returned home and reviewed the footage, I saw that my twenty-minute shoot (or was it longer?) had yielded some interesting clips, but they were far from perfect. That said, my Osmo Pocket had successfully captured the amazing sounds of that waterfall.

And based on that variable, I decided to edit together the video clips into this short sequence:

It’s hard to properly record the majesty of any waterfall, but happily, I did successfully capture the different songs from this little water beast. And that carried the day for me.

It’s just another example of how audio is often the unsung hero behind any successful video.

The Sirens Still Sing
In hindsight, I should have brought my waterproof GoPro. But happily, I didn’t destroy my DJI Osmo Pocket. Nor did I fall to my doom on the slippery rocks. My family and friends indulged my waterfall encounter, and we eventually continued on our glorious hike.

I’d call that a good day.

Yes, both my camera and I escaped the lure intact. But this waterfall still calls to me. I can still hear its music.

I’ll be back…

How to Use an Apple Watch as a Remote to Snap a Better iPhone Photo

If you should come upon an amazing vista and desire a picture of yourself using your iPhone’s rear-facing camera, you can use your Apple Watch as a remote viewfinder to frame the shot. Here’s how.

I’ve often found when using my iPhone’s camera that one of my biggest challenges has been framing enough of the environment into a selfie pic. This has been especially difficult when I’m also trying to jam several people in. Sure, capturing all of the faces is hard enough, but if you can’t see where everyone is, the picture has limited value.

Of course, the solution is to move the iPhone to a distance beyond your arm’s length, which will get you the wider shot. But then, it’s not a selfie anymore. Well, not exactly. Let’s call it an ‘extended selfie.’

But how do you take the picture if you can’t touch your iPhone?

Camera Remote App
If you also have an Apple Watch, you can use it as a remote for your iPhone’s camera. The Apple Watch’s native Camera Remote app essentially controls your iPhone’s camera and offers a convenient 3-second countdown after you tap the shutter button. That should give you plenty of time after your look down at your Apple Watch and tap it to then look up at your iPhone’s camera in the distance.

Easy Activation
To turn on your Apple Watch’s Camera Remote app, you can simply proclaim to your iPhone, “Hey Siri, take a picture.” Or if it’s too noisy around you, you can also tap the app’s icon on your Apple Watch’s screen.

The Value of Using a Remote Viewfinder
This Apple Watch app can control the front or rear-facing iPhone camera. So that means you can take advantage of the better quality of your rear-facing camera for your extended selfie. That’s because even though you can’t see your iPhone’s screen when using the rear camera, you can still frame the shot using your Apple Watch. It effectively becomes a remote viewfinder.

Removing Yourself from the Picture
Using the Camera Remote app also opens up plenty of photographic options beyond selfies. If you’re able to position yourself far from your iPhone (but close enough to maintain the Bluetooth connection), you can erase your presence from the environment. And that should allow you to capture more natural moments.

Bring Along a Tripod
All of these options will give your iPhone photography a lot more flexibility. That said, you should also bring along a tripod. Propping your iPhone up against an object to get the right angle can be a really difficult and potentially risky exercise for your iPhone.

I know that using a tripod doesn’t exactly match up with the spontaneity of pulling your iPhone out of your pocket to take a quick shot. But a little Joby tripod with an iPhone grip should fit easily enough into any bag or backpack.

Shooting Beyond the Distance of a Selfie Stick
Yes, using a selfie stick can also help to get the shot you want. But performing this remote Apple Watch trick will offer even more opportunity to create a really great photo.

Just be careful not to put your iPhone in harm’s way… now that you no longer maintain physical contact with it. (I’ve have a tendency to do that with my cameras.)

To date, I’ve been successful protecting my iPhone while using it as a camera and found that using my Apple Watch as a remote viewfinder is a nifty tool to enhance my iPhone’s photos.