Is It Bad to Fully Charge your iPhone Every Night?
With new iPhones, now you have the option to throttle back the battery’s charging limit to just 80%. Is that good? Let’s find out.
Once upon a time, rechargeable batteries, however magical at the time, came with ‘memory’ problems. If you kept topping off your device with a bit electrical juice every day without really using the rechargeable battery, it would ‘forget’ how to fully recharge.
Today, Apple says of its lithium-ion iPhone batteries, “You can charge your iPhone every night even if the battery isn’t fully depleted.”
Well, that’s progress. So, what’s the problem here?
Should You Charge your iPhone to 100% Each Night?
On the one hand, yes, our friends from Apple say it’s okay to charge up your iPhone’s lithium-ion battery every night.
On the other hand, Apple has now offered a new feature in its iPhone 15 line to limit charging to just 80% to help reduce the drain on battery life.
The reality has always been that full-charge cycles accelerate the eventual reduction of an iPhone’s lithium-ion battery’s lifespan.
In fact, fully charging up and completing discharging your iPhone’s battery… that’s actually bad. Charging up to just 80% will, in fact help your battery last longer.
The 80% Solution
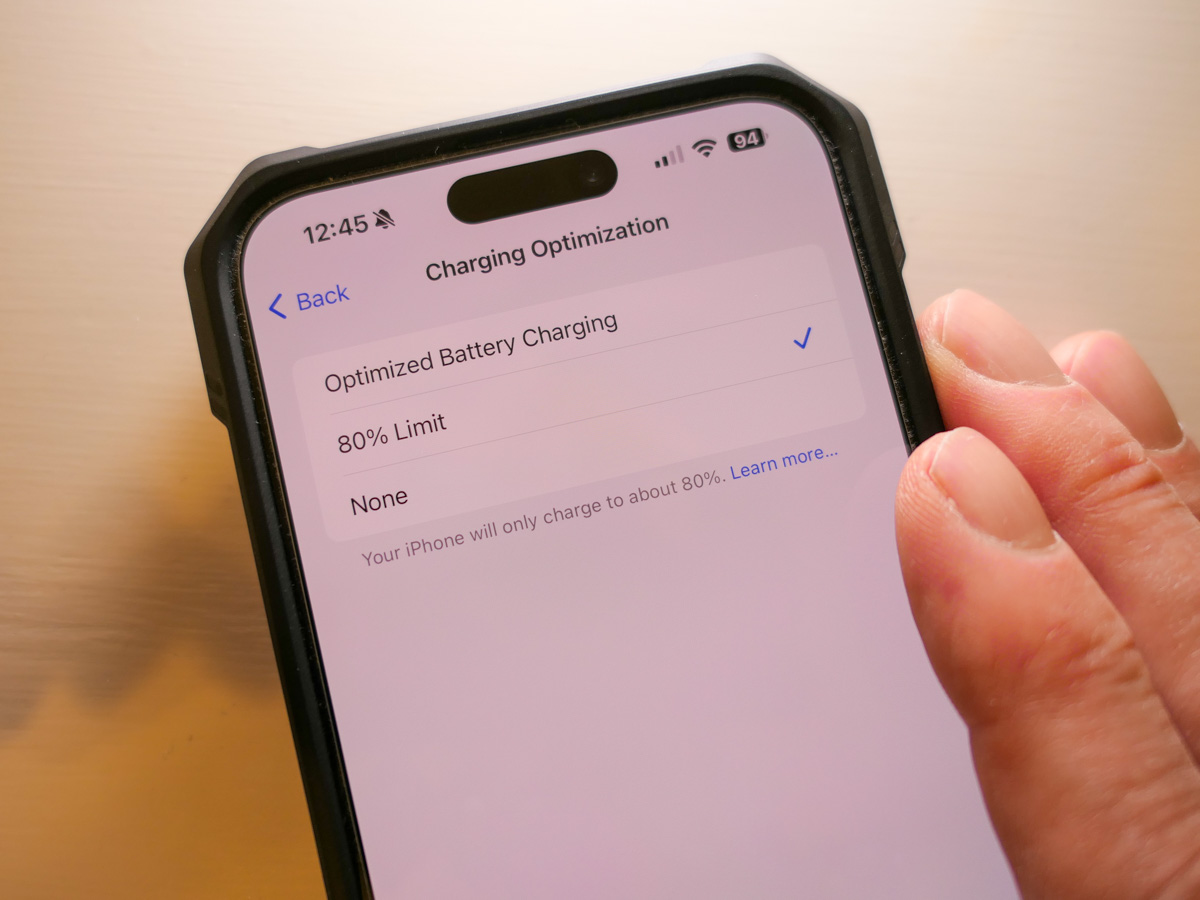
Here’s how you activate the 80% Limit mode:
Click:
- Settings
- Battery
- Battery Health & Charging
Choose between:
- Optimized Battery Charging
- 80% Limit (sometimes it still goes to 100%)
- None
Apple’s default setting is – Optimized Battery Charging
The Value of Optimized Battery Charging
So, yes, you can choose the 80% Limit setting, but Apple also talks a lot on its support pages about how useful the Optimized Battery Charging setting can be to maintain your iPhone battery’s health.
How Optimized Battery Charging actually works… I do find confusing. Something about learning algorithms based on your use. The setting doesn’t always get your iPhone’s charge level back to 100%, and it can delay when the actual charging is happening overnight. (I think there could be some borrowed “Flux Capacitor” or “Borg” tech involved. Who knows.)
But it’s all supposed to be good for your iPhone’s battery. (And that’s all that really matters, right?)
Plus, the name implies it’s the best setting. It’s ‘optimized.’ And it’s the default setting.
What more can you ask for?
80% is Technically Better than 100%
So why is there now the 80% setting? Well, it’s not totally clear to me other than charging up to 100% is simply not optimal for a lithium-ion battery. (Yes, there’s some irony here.)
I imagine the 80% solution is technically best for your phone’s battery, but then you’re constantly denying yourself the dopamine hit when you see that 100% glow to start your day.
Optimized 100% is Better than Regular 100%
So ‘optimized’ charging is designed to minimize the inevitable long-term damage of the 100% solution.
Optimize. Yes. That’s the camp I’m in.
Live your life. Minimize the damage.
As nuanced as all this may feel, what is crystal clear is to never go with the third battery-health option – ‘None.’
Then, you’re just charging up… old school. You’ve got yourself the 100% solution with no benefits from optimization. Your iPhone’s battery will flame out (not literally) more quickly.
Optimize Me!
So where does all of this leave us?
- Is it bad to charge your iPhone to 100% every night. YES.
- Can Apple minimize that problem by optimizing it? YES.
- Should you go ahead and keep charging every night in Optimized Charging mode? YES.
- Is that better than the 80% Solution? PROBABLY NOT.
But where’s the fun in 80% of anything?
I want 100%!
Plus, I want it to be optimized, even if it’s just a word to make me feel better about making the wrong choice. Well, second best.
Happy charging.