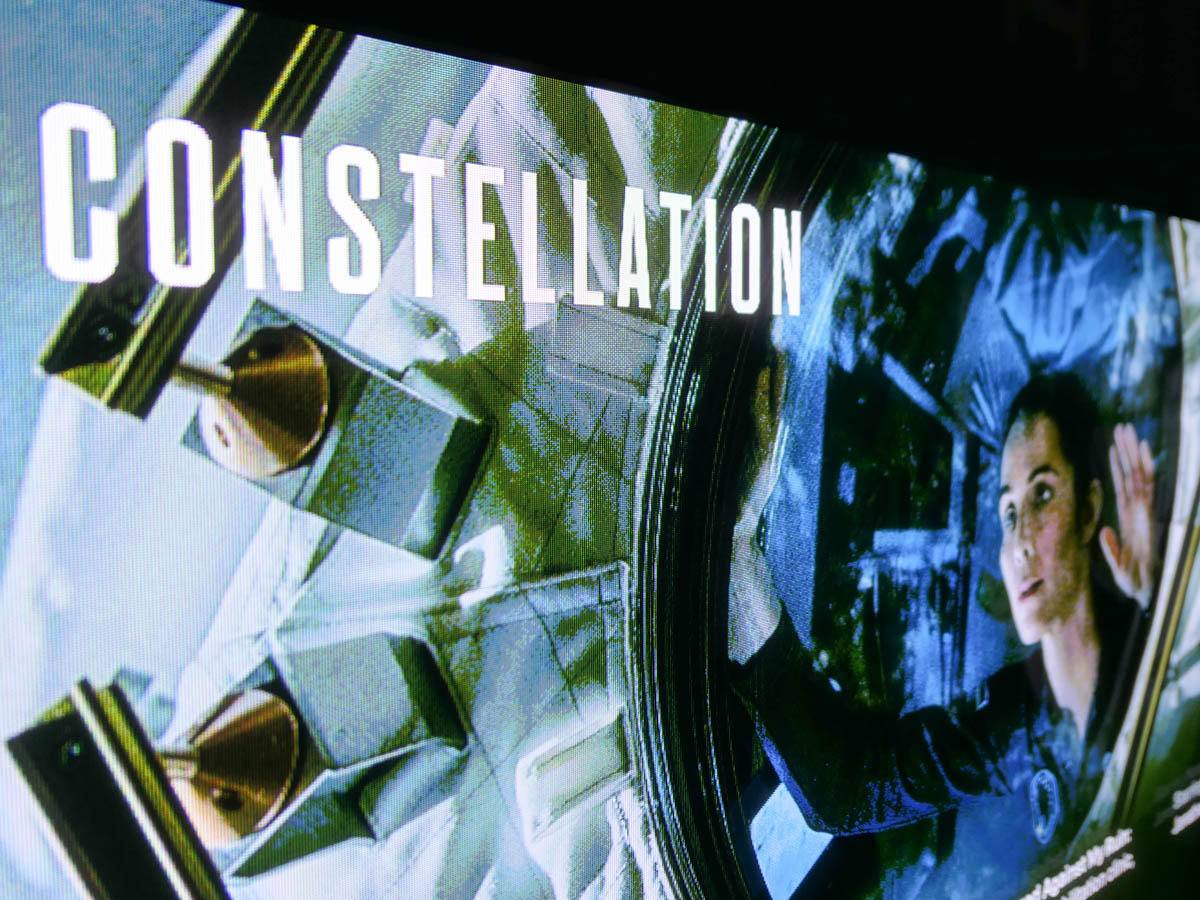
At Home with Tech

Unlock the power of all your technology and learn how to master your photography, computers and smartphone.

Why It’s Time to Refresh your Digital Clones 

Have you updated your personal online brand lately? It’s also probably time to replace your photos that the world can see. Here’s why.

“Life moves pretty fast. If you don’t stop and look around once in a while, you could miss it.” This quote from the fictional Ferris in the 1986 movie “Ferris Bueller’s Day Off” was spot on. And it applies in so many ways today.

It’s hard enough keeping up. It’s easy to forget or neglect your virtual self. Yes, like it or not, we’ve all created multiple online beacons that represent our lives.

Unless you’re focusing enough time to curate your online presence and stay active on social media, your virtual identity can easily start to fall behind your actual existence.

This divergence of realities can create a time warp of sorts where you will start to simultaneously exist in two separate decades.

Pro tip: Everyone should follow one timeline.

Do You Exist?
It’s always important to keep your personal online brand fresh and accurate. That’s healthy in any number of ways.

I’ve said it before that you really don’t exist if you can’t be found online.

  • Your professional self must have a strong and updated LinkedIn presence.
  • Your personal self should engage in some social media activity, if only to avoid missing out on everything your family and friends are regularly sharing.

Today, we’re all effectively micro media outlets, broadcasting our lives out to the world. It’s unavoidable. Sure, you can debate that statement, if you want. (I’m sure there were people in 1920 who insisted that they didn’t need a landline telephone.)

Even if you don’t feel you have a specific need to update your online identity today, it’s always out there working for you. So, you should keep it current.

Post a Recent Photo of Yourself
Have you updated your LinkedIn photo lately? Has it been more than five years? Maybe a decade? Perhaps… never?

Yes, then it’s definitely time to change it out. Look we’re all getting older, and we do look different. That’s not a bad thing. It’s reality. It’s life.

Embrace your reality. It’s all you have.

But that doesn’t mean you can’t maximize your reality. So, use a new great photo you love. (It doesn’t have to be professionally shot.)

And I suggest you pick a photo of yourself that’s warm and welcoming. It’s effectively your greeting card to the world.

Smile!
I’ve occasionally come across LinkedIn profile pics without smiles, and I’m always confused by that choice. Why would someone actually want to look unfriendly?

Other times, I see photos that are poorly lit or badly framed. Then, there’s the example where the person is clearly part of a group pic (awkwardly cropped in).

I don’t want to be judgmental, but I don’t get it. We all have smartphones with cameras. If someone isn’t around to snap a new photo for you, a selfie can work just fine. (Just make sure you stand in front of a window to ensure you’re brightly lit.)

Time to Update your Digital Clones
I get it. You’re busy. We’re all busy. You might feel it’s not critical today how people ‘experience’ you online.

But I would say you can’t wait until the day it’s suddenly important again. Then, it’s too late. You can never really know the true impact of actively maintaining your personal brand online across the years.

I believe it’s always beneficial to promote your own story. And to check out how well you’re doing, simply Google yourself.

No, this digital snapshot of your life will never be perfect. You can’t create total digital clones (well, not yet),

But it is a partial view of the real you.

So, give your online personal brand what it needs to best represent you.
Today… and always.

Is It Bad to Fully Charge your iPhone Every Night?

With new iPhones, now you have the option to throttle back the battery’s charging limit to just 80%. Is that good? Let’s find out.

Once upon a time, rechargeable batteries, however magical at the time, came with ‘memory’ problems. If you kept topping off your device with a bit electrical juice every day without really using the rechargeable battery, it would ‘forget’ how to fully recharge.

Today, Apple says of its lithium-ion iPhone batteries, “You can charge your iPhone every night even if the battery isn’t fully depleted.”

Well, that’s progress. So, what’s the problem here?

Should You Charge your iPhone to 100% Each Night?
On the one hand, yes, our friends from Apple say it’s okay to charge up your iPhone’s lithium-ion battery every night.

On the other hand, Apple has now offered a new feature in its iPhone 15 line to limit charging to just 80% to help reduce the drain on battery life.

The reality has always been that full-charge cycles accelerate the eventual reduction of an iPhone’s lithium-ion battery’s lifespan.

In fact, fully charging up and completing discharging your iPhone’s battery… that’s actually bad. Charging up to just 80% will, in fact help your battery last longer.

The 80% Solution
Here’s how you activate the 80% Limit mode:
Click:

  • Settings
  • Battery
  • Battery Health & Charging

Choose between:

  • Optimized Battery Charging
  • 80% Limit (sometimes it still goes to 100%)
  • None

Apple’s default setting is – Optimized Battery Charging

The Value of Optimized Battery Charging
So, yes, you can choose the 80% Limit setting, but Apple also talks a lot on its support pages about how useful the Optimized Battery Charging setting can be to maintain your iPhone battery’s health.

How Optimized Battery Charging actually works… I do find confusing. Something about learning algorithms based on your use. The setting doesn’t always get your iPhone’s charge level back to 100%, and it can delay when the actual charging is happening overnight. (I think there could be some borrowed “Flux Capacitor” or “Borg” tech involved. Who knows.)

But it’s all supposed to be good for your iPhone’s battery. (And that’s all that really matters, right?)

Plus, the name implies it’s the best setting. It’s ‘optimized.’ And it’s the default setting.
What more can you ask for?

80% is Technically Better than 100%
So why is there now the 80% setting? Well, it’s not totally clear to me other than charging up to 100% is simply not optimal for a lithium-ion battery. (Yes, there’s some irony here.)

I imagine the 80% solution is technically best for your phone’s battery, but then you’re constantly denying yourself the dopamine hit when you see that 100% glow to start your day.

Optimized 100% is Better than Regular 100%
So ‘optimized’ charging is designed to minimize the inevitable long-term damage of the 100% solution.

Optimize. Yes. That’s the camp I’m in.

Live your life. Minimize the damage.

As nuanced as all this may feel, what is crystal clear is to never go with the third battery-health option – ‘None.’

Then, you’re just charging up… old school. You’ve got yourself the 100% solution with no benefits from optimization. Your iPhone’s battery will flame out (not literally) more quickly.

Optimize Me!
So where does all of this leave us?

  • Is it bad to charge your iPhone to 100% every night. YES.
  • Can Apple minimize that problem by optimizing it? YES.
  • Should you go ahead and keep charging every night in Optimized Charging mode? YES.
  • Is that better than the 80% Solution? PROBABLY NOT.

But where’s the fun in 80% of anything?
I want 100%!

Plus, I want it to be optimized, even if it’s just a word to make me feel better about making the wrong choice. Well, second best.

Happy charging.

How to Use AI to Easily Improve your iPhone Photography

AI can effortlessly and perfectly select the people in your photos to individually brighten and edit. Here’s how to access this superpower using your iPhone and Adobe Lightroom.

I don’t travel about taking family photos with my own team of lighting professionals and a heavy bag of prime lenses (I wish). I typically just use the camera baked into my smartphone, which as you know is my trusty iPhone.

Sure, I sometimes get more ambitious and bring my GoPro, my Panasonic Lumix LX-10 or Lumix ZS200 with its bigger zoom. But my iPhone 15 Pro Max has a great camera system. And best of all, it’s always with me.

So, like the rest of us, most of my photography is generated through my phone.

When the Light is your Enemy
Even though my iPhone’s camera skills are admirable, the world usually doesn’t present perfect conditions to capture an optimal photo. Often, the lighting is not quite right.

Your subject can often look dark. Sure, my iPhone can sometimes handle this challenge. But it has problems (as does any camera) when my subject isn’t as well-lit as other parts of the frame. A similar limitation develops when the background is too bright (such as when your subject stands in front of a window with sun pouring in).

Then you’ve got yourself a silhouette shot, which is the opposite of what you probably wanted.

Yes, you can try to reframe, but that’s not always possible. The only option is to snap the photo and then try to fix it in post.

The Former Limits of Photo-Editing Solutions
There are any number of photo editing software options where you can brighten your photo to pump up how your subject appears. (Your smartphone will do this in one click.) But that can often start to overexpose the other parts of your image that are already sufficiently bright.

Professional photo editing programs can enable you to just select a portion of your photo to enhance, but there’s not been a one-click solution… until recently.

How to Brighten the People in your Photos using the AI in Adobe Lightroom
I use Adobe Lightroom Classic to organize and enhance my photos. The software now offers the ability to perfectly isolate and select people in photos with just one click. Being able to accomplish that used to take years of training and practice with complex software.

But with the power of Adobe Sensei AI, Lightroom does all that for you. Then you can easily pump up how the people in your photo look.

Here’s how:

  • In Develop mode, click on the circular Masking Tool on the top right. That’s your entry point.

On the top of your options, there are three boxes you can click to select:

  • Subject
  • Sky
  • Background

The AI-powered Masking Tool immediately isolates a perfect cut out and adds a mask that you can brighten, darken or adjust in any number of ways. If there are several people in your photo, and you want to enhance the look of just one, you can click on ‘People’ to select that individual.

It’s amazing.

Two Examples of Lightroom’s Masking Tool in Action
Here’s one example of using the Masking Tool to pump up the light and color saturation of just the two people in my shot overlooking Exit Glacier in Alaska’s Kenai Fjords National Park.

Brighten the People

And here’s another example where I used the Masking Tool to brighten this somewhat hidden young moose I spotted while biking near Anchorage.

Brighten the Moose

It’s not a perfect shot but being able to actually see the moose more clearly with the help of AI certainly improves it.

  • A warning: Clicking-in more light onto your subjects should be a subtle enhancement. Otherwise, it will look fake. So, sprinkle in your extra light sparingly.

Add Buttery Bokeh Blur Using your iPhone’s Portrait Mode
Once, you’ve got your photo subjects properly ‘re-lit,’ then you can focus on editing the backgrounds in your shots. A relatively new AI trick you can use is adding in background blur or ‘bokeh.’

This nifty visual effect used to be achievable only while taking photos with a more traditional camera in bright light using the right lens and aperture setting. Now you don’t have to be an expert photographer to get some bokeh. AI can create the same effect in post!

An iPhone camera’s Portrait Mode setting is designed to do exactly that. The iPhone’s software in the Photos app isolates the background from your subject, allowing you to dial in your background blur. You can snap away and then later choose to add bokeh (as long as the photo was originally taken in Portrait Mode).

This feature has been a game changer for me.

  • Another warning: You might want to dial back the amount of your iPhone’s auto bokeh level setting (Yes, you can do that.). Sometimes, just a subtle background blur is all you need. Too much may make the background look like it’s a complete digital replacement.

Three Levels of Bokeh
Here are three examples adding different levels of bokeh in Portrait Mode on my iPhone. I took this selfie while I was shopping for a new pair of reading glasses. You don’t need to see the optometrist office background. So, I thought it was a perfect opportunity to blur it out. But how much bokeh is the right level? You decide…

Lens Blur in Lightroom Classic
Adobe Lightroom Classic can perform the same bokeh trick with its new Lens Blur feature. In one click, you can create a depth map of your photo using Adobe Sensei. From that point, you can tinker further to adjust the scope of the blur.

Is It Cheating to Use AI to Improve your Photos?
The technology to digitally adjust your photos has been around for years. But some of the tricks were complex to pull off. The big change now is AI can do much of the same work for you with just a few clicks.

Should you feel like all of this is somehow cheating? Are you not really a good photographer, because you couldn’t originally capture your shot perfectly, and you need AI to save you?

Please.

If you’re a Luddite, maybe. Otherwise, this is simple technological progress.

Time to get on board and use some AI-oomph to make your photos shine brighter!