How Real Is This AI Video If I Created It Using My Own Photos?
Technology has chipped away at the definition of reality. Digital photography and photo editing software provide almost endless adjustment opportunities for creative expression. But now, with AI-powered tools, you can literally reconstruct an entire photo. You can remove distractions and even people. So, what’s real anymore?
For the past few years, I’ve been fighting a certain sense of guilt as I’ve learned to ‘improve’ my photography using AI-fueled enhancements. Sure, my resulting photos are better, but I sometimes worry that they’re no longer the pictures I captured. But I’ve been careful, and I’ve worked hard to keep it real.
Today, I happily use all the AI-powered photo editing tools in Adobe Lightroom, because I make sure my modified pictures are still faithful to the core images. This is essence of my rule book, and I follow it without angst.
Next comes video.
AI Can Turn Your Photo into a Video
Text-to-video prompting and photo-to-video magic is today’s big creative disruptor. And I know I must face this revolution head on, as it changes everything about the work I’ve been doing for decades.
I’m particularly interested in the generative AI power to to turn a real photo into a video that looks shockingly similar. AI can replicate and then extend the creative elements in your photos into full motion video. Remarkable. (The results are not always perfect, but they’re improving.)
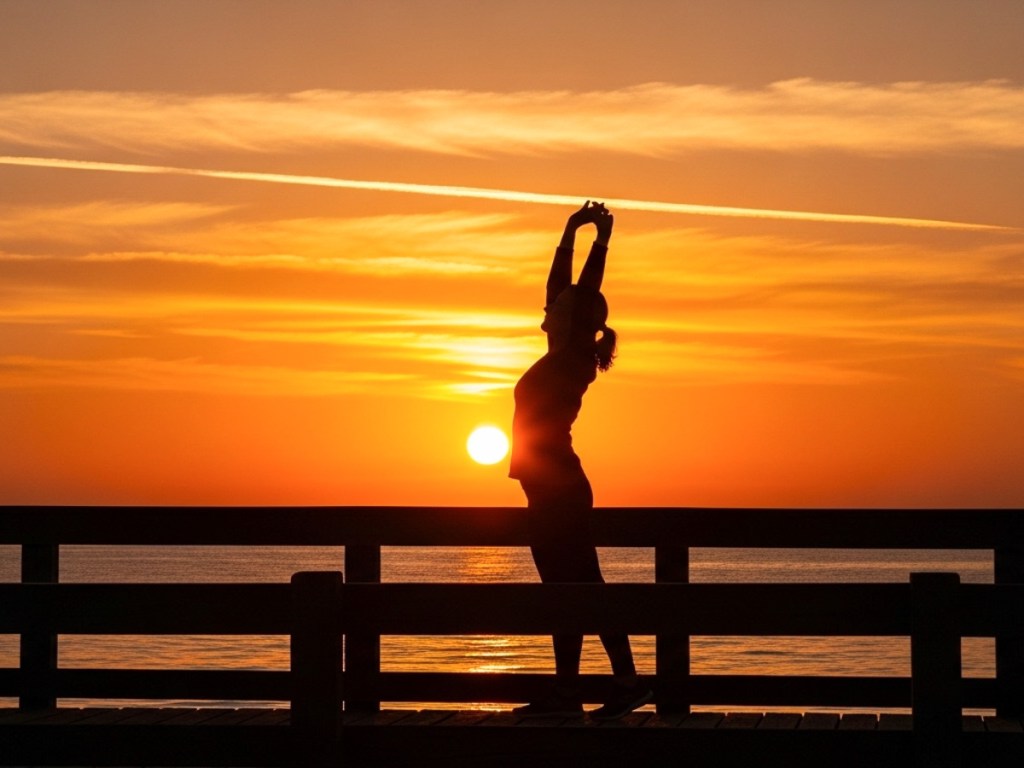
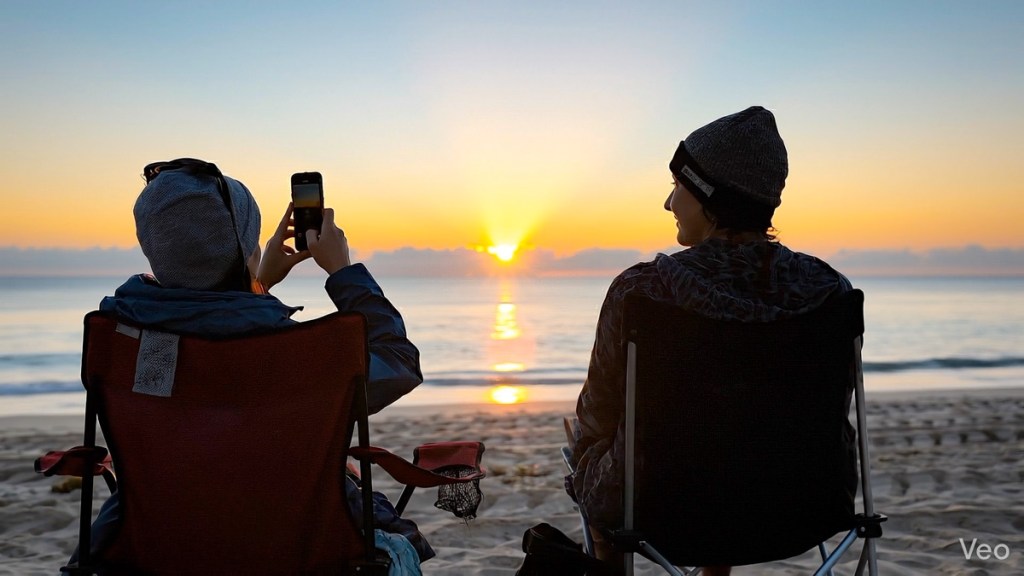
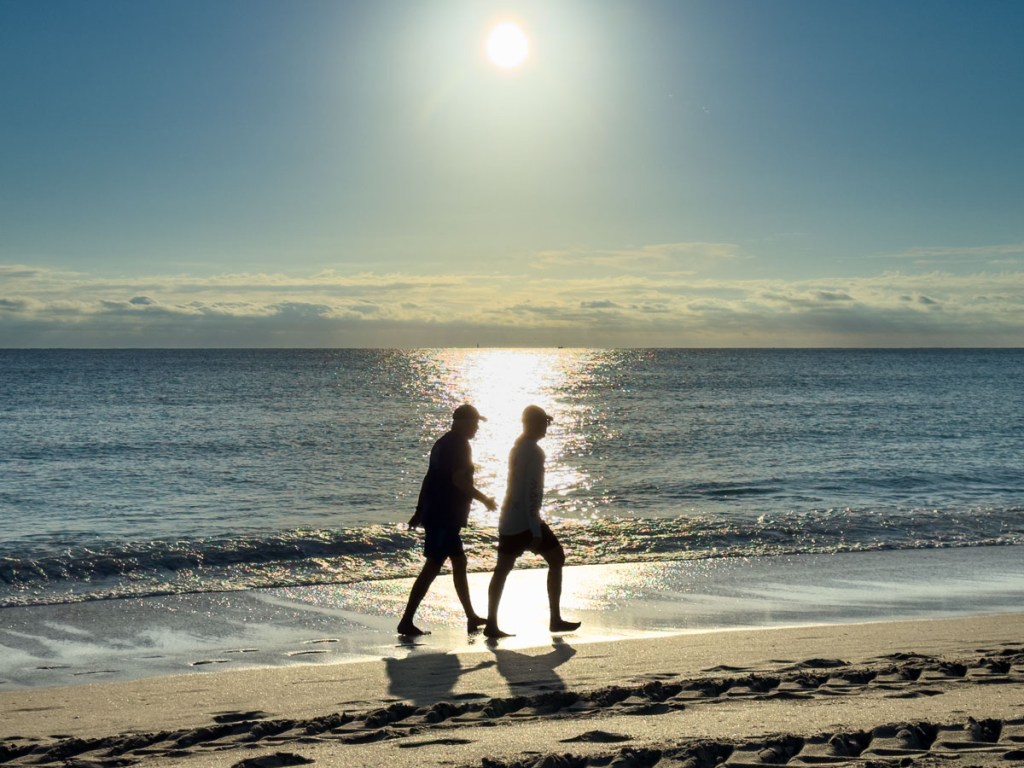
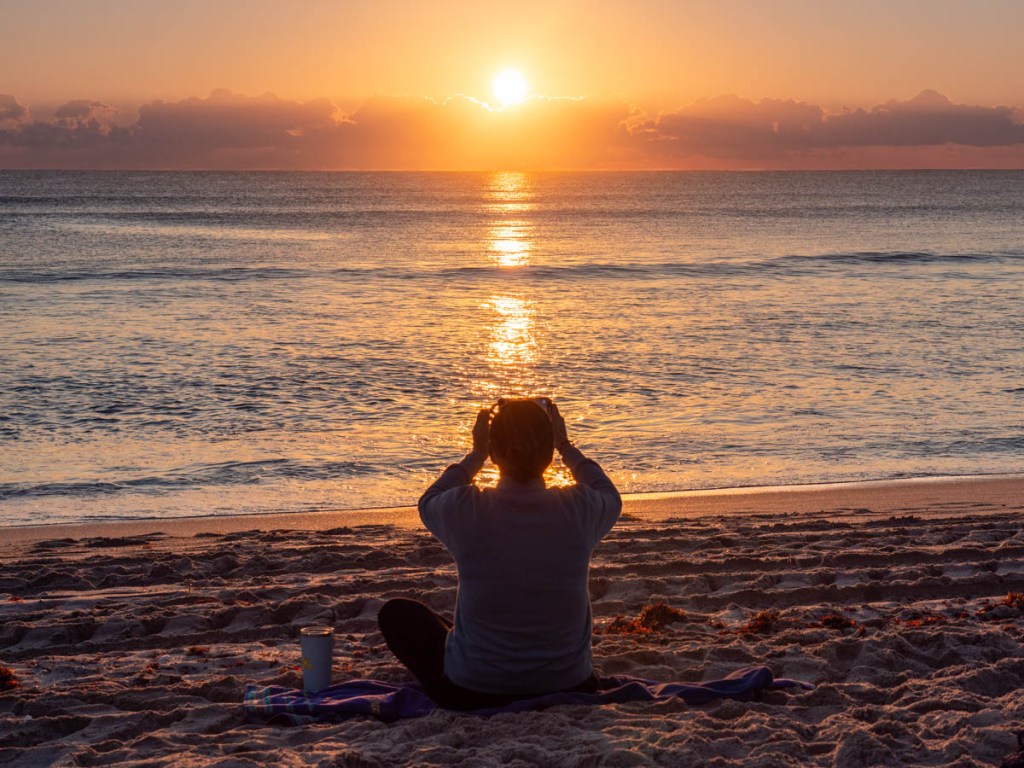
So, I embarked on a little creative exercise. I chose a few silhouette photos I snapped during a sunrise over Delray Beach on our recent Florida vacation and ran them through Google Veo. This process generated 8-second video clips that almost exactly followed the visual elements from my photos. The only exception was Veo created alternate, though similar, people on the beach. (And that’s fine.)
Then I edited the AI video clips together to create this sequence representing my own sunrise experience on that beach.
AI Video Generated from My Photos
As Real as Art Can Be
So, what exactly is this? What have I created here? Well, it’s simultaneously real and not real.
My photos provided enough creative direction for Veo to effectively clone each photo and then extend each moment.
So sure, then it’s easy to call this sequence ‘fake’ as Veo has invented 8 seconds from each frame I gave it.
But these individual scenes faithfully reflect the reality I saw. They do express the essence of my experience.
So perhaps this entire AI-enabled creative process should fall under the category of art. Yes, maybe that’s what I’m doing here.
No Professional Video Crew Required
I also found it wildly fun that I’m able to generate video clips that would otherwise require me to hire a professional video crew for the day.
In my AI video, the opening shot of the two people walking on the beach… yes, I might be able to capture that with my DJI Osmo 3 gimbal.
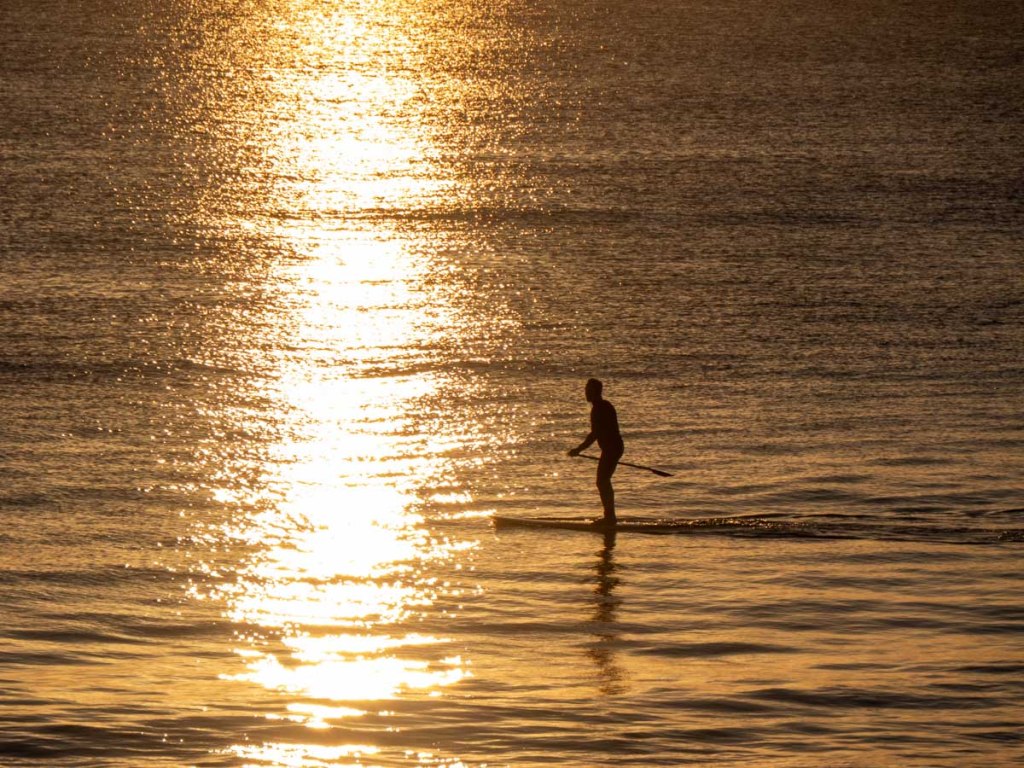
But that closing tracking shot of the paddleboard man surfing? That’s a clear step beyond Barrett’s personal filmmaking chops (for now).
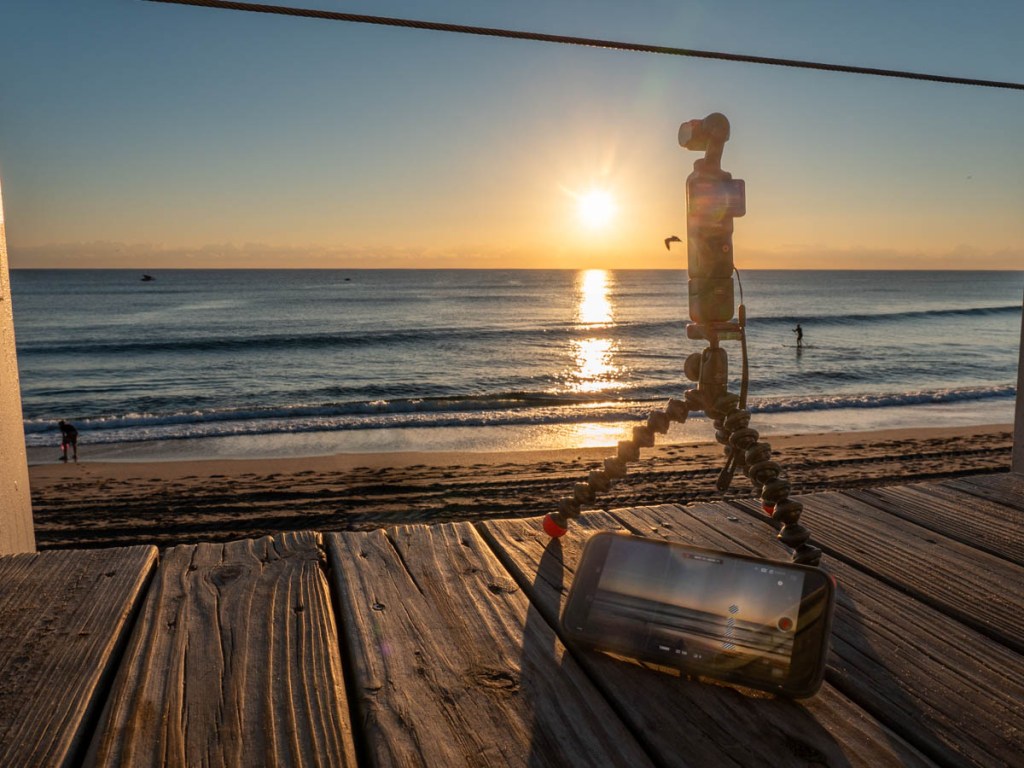
The Limits When Recording Real B-Roll
Of course, I don’t need AI to create video for me. Here’s some actual b-roll I recorded on Delray Beach that same morning with my Osmo.
Real Barrett B-Roll
But while I also like this ‘real’ b-roll, these are necessarily wider shots, limited by the realities I encountered in those moments on the beach. (Shooting b-roll can be an intrusive process. And I didn’t want to mess with people’s sunrise Zen.)
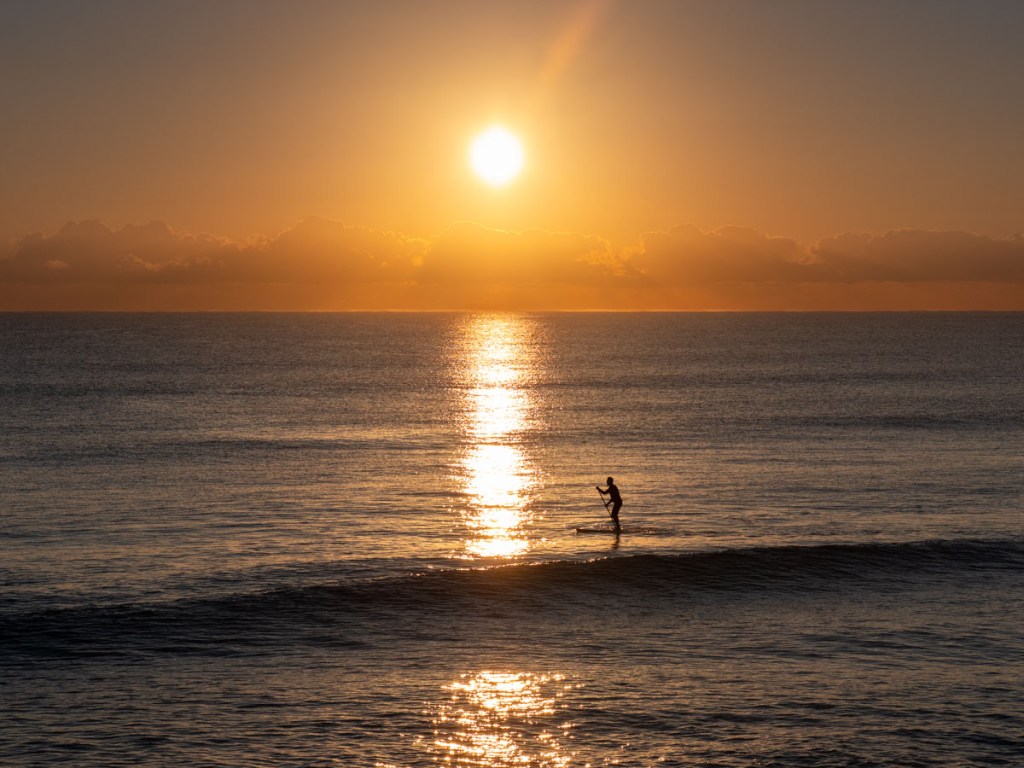
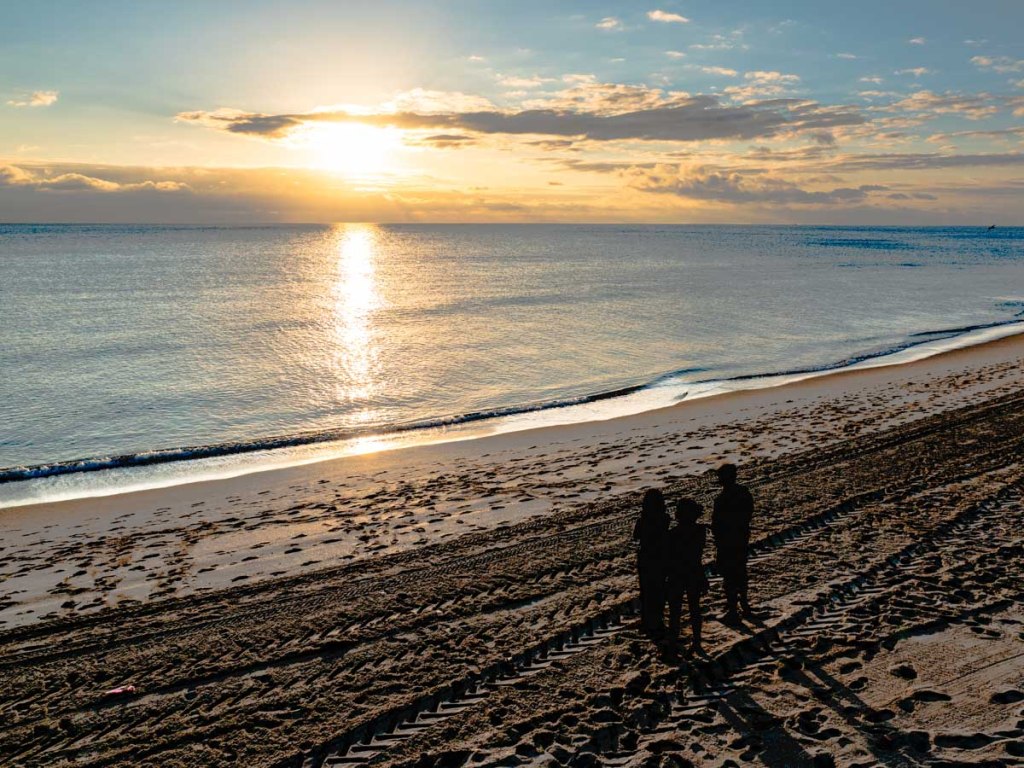
Snapping a photo is quick and usually less invasive. As a result, I think my original silhouette shots had additional visual impact.
Real Barrett Photos
But now, I can also use my new AI tools to express my creative interpretation of these same images into longer scenes. I can build on these moments, magically extending my stills into the video realm. That’s so cool!
But what does this all mean moving forward? Well, I’m not exactly sure.
A Digital Painting in Motion
I don’t truly understand my little Frankenstein video. Yes, I made it, but what is it?
- It’s alive… and yet not
- Fabricated, but very close to reality
- Hard to exactly define, other than an artist’s interpretation
Perhaps I’ll simply call it my digital painting in motion.
Of course, there are any number of unanswered questions regarding the broader topic of AI-generated video for our society. But I’ll leave that for another day.
For now, I’m pleased that I was able to simply share with you the flow and true ‘spirit’ of my beautiful sunrise experience with a little artistic help from AI.
And I hope you liked the paintbrush I chose to use.