At Home with Tech

Unlock the power of all your technology and learn how to master your photography, computers and smartphone.

Category: Tech How To

How to Make a Bar Mitzvah Video

Here’s an outtake from the video I created to celebrate our son’s bar mitzvah. I followed a process that prioritized keeping it simple. Here’s how I did that.

Over the years, I think I’ve recorded hundreds (thousands?) of little family video clips. So if you’re wondering, yes, of course I created a video to celebrate our son’s bar mitzvah.

It was a highlights reel of sorts, containing some of his greatest hits to date… at least the ones that I happened to capture on video.

Fortunately, I’ve been diligent over these past thirteen years to label each of my family video clips and organize them into folders by month and year. (That’s a lot of folders!)

Over time, I’ve also created a variety of little ‘finished’ family videos that reflected different moments in our family’s story (birthday parties, vacation trips). These particular videos were especially useful to identify the clips I needed for the bar mitzvah video.

Not a Documentary
So years of good digital organization set me up nicely to begin my project. (I’ve got all of my video files stored in an external G-RAID drive.)

But really, any way I looked at my task, it was still absolutely overwhelming. (And I wasn’t even considering using any photos.)

So instead of trying to accomplish the impossible and somehow jam in every perfect clip to tell the ‘total’ story, I decided instead to enjoy my trip into the past and simply use what I uncovered in my digital archives over the course of several hours during three separate research sessions.

Capture the Spirit
Sure, there were a few video moments that I had specifically remembered and searched for. (My wife also had a few clip requests.) But for the most part, my process of rediscovery organically led me to the clips I used. If I had repeated my exercise the following month, I could have easily collected an entirely different grouping of clips that were just as delightful.

I realized as I went along that the video would mostly reflect these three factors:

  • Our son’s growth across the years
  • His family and friends
  • Some fun moments

It would never be a complete reflection on his life to date. And that was fine.

Keep a Simple Structure
This understanding freed me to focus on creating a video that was simply enjoyable to watch. And it was ‘relatively’ simple to make.

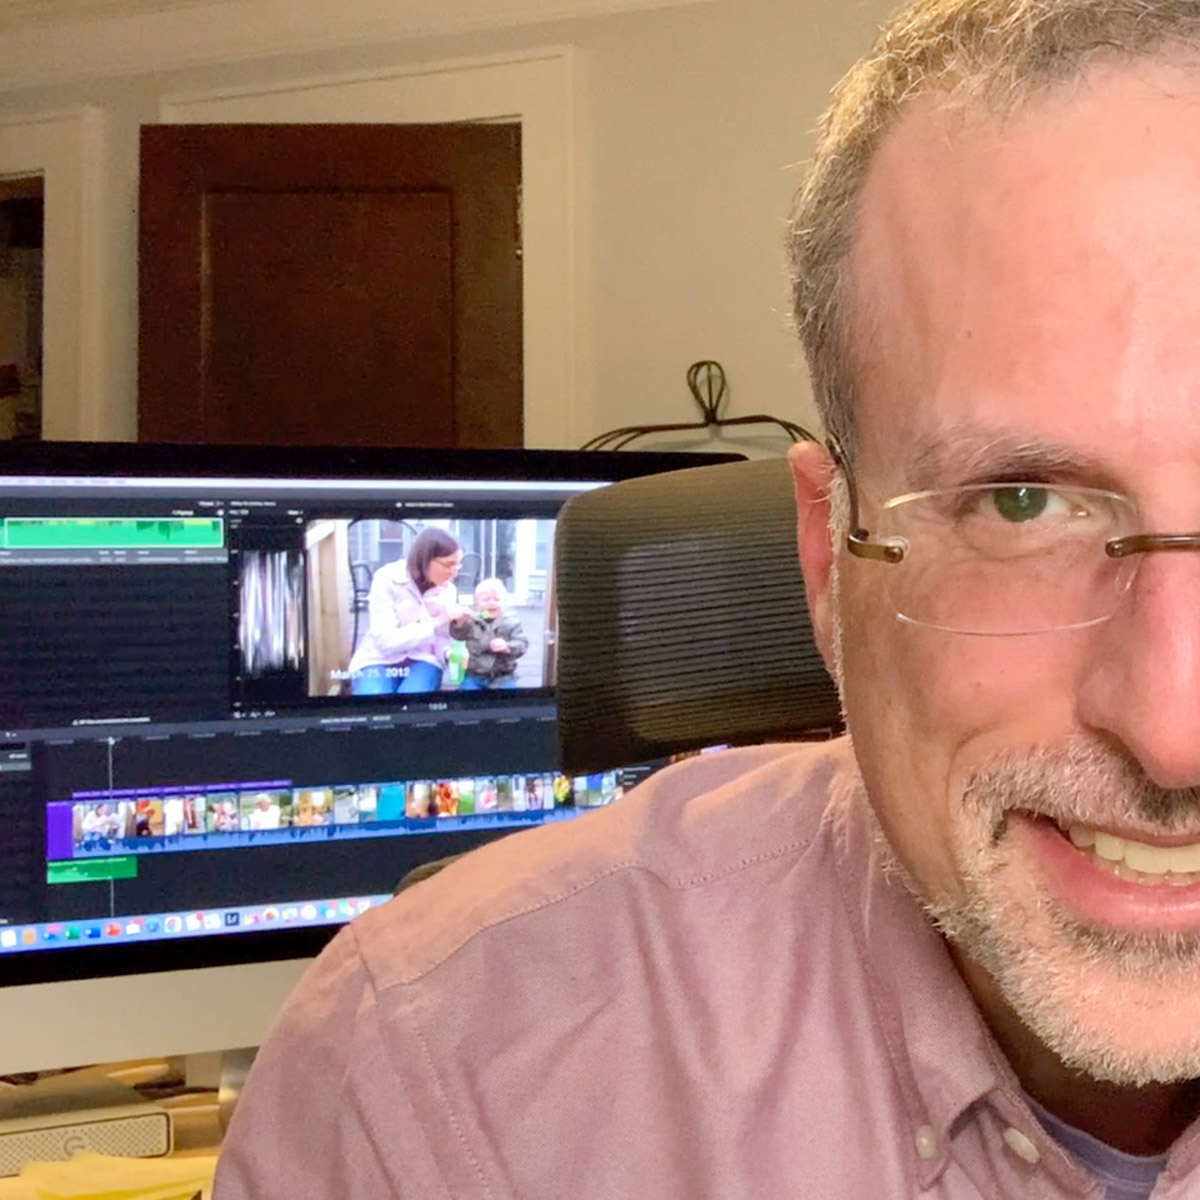
It ran seven and a half minutes. Each clip was 10 to 15 seconds long. And I organized them chronologically (using Final Cut Pro on my iMac) with a date stamp graphic in the bottom of the frame. I think the dates were useful to show the passage of time. I used a couple of his favorite pieces of music to support sections that were more visually oriented. And I popped in a title at the top and a ‘congratulations’ graphic at the back.

Finally, my wife and I recorded a short video message to our son that I included towards the end of the video.

Make a Few Drafts
That was it. I made three drafts before locking the final cut.

The first draft was a just a long string of clips in the right order. The second draft was a shorter version. (Everything can’t make it in. Always remember that less is more.) The third draft added a few more clips that my wife had remembered. (Don’t forget to collaborate!) And the final cut was where I polished it all up.

There are any number of ways to make a bar mitzvah video. This was the path I took.

A Video for the Past and the Future
We showed my finished video to our son, and I think he enjoyed it. He did smile a few times. To be fair, I can understand how he may not be as excited to see his toddler clips as we were. (My wife and I were delighted with the trip down memory lane.)

But beyond celebrating an important milestone for our son, I also see this video as a piece of family history that reflects our son’s first thirteen years. And I hope it’s something he can return to years into the future and enjoy.

My wife and I certainly will!

How a Bio Site can Unify your Personal Brand

If there are multiple versions of your personal brand online, maybe it’s time to bring it all together. Here’s how to do that with a Bio Site.

In addition to my At Home with Tech blog, which I host on WordPress, I also have a more professional presence at barrettlester.com. I built that website using Squarespace. (Of course, I’ve also got LinkedIn for my professional life.)

My thinking has always been to have two parallel but separate paths for my online branding. One for weekdays… the other for weekends.

There is Only One True Version of You
That said, I’m acutely aware that there really isn’t separation when it comes to anyone’s personal brand. So, I’m mindful to ensure my home technology blog stories as a dad are complementary to my professional presence as corporate video production leader.

And whether it’s LinkedIn, Facebook, Instagram, Twitter or TikTok, everything we post online molds our identity. So why even try to separate it?

Instead, perhaps we should try to bring it all together with the links in one place. That unification is what Squarespace has offered me.

Build your Bio Site
In fact, Squarespace has been bugging me for quite a while to do this by setting up something called a Bio Site. It’s a free option that creates a new mobile-first, one-page website where you can aggregate all of your social media links and website links.

Think of it as a link-centric, ‘everything you’ profile. (And yes, there are other bio services out there.)

But since Squarespace’s free offer was right in front of me, I decided to go ahead and stand up my new ‘All Barrett’ destination at biosites.com:

My new Bio Site is bio.site/barrettlester.

My Bio Site is Live!
You can see that I’m still organizing my existence into two pieces. My work life is on the top, and my home life inhabits the bottom half the page. (I’ll continue to work on better integrating a more holistic identity.)

Yes, my Bio Site was easy to create. Yes, the design is flexible. Yes, I can change and add to it as I go along.

But do I really need this?

The Total You
Well, I can certainly add the link to my email signature. It’s also intended to be useful in places like Instagram, where you can only post one clickable link.

It feels a bit like a digital business card, but it’s really more of a digital ‘life’ card to share.

It’s everything that’s you.

Bring It Together
I like the simplicity. It’s one-stop shopping.

Sure, you can unify your online identity in other ways, but if you’ve already scattered your existence across the web, a Bio Site can be a good way to bring it all together!

How to Quickly Turn a Scanned Negative into a Positive Image on a Mac

If you think a 90-year-old negative is a lost cause, think again. Here’s how to bring it back to life.

Sure, photo negatives aren’t cool anymore. They represent 19th century technology. Most of us aren’t housing a roll of Kodachrome in our camera bags these days. I get it.

But there’s well over a century of family history locked away in millions of shoe boxes in the back of closets… all in those negative strips. There should be a way to rescue them.

Correction:
There should be an easy way to rescue them and quickly bring the negative images back to life into positive form.

I’ve been traveling that complex journey for the past months since I’ve taken ownership of all of my family’s photo archives (shoe boxes) after my father passed away.

Digital Conversion
So, I bought a slide and negative converter to handle the bulk of the work.

It’s fast. It’s a one-click solution. The results are mostly solid.

But the Wolverine couldn’t capture the full real estate of the larger negatives dating back to the 1930s (2 ½” x 3 ¾”).

I turned to my old flatbed scanner to handle the large negatives. But then I needed a way (an easy way!) to transform each negative into its positive doppelganger.

Adobe Solutions
There are any number of tutorials on YouTube that demonstrate how to do that in Adobe Lightroom or Photoshop, and they all promote the concept of how easy and fun it is.

‘Fun’ is code for it’s not really that quick. Sure, it may be relatively easy, but it still requires about five minutes of fiddling to bring the image to life in the positive universe.

A few minutes may not seem like a lot of time, but fiddling is not a precise exercise, and five minutes can easily turn into fifteen.

Apple Photos (OS X):
As a Mac user, I wanted to see if I could find a native solution without having to rely on the muscle of Adobe. The good news is I found a couple good options.

If you already use the Apple Photos app on your Mac, you can do the conversion right there. It’s not quite one click. But it’s straight forward. Let’s give it a shot using a negative of my grandmother Rae from 1935 with my father and uncle. (My dad is the tiny one!)

  • Upload your negative into Apple Photos.
  • Select it.
  • Click on ‘Edit.’

Select the ‘Curves’ drop down.
You’ll see a histogram of the photo with a straight white line positioned diagonally from bottom left to top right.

To invert the negative image to its positive version:
Click on the bottom left of the line and drag it all the way to the top left. Then click on the top right of the line and drag it to the bottom right.

Voilà! Your negative image is now inverted and displays in positive form.

Then, you can continue to tweak the image from there as you choose. (And that’s where you can go down the rabbit hole of tweaking.)

Using Apple Photos to perform this trick is actually quite similar to Adobe Lightroom’s interface.

Preview App
You can also use Apple’s ‘Preview’ app to bring your negatives back to the positive universe.

It’s a near-identical exercise:

  • Select ‘Tools.’
  • Then ‘Adjust Color.’

Can You Invert a Negative Image in One Click?
Okay. None of these options are one-click solutions. So, Is there one? I figured any number of online photo management websites must have a negative-reversal filter built in.

I checked out Shutterfly, Google Photos, Amazon Photos and Canva.

Nope.

Yes, there are apps out there that promote the ability to reverse a negative in one click. But after giving it some more thought, I just didn’t want to add yet another piece of software into my workflow.

So, I canceled my adventure down this particular rabbit hole. Enduring a few clicks to turn a negative into a positive image will suffice.

Diagonal-Line Maneuver
The truth is I already do most of my photo management work in Adobe Lightroom. The diagonal-line maneuver in the Tone Curve section works just fine (just like with Apple’s ‘Photos’ and ‘Preview’ apps).

The good news is there’s a choice on the software to use if you don’t want to take the Adobe path.

And now I need to get back to work on my time machine. There’s still almost a century of negatives to go through.

I’m bringing the past back to life, one image at a time.

I’d say maybe that’s worth the five minutes.