At Home with Tech

Unlock the power of all your technology and learn how to master your photography, computers and smartphone.

Category: Tech in the News

Three Websites to Create and Mail a Card from Your Computer

This photo card I created at Paper Culture represents the end of a tech quest I’ve been on for my father: Type a card. Put it in the mail. Don’t get out of your chair.

This photo card I created at Paper Culture represents the end of a tech quest I’ve been on for my father: Type a card. Put it in the mail. Don’t get out of your chair.

My father asked me a couple years ago how to send out a letter from his computer directly to the mail.

I told him that was a service called email.

He gave me an annoyed look.
(My eighty-year-old dad is quite tech savvy for his generation.)

He politely replied that an email can get lost in the deluge people receive.
Plus they don’t carry the gravity of a physical piece of mail.
(He had a point.)

Dad is still quite focused on the golden days when telegrams ruled the world of instant communication!

The idea of creating and sending out a physical piece of mail through your computer may seem more quaint than critical, but it’s not an unreasonable request.

At the time, Apple’s Cards iOS app had just launched.
The service was designed to mail out customized cards with your photos via your iPhone/iPad as opposed to using a desk-bound computer.
Cards was a great idea and a nifty time saver, since you didn’t have to schlep to the post office. Apple did all the heavy lifting.

Suddenly ‘quaint’ became ‘cool.’
But it wasn’t quite right for my father, as he didn’t have an iPhone

So Cards was a near miss.

I think I then got consumed with my life as a new parent.
And I never did come up with an answer for my dad.

Fast-forward two years…

Cards… We Hardly Knew You!
Guess what?
Cards wasn’t that cool after all.

Amidst all the recent fanfare of the iPhone 5S and 5C launch,
Apple also killed off Cards.
What?!

Yes, On September 10, Apple quietly acknowledged its Cards service had been discontinued, pushing customers towards iPhoto instead.
…And also pushing people to get off their tushies to find a mailbox!
(iPhoto won’t mail out your cards for you.)

Three Choices Take Center Stage
Apple’s Cards obit got me thinking back to the unfinished project for my dad.

Today, there are plenty of ways to send out a greeting card online, even using photos you’ve uploaded.
The problem is the massive overload of design options and targeted ‘themes’ for your card.

You’ve got hundreds… sometimes thousands of choices.

My father is looking for something simple:

  • No anniversary
  • No graduation
  • No congratulations
  • No happy retirement
  • There’s no event to celebrate!

He wants to avoid all the fanfare and just write and send out his own little notes.

So I began my research again…

And with the vacuum created by Card’s departure, the competition was happy to remind everyone they’re out there…

Sifting though them to find the ones that still stuck to the basics wasn’t easy…
But I found three choices I think my father will like….

Shutterfly

So of course, I started with Shutterfly, because it’s such a well-known brand.

That said, I realized it’s become quite the sprawling mall of photo-related products.
Believe me, finding the right page to create and mail out a singular card wasn’t easy.

Shutterfly Photo Cards
Shutterfly doesn’t offer the option to mail out old-school post cards or individual single-sided photo cards.
(They only sell single-sided photo cards in bulk.)

Shutterfly Flat Stationary Cards
But wait… you’re suddenly in luck if you morph the aforementioned photo card into a ‘flat stationery card.’
Yes, Shutterfly will mail out individual flat stationery cards that you can customize with your photos:
(5 x 7, 5 x 5, 6 x 8, and 4 x 8…but not 4 x 5!)

The price:

  • $2.47 for most of the sizes (They’ve got a sale running.)
  • $2.44 for the 6 x 8 (They’ve got a bigger sale running.)
  • Plus 99¢ to mail ($1.49 for international)

The only downside, and it’s a big one is all of these cards are tied to a theme.
So you may have trouble making your simple message fit if its not tied to some big ‘event.’

Are you getting a headache yet?

Shuddering with Shutterfly
I’ve got to tell you all my Shutterfly research was exhausting.
I could have driven back and forth to the post office five times by now.

Touchnote

Touchnote comes closer to hitting the sweet spot.
Most importantly, it’s so simple by comparison.

  • You can quickly send out a postcard or greeting card
  • They also offer a mobile app for Android and iOS, so you can do all your work with your smartphone (like Apple’s former Cards app)
  • You can send your postcard anywhere in the world

And you can’t beat Touchnote’s pricing:

  • You pay in ‘Credits.’
  • It costs 1 credit to create and send a postcard
  • 2 credits for a greeting card
  • A credit costs $1.49
  • But it’s cheaper if you buy in bulk…
  • If you buy a pack of 5 credits, you get the 6th for free
  • If you go crazy and get the 50-credit pack, they give you 25 more for free, which brings the price down to the low/low price of 99¢/credit

I picked up the 5-credit pack, which meant I would be sending out my postcards for $1.25.

Not bad…

I only encountered one problem:

Touchnote 1
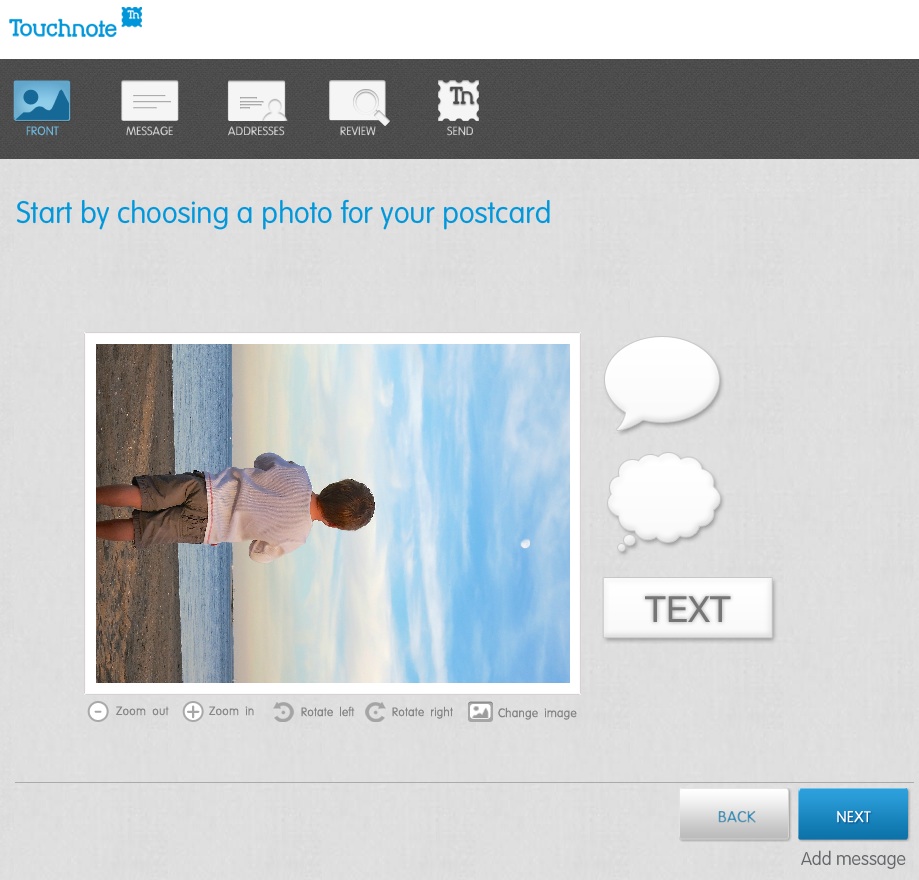
When I first loaded up my vertically oriented image, I rotated it into portrait mode from the default landscape setting.
But unfortunately, I realized you can’t use the clever text and thought bubbles they offer in portrait mode.
(disappointing)

Otherwise, it was a snap.

The postcard goes out the next working day, and they say it will arrive in 1 to 4 working days (within country).

Paper Culture

These guys are the green alternative.
They also promote the quality of their paper stock. But you’re not killing trees when you use Paper Culture.
In fact, quite the opposite…
All of their products are printed on 100% post consumer recycled paper.
Plus, a part of every order placed goes towards planting a tree.
(They’ve got a goal of planting 1 million trees, and they’re almost a third of the way there!)

Pricing:

  • $2.59 for a standard card (6 x 4.3)
  • $3.19 for a larger card

After that, they just charge the cost of the stamp to mail your card for you.

So all in, that’s $3.05.
(though I got a 15% discount on a deal that’s ending soon)

For your 3 bucks, they also provide free designer assistance and offer you up to 2 proofs for free.

And they’ve got a line of personal stationery that allows you to send out a classy-looking note (with a photo if you like), just like my father asked about!

What’s not to like?

Well I did run into one disappointing detail in the fine print on the final order page:

“If you approve your proof today, we will ship your card(s) no earlier than 6 calendar days before and no later than the date you select below.”

The earliest date I was allowed to select was a whole week out.

So that means they can take their time being all green.
And delay up to a week putting my card in the mail.

Hmmmm….

I just had a flashback to the old Orson Welles commercial.
“We will sell no wine before its time…”

Hallmark

Of course I checked out the grandfather of all greeting cards.
Hallmark offers a similar online card service that pops your card in the mail…

Their pricing structure is more complicated:

  • $1.29 for a 3.9 x 5.3 flat stationery photo card
  • $1.99 for a 3.9 x 5.3 folded stationery premium paper card
  • $3.49 for a 5 x 7 folded photo card
  • $5.99 for 5.5 x 5.8 folded song card
    Yes, the one with the little music chip and speaker
    (And yes, you can choose a song from their relatively extensive though super clichéd song library)

Like Paper Culture, they’ll mail out your card for the price of a stamp.
But they only mail to the U.S. and its territories.

I went with their simple flat stationery photo card for $1.75 all in.

Again, I ran into one little snag…

I first uploaded a photo of my father and me enjoying a Vietnamese coffee at an outside café in New York City.

Then, Hallmark’s spell check program went into Red Alert mode.
Something about ‘Anytown’ not being spelled correctly.
(That was strange, as I had not typed in any text!)

But then I realized the spell check was referring to the back of the card, which I hadn’t gotten to yet!
It had populated a default ‘Anytown’ address.

Hallmark
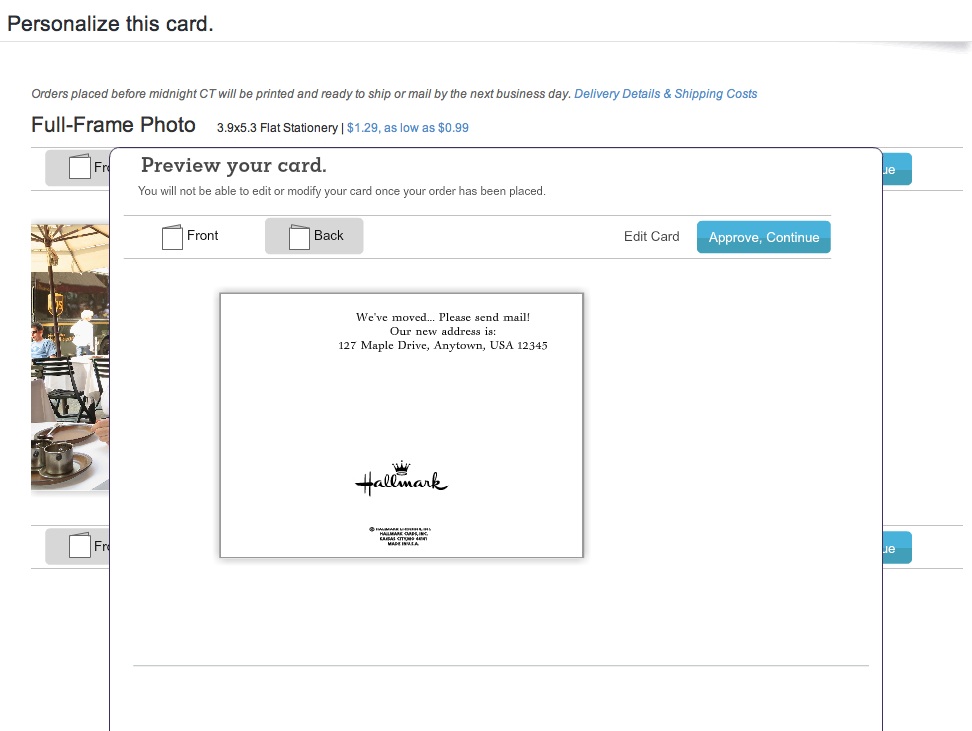
(How ironic Hallmark was questioning the spelling of its own default ‘Anytown’ word!)

The earliest mailing date Hallmark offered was two days off, which wasn’t bad compared to Paper Culture, but not as fast as Touchnote.

Survey Says…

So how do these competitors stack up?

I’d call it a relative draw.

All three online card services did a solid job.
Yes, they all had their own minor hiccups, but only deserving a minor ding.

Other points to consider:

Touchnote:

  • Easiest to use, but the others aren’t far behind

Paper Culture:

  • If you’re interested in helping Mother Nature

Hallmark:

  • You still can’t go wrong with a Hallmark card

Price (including stamp):

  • Touchnote: $1.25 (postcard)
  • Hallmark: $1.75 (flat stationery photo card)
  • Paper Culture: $3.05 (note card)

(Note: These aren’t entirely apples-to-apples comparisons, but they’re close.)

Dad- you really can’t go wrong with any of these services.
Just stay away from Shutterfly for this particular use.

Happy letter writing…

You’re welcome.

Follow my blog with Bloglovin

The Heart Beats Faster Waiting for the Next Apple Special Event

If you’re like me, I’m eager for September 10th to arrive to see what sweet tech has been growing in Apple’s garden.  This annual fall spectacle is a spectator sport as much as an opportunity to upgrade your gadgets.

If you’re like me, I’m eager for September 10th to arrive to see what sweet tech has been growing in Apple’s garden. This annual fall spectacle is a spectator sport as much as an opportunity to upgrade your gadgets.

For me, September 10th is like Opening Day at Fenway Park.
(The effect of my many years in Beantown occasionally betrays my strong New York identity.)

Just the anticipation makes you feel like a kid again.

What fabulous new tech does Apple have up its sleeve?
iPhone 5S?  5C??
Everyone’s got an opinion…

But my comparison of Apple’s upcoming ‘special event’ to baseball is also apt, because Apple certainly feels like my home team.
And this once-unstoppable franchise needs another hot streak.

Remember the day when absolutely everyone wanted an iPhone?
And if you didn’t have AT&T service, you couldn’t even get one?

Now the competition has taken such a huge bite out of the smartphone market share, Apple is no longer the omniscient tech god it once was…

It kind of feels like the seventh inning stretch, and we’re down 2-1.
I’m ready for some action!

You can hear it from the bleachers…
“Let’s go Apple… Apple let’s go!”
(Stomp. Stomp. Stomp!)

The Apple Still Shines
But that doesn’t mean I’m totally bored with Apple’s current line up.

When the iPhone 5 debuted, I was still stuck in my two-year phone plan, unable to qualify for the upgrade to my 4S.

All I could do was drool and write my Ode to the iPhone 5.

The reality is it’s statistically impossible to always own the latest and greatest tech.  (unless money is no object)
Zippier upgrades hit the shelves every year.
(Sometimes sooner!)

When to Pull the Tech Trigger
Deciding exactly when to jump into the pool of new tech can be a little daunting.

I think the sweet spot is a year or so after a new product launches.
(There are always kinks to work out…)

So that means you’ve got to wait for version #2, which will always be better, though not quite as cool.

(Was anyone out there really that functionally satisfied with the sluggish and tiny-brained first iPhone?)

But you don’t want to wait too long to jump on the bandwagon, because, you know, you’ve got to live your digital life.

And if you tend to time your purchase cycles like me, you’re going to be coveting thy neighbor’s tech more often than not.

All Good Things Come to Those Who Wait
But there is a silver lining…

You may not rush to buy everything that’s revealed on September 10th.
But you will indeed own it all…eventually…one day.
And by the time you get it, it will be even better!

I call that a win/win scenario.

So bring it on, Apple!
I’ve got my popcorn, and I’m ready for the game to begin… again.

Happily Married to my Newly Installed Nest Thermostat

My new Nest and me.  I needed a little help directing my house’s response to extreme weather.  So it was time to bring on a new tech tool to join the home team.

My new Nest and me. I needed a little help directing my house’s response to extreme weather. So it was time to bring on a new tech tool to join the home team.

Some people love the summer heat.
I hate it.
For the record, it’s my kryptonite.

  • Problem #1
    Keeping your home cool throughout the summer is always a priority, but you don’t want to continue throwing money out the window using a manual thermostat with a set-it and forget-it mentality…
  • Problem #2
    What’s the temperature in your home right now?
    (You’re not there? Doesn’t matter.)

X-ray vision could do the trick, but how can you magically adjust your thermostat from fifty miles away if you’re not Superman?

Solution:
This is a job for… Nest!

Nest is a learning thermostat, which you can control with your smartphone from anywhere in the world. She also observes your energy-use patterns and programs herself!
(See, I’m already anthropomorphizing it.)

Her goal is to keep you comfy and save you money.
Pretty neat, right?

Last time on At Home with Tech, I decided it was time to buy a Nest for my little Fortress of Solitude.
(though my house has not been so quiet lately with my three-year-old boy running about faster than a speeding bullet!)

Now it was time to introduce my Nest to my HVAC system…

Warning: Your Home can be a Dangerous Place
I’ve been a homeowner for more than twenty years.
And I’ve made my share of mistakes on the home-improvement front.

My favorite story I like to tell about my ineptitude as a new homeowner is how I handled a little rain…

It was a few months after I moved into my first house, and there was an incredible spring rainstorm.
My basement started to flood.
I called the fire department fearing some sort of water main break, and they came by to check out the situation.
Their evaluation… It had rained a lot, and the water table had simply risen
‘a bit.’ Everything was exactly as it should be.

Mr. Fireman told me I needed to call a plumber to pump out my basement.
So I did.

Mr. Plumber came over, and before you could say “emergency plumbing appointments are wicked expensive,”
…the lake in my basement was gone.

As soon as he left, I walked back downstairs to continue the drying-out.
To my horror, I realized I had acted too soon.
I watched my basement fill right back up.
D’oh!

The next day I bought a sump pump.

The moral to this laughable tale of new homeownership is you’d better do your research before beginning any home improvement/repair project.

The existence of Nest doesn’t threaten disaster the way a nor’easter does, but you can never be too careful…

The Nexus between Tech Savvy and Handy at Home
Many home tech improvements go beyond the relatively safe bubble of your desk, where much your technology lives.

If you want to create a ‘smart home,’ sometimes you’ve got to roll up your sleeves and get your hands dirty!

And it’s difficult to integrate tech into your house without dealing with a little…
(cue the organ music)

ELECTRICITY…

Please Don’t Electrocute Yourself
Replacing your old-school thermostat with a ‘smart’ one requires you to disconnect a few wires from one device and attach it to another.

One potential problem is these wires carry some electrical current.
It’s not exactly like handling wiring for a power outlet, but you don’t want to get caught completing any kind of electrical circuit with your fingers.

Nest clearly directs you to turn off the power to your furnace/AC, or if you can’t be certain you’re safe, just turn off all the power.

Cutting the main breaker seemed like overkill, but it took me ten tries to find the right circuit breaker to flip.

I’m not proud admitting this, but I didn’t realize till the ninth attempt that the bulk of my main electrical panel had been bypassed.
My electrician installed a manual transfer switch for
my new portable generator last month into a new subpanel, underneath the original.
That’s where most of the action now lived.

(I told my bruised ego it was good to get acquainted with the new breaker box before the next power outage showed up!)

The Installation: Don’t Forget your Wall Prep
With the power off, it was time to begin….
Comparing Nest to Honeywell

Nest claims, “Three out of four customers install Nest in 30 minutes or less.”

Sure, it didn’t take too long to remove the wiring from my old Honeywell manual thermostat and pull it off the wall.

Straighten out the wires

What the Nest folks don’t say is their stopwatch stops ticking as soon as you take a look at the ‘time bubble’ behind the old thermostat, and only starts running again after you’ve erased it.

What I’m talking about is if you live in an older house like mine, the wall underneath the old thermostat has likely been hidden for decades.
Even if the thermostat has been more recently replaced, nobody’s been minding the condition of the poor wall.

My circular bare spot looked like a war zone from WW2.
(There were crumbly holes everywhere!)
Get prepared for what’s behind the thermostat

So a glop of spackling paste was clearly in order!
Spackle and sand away

Then, there was the tiny issue of the paint job.
My Nest is smaller than my old Honeywell…

Nest’s Smaller Footprint

So my ugly green paint lurking underneath from the 1950’s (‘40’s?) would surround the Nest like a really ugly case of ring-around-the-collar!

Nest provides a white rectangular plastic plate mount to hide all of this mess.
But what’s the point of buying a cutting-edge product with a clean, Apple-like sleekness if you’re going to take the easy-way out by using a chunk of white plastic for the install?
(I’m insulted at the very idea.)

Believe me, you don’t see the plastic mount displayed in any of Nest’s marketing beauty shots…

The only real solution: Repaint that section of the wall.
The patch and paint job is done

Let’s just say it was a few hours later when I was finally ready to begin the installation process…

How Simple is Simple?
This is all the Nest manual says about installation…
And I quote:

  • Attach base
  • Connect wires
    (After all the wires are connected, make sure they’re flush with the wall.)
  • Attach display
  • Switch power back on

That’s it.
And they’re not lying!

Screw in the new base
I first screwed in the base with the two provided screws

Reattach the wires

  • Then, I carefully reconnected my five wires
  • Snapped on the iPod-like flat sphere
  • About 35 minutes later, I proudly walked downstairs and flipped back the circuit breaker
    (Okay, so I’m in the lowest 25th percentile… but it’s not a race, you know.)

I ran back upstairs and was greeted with a glowing screen displaying a home icon.
(joy)

It’s Alive!
My Nest had a heart beat!

Now what?
There really aren’t any provided instructions.
You either turn the ring or click the front.
(sound familiar?)

Setup Steps

Well, the setup was a joy. It’s really quite intuitive.
(If you were willing to pay $249 for this, you’re probably going to have enough tech smarts to breeze through this…)

First, I connected my Nest to the Web via my Wi-Fi network.

Downloading Update
Then, she downloaded a software update… One moment please!

Uploading Software

She performed a self-diagnostic and displayed a diagram with all of the attached wires she sensed.

I noticed the yellow wire was conspicuously absent.
Uh Oh!

  • Heat. Check.
  • Fan blower. Check.
  • Air Conditioning. Nada.

Red Alert!

It appeared I needed to reattach the yellow cable.

Next problem:
How do you take Nest off her base?
I didn’t want to force anything and break the mount.

But the solution was nowhere in the written directions.
I scoured the Web and Nest’s support site for an answer.
Finally, I found it.

Are you ready?
“Pull it off the base.”

What, you’re not going to break any tabs by just yanking it? (gently)
Nope.

Snap it on.
Snap it off.
Genius.

So I pushed in the yellow wire a little further and snapped the base back on.

Wiring Self Diagnostic

Warp power restored!

How Bad is Error Code N22?
Then my Nest gave me a worrisome message:
“N22”
Apparently, another wire (Rh) was attached but not talking to my furnace.

She directed me to –
Nest.com/n22

The Mystery of N22

With a few clicks I again diagnosed there was no power to my ‘Rh’ wire,
which normally connects to the heating system.

Nest’s recommendation:
“If your heating and cooling system is working correctly, ignore this note.
Your system has an unusual configuration, but Nest will work fine with it.”

Ignore it?!

Well, everything seemed to be working.
(both furnace and air conditioning)

The website then gave some parting words of wisdom-
“Enjoy living with Nest.”

Don’t mind if I do…

Remote Access
Now the fun can really begin!

I completed my Nest’s launch and set the temperature for the first time,
(Remember, she’s paying attention to every degree adjustment you make to create her ‘Auto-Schedule.’)

Then I went back online and officially opened up a Nest account.
Nest.com immediately recognized my computer was using the same Wi-Fi network as my Nest.
(That’s really spooky.)

And with three more clicks, my Nest paired with my new account.
Then, I downloaded and logged into the Nest mobile app for my iPhone and iPad.
(also available for Android)

In less time than it takes for a black hole to engulf the planet Vulcan, I gained the capability to control my Nest from anywhere around this globe.
(assuming an Internet connection)

My Nest is home

But Wait, There’s More…!
She’s also got a whole host of other tricks to help you save energy and money…
(Remember, Nest claims you’ll make your money back in less than 2 years.)

  • Airwave, which helps squeeze out more AC for your buck
  • Auto-Away, which activates automatically if you’ve left on vacation and forgotten to adjust the temperature
  • Early-On, which fires up your system to get to your desired temperature before you wake up or return home
  • Auto-Tune, which tweaks your settings to eke out even more savings
  • Nest Energy Reports to help you track your savings

Wedding Bells
Well, there you have it.
It’s official. My Nest has officially moved in.

We’re entering the height of the summer heat, but I’ve never felt so cool…

It’s going to take a week or so for my Nest to officially take over as it learns my energy-use preferences, but it’s great knowing I’ve already begun earning back my $249 investment.

Yes, we’re only in the honeymoon phase.
But please allow me to happily borrow a line from “Man of Steel” and proclaim…

“Welcome to the planet!”