At Home with Tech

Unlock the power of all your technology and learn how to master your photography, computers and smartphone.

Tag: digital photography

How AI can Fix your Low-Resolution Photos

If you’ve got an old digital photo that looks grainy when you crop in, it’s time to add in more pixels with a little AI assistance. This cropped photo of our cat from 2008 benefits from 4x more pixels on the left generated by Adobe Lightroom.

We all know the famous scene in the 1982 sci-fi movie “Blade Runner” where Harrison Ford’s futuristic detective inserts a photo into a computer and tells it to zoom in and enhance the clarity of the background until he finds a person hidden in a reflection from a tiny mirror.

No, we can’t tell today’s computers to scan a photo, “track 45 left” and then “enhance 15 to 23” to find what’s there. But we’re getting closer.

That’s thanks to today’s software that can increase resolution in lower-res photos while maintaining the quality (and without adding digital artifacts). This trick can also clean up jaggy edges that become more apparent when you zoom into a low-res pic.

Often, when you crop in too tight on a photo, grainy problems show up, because you’ve deleted too many of the pixels. You’ve suddenly created a low-res photo that clearly needs pixel infusion.

Enhance Tool is Not Science Fiction
Adobe Lightroom can help. It has an AI-powered upsampling ‘Enhance’ feature called ‘Super Resolution.’ This nifty tool creates a duplicate photo with four times the pixels. And that can make a significant difference.

Here’s how to ‘enhance’ a digital photo in Lightroom:

  • Click on the Photo dropdown on the top menu
  • Click on Enhance
  • Click on Super Resolution
  • Then click Enhance
    (You can preview the effect before you proceed.)
  • Voilà! An ‘enhanced’ file is generated in a DNG format.

There are other companies that offer similar solutions, but as Adobe Lightroom Classic is my main photo-editing and organization tool, I’m very happy to keep my workflow in one place.

A Useful Tool for the Right Circumstances
I’ve used this enhance trick mostly when I work with digital photos that I took twenty years ago. That’s, of course, during the early age of digital photography when original file sizes were relatively tiny.

It’s a helpful solution, but this tool is not magic. It can’t create what’s not there or fix a blurry photo. But it does add in a bit more visual crispness, even if you’re not having a pixelization problem.

It’s also quite helpful if you want to print out the photo. A physical print is usually more unforgiving than a computer screen.

Adding Pixels into My Old Photos
Here’s a photo I took of an actor playing a Klingon at the Star Trek Experience in Las Vegas back in 2001.
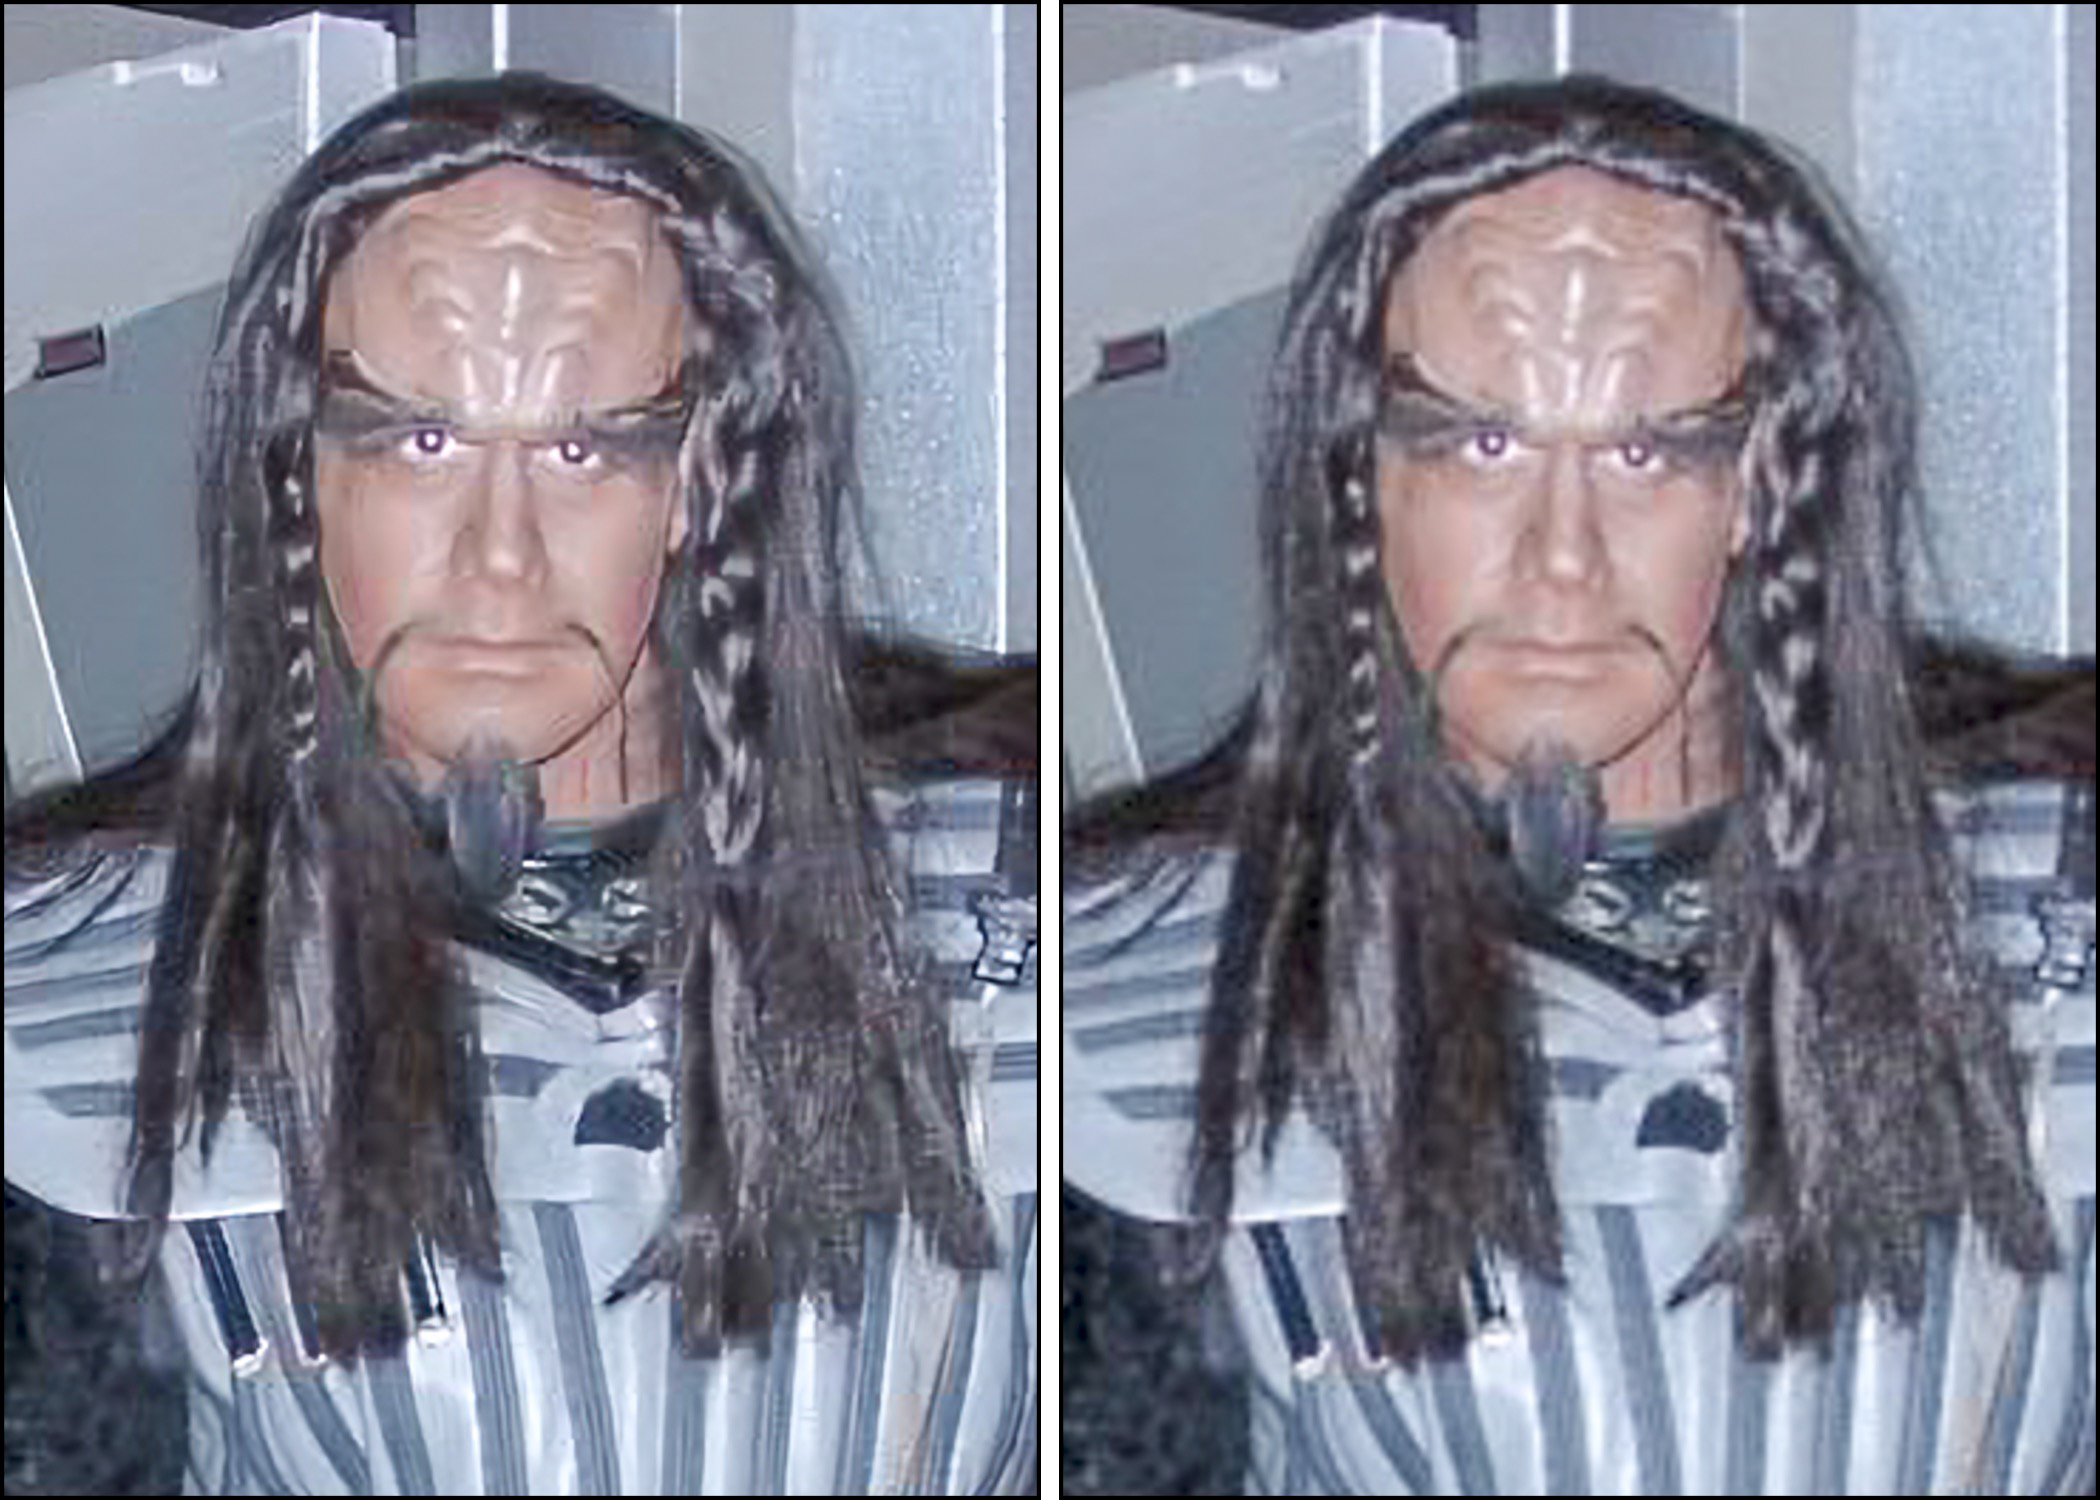
The original photo file was only 1024 x 768 pixels. I’ve cropped it in tight to just 198 x 264 pixels. The enhanced version on the left gets our friendly Klingon up to 396 x 598, which does make a difference.

Here’s a street shot I took in Hong Kong in 2005.
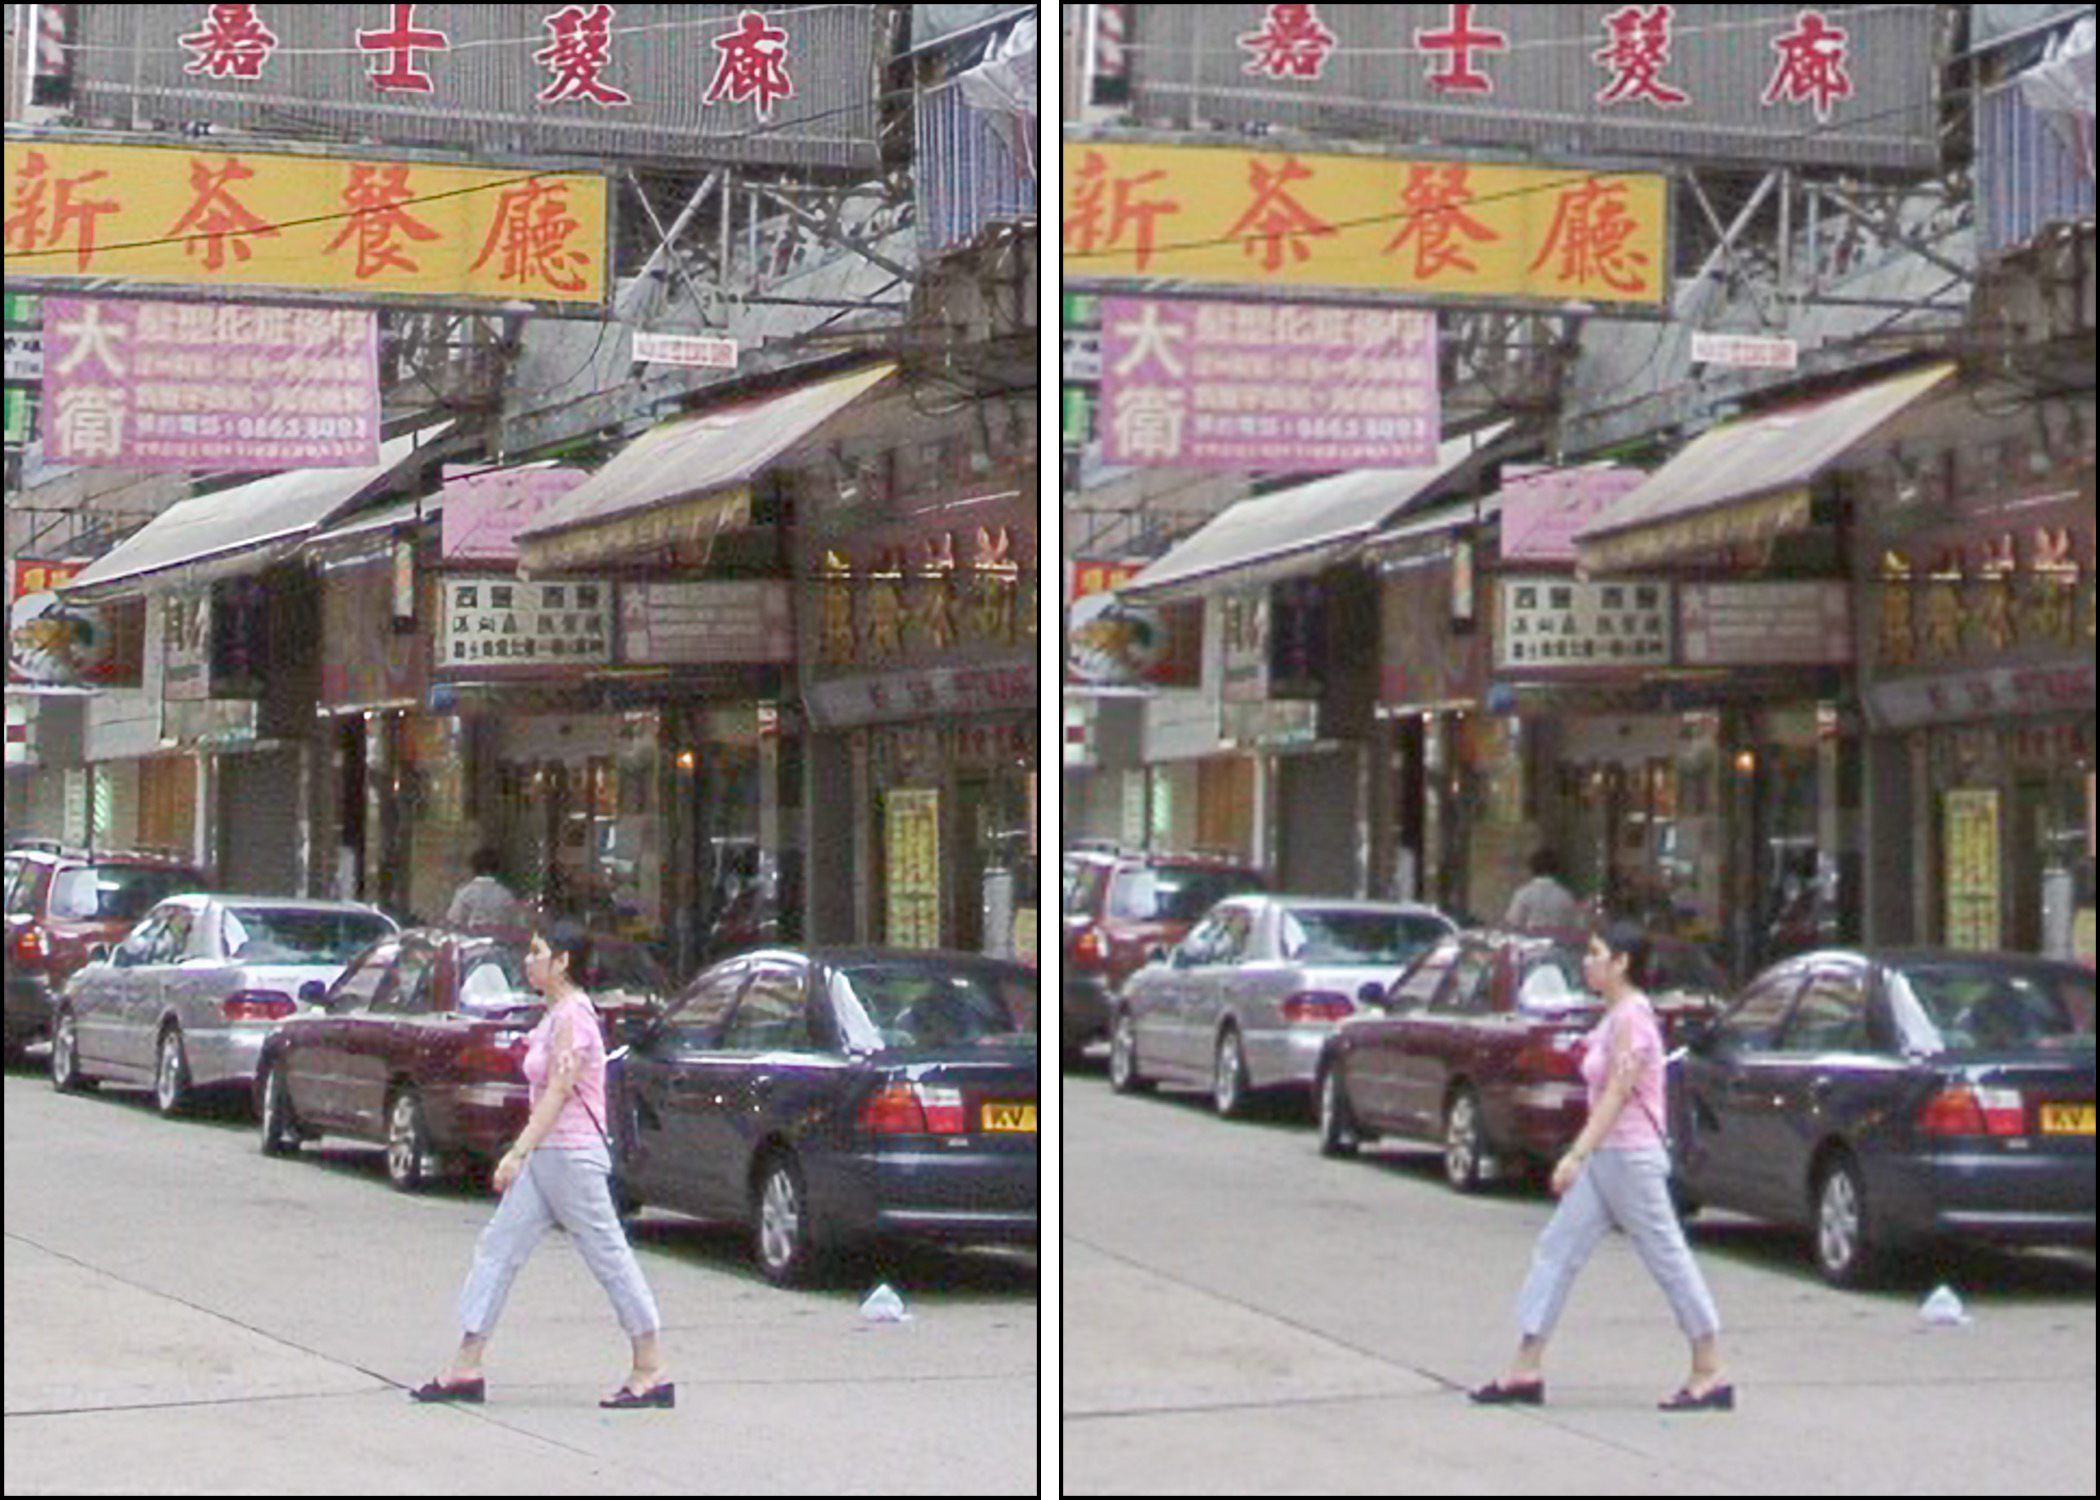
The enhanced shot on the left helps to bring out the background. You can also make out some of the car’s license plate letters.

Smile for AI
If you’ve found yourself having to squint to pick out the above differences, that’s okay. They’re minor, but they’re there. I think it’s fair to say that Adobe Lightroom’s “Super Resolution” mostly gives you minor sharpening.

It’s not a magic wand, but it does give you 4x more pixels to work with out of thin air.

With AI’s text-to-image capabilities already in common use today, I’m sure this is not the last time we’ll be discussing how AI can rebuild old photos in just a few clicks.

How to Build a Cloud Family Photo Archive for your Smartphone

It’s time to release the power of your best family photos! Here are four steps to help you create a family photo archive that you can carry around in your pocket.

Remember how your parents and grandparents liked to carry around wallet-sized photos of you when you were a kid? I think some folks still do that. How quaint… how silly…how unnecessary!

With smartphone tech that can house thousands of photos, why would anyone want to carry around a tattered physical family photo in a wallet?

Well, for one reason… you know exactly where that photo is. And when someone asks you about your family, you can pull it out on demand and show it off.

Can you boast that same super power?
…Right now?

Stop Looking for a Needle in your Visual Haystack
Yes, this topic may fall under the category of ‘super obvious,’ but you can’t simply hope to swipe through a mess of photos in your smartphone representing years of moments and successfully pull the desired image out of a hat whenever you need to.

You’ve got to tuck away a few of the really important ones in a place where you can easily access them (beyond your wallet).

And I’d say the best way to do that is to create a family archive photo album in the cloud that you can access from anywhere, including your smartphone.

Here are four easy steps to help get you going…

Step 1:  Create a Shared Cloud Photo Album
In the Apple ecosystem, of course that’s really simple to do…

You can create a ‘Shared Album’ either on your iPhone or in ‘Photos’ on your Mac and then simply pop in your top 50-100 pics that represent the entirety of your family and your life to date.
(Keeping the number down is much easier said than done, because you’ll find so many choices that you’ll want to include!)

The trick here is to only choose a small number of pics among the thousands you’ve got. Remember, you’re trying to essentially simulate the tattered wallet photo experience… with some obvious improvements. Simplicity and easy access are paramount.

Then after the heavy lifting of curating your little photo collection, simply share the album with your partner and whoever else you’d like…
How considerate of you!

Step 2:  Choose only a Few Photos
So which photos are you going to include?
Well, think about which pics best represent your family’s ‘story.’

Yes, that may take you some time to figure out…
(Our ancestors had it easy with only having to manage through a shoebox of disorganized photos.)

But once you go through your digital collection and pull together this new group of archive-worthy gems, you’ll realize the awesomeness of your accomplishment.

Step 3:  Include the Major Moments
I don’t think there’s one particular recipe to follow… you just need to take a little time to decide what those exact photos are…

For me, I wanted to include some of the obvious milestone family moments…

  • Our wedding
  • Our son’s birth and first days


Then show off a little of the ‘where…’


And then I realized, beyond the several landmark moments in life and fun places that anyone might want to display a picture from, there’s a blur of countless other experiences over the years that you really don’t need to consider.
(That’s sobering, right?)

So, what’s left…?

Step 4:  Focus Mostly on the ‘Who’
Well, it’s the people in your life… your family and friends.

The “who.”

Yes, we’re back to essence of the wallet photo phenomenon.

You’re going to want to carry around the pictures of the people in your life who have mattered most.

Those images are what I immediately felt the need to collect into my own cloud family photo archive…

And so I put those photos in a cloud folder titled ‘Family Portraits.’

Some were candid pics, but most were posed group shots taken at family events. The organic organization of the people in these photos nicely framed much of my family’s history.

Carry Your Family History in Your Pocket
Remember when I said that your photos have expiration dates and that your family and friends only care to see the most recent pics from your life?

While that’s certainly true at one level, some of your pics will defy that phenomenon and retain their long-term value as foundational explainers for your family’s history.

Just make sure you don’t lose them in the endless mass of digital freeze frames from your life.

Sure, they might be properly archived in a portable hard drive somewhere, but if you can’t immediately access them when you want to on your smartphone, you’re going to miss most of the opportunities to share them throughout your life!

A cloud family photo archive that lives on your smartphone is a strategy lightyears ahead of using those tiny wallet photos.

You’ve just got to build it!

How to Hold onto Your Best Summer Memories

Don’t let those great summer memories go. Sure, you’ll remember them, but you’ve probably also got some digital documentation as well. That’s the key. Here’s what I did…

Summer’s over. Deal with it. But don’t move on… not yet. Now’s the time to review, organize and archive all of the great summer photos and videos you captured. Like me, you probably haven’t had the time to organize your summer memories, because you’ve been living them!

The best way to hold onto all of those great memories is to properly share them:

  • Email or text a few of the very best to your family and friends
  • Share them on your social media accounts
  • Print out a couple of photos for your desk at work
  • Add them to your digital Wi-Fi cloud photo frame in your living room
    (I use Nixplay frames)
  • Make a hard-copy photo album from your go-to online service
    (I use Blurb)
  • Add your favorite photo to the background of your smartphone screen
    So, when someone asks how your summer was… you have that perfect image at the tip of your fingertips. You then turn your phone around, and your summer recap story can begin!

And remember, nobody wants to hear about your summer adventures when the leaves start to fall. That time is now.

So, in the spirt of not only doing what I say, but also doing what I do…
Here’s my summer recap in five photos and five videos…

Watching the Summer Solstice Sunset from Griffith Observatory
Seeing the Space Shuttle Endeavor at the California Science Center

Experiencing July 4th Fireworks at Calf Pasture Beach in Norwalk, CT

Riding the Port Jefferson Ferry
Port Jefferson Ferry

Fishing in Peconic, NY


Boogie Boarding at the Peconic Shore
Boogie Boarding at Peconic Shore

Picking Blueberries at Bhavana Blueberry Farm in Southold, NY

Picking Blueberries at Bhavana Farm

Spotting Humpback Whales off Cape Cod from the Hyannis Whale Watcher

Humpback Whales off Cape Cod

Swimming Underwater at Joshua’s Pond in Osterville, NY

Ziplining at The Adventure Park at the Discovery Museum in Bridgeport, CT
Ziplining at Discovery Adventure Park

Share Your Summer Memories Now!
…And how was your summer?