At Home with Tech

Unlock the power of all your technology and learn how to master your photography, computers and smartphone.

Category: Tech Trends

Is Nest Protect Worth It?

Stop being angry with your smoke and CO detector and consider getting a Nest Protect. But it’s a costly upgrade…

Stop being angry with your smoke and CO detector and consider getting a Nest Protect. But it’s a costly upgrade…

I came home from work on Thursday to learn there was a sudden breakdown in my house’s smoke alarm and carbon monoxide-sensing infrastructure. Apparently, the 9-volt battery powering the CO detector in my son’s room decided to suddenly quit, causing the tiny unit to emit a piercing ‘chirp.’

In an attempt to stop the deafening repetition, the smoke detector on the ceiling outside my son’s room was incorrectly identified as the culprit.

And let me simply say… in all the confusion, ‘someone’ broke the smoke detector away from its plastic circular mount.
(Names have been removed to protect the ‘innocent.’)

Broken Smoke Detector Tab


When it became clear that the wounded disc wasn’t the correct target, the CO detector’s horn was properly identified as the disruptor.
(Its dying battery securely jammed inside)

What’s a family to do when good home tech goes bad, threatening your child’s night-time rituals on the way to bed?

The next morning, as soon as my four-year-old son woke up, he ran downstairs to tell me what had happened.
“Mama put it somewhere where we would never hear it.”

It was banished to the garage.

Time to Make Some Lemonade
Of course, my wife had already relayed the ‘incident’ to me the night before.

And how did I feel about all of this?
(I’m not particularly known for my flexible attitude on home-tech malfunctions.)

I should have been sad.
Annoyed.
The essential order of my little kingdom compromised by a bad battery.
But I wasn’t.

I was thrilled.

I had been waiting for this particular moment for life to throw a few lemons at me.  Looking for a reason to replace this smoke detector that had actually been taunting me for years.
(Whenever I’d cook a steak in the kitchen below, the slightest whiff would set it off.)

But a typical battery-driven smoke detector rarely stops working. Sometimes, it just annoys you… till you find a reason to throw it away.
(Usually because one of the delicate plastic latches breaks away when you’re pulling it down)

Now I had my excuse.
An excuse to buy a Nest Protect.

Thank you, family!

Hello, Nest Protect!
Nest Protect is a relatively expensive smoke and CO detector and alarm created by the makers of the Nest Learning Thermostat.
(now owned by Google)

But this $119 smart device is exceptionally cool!

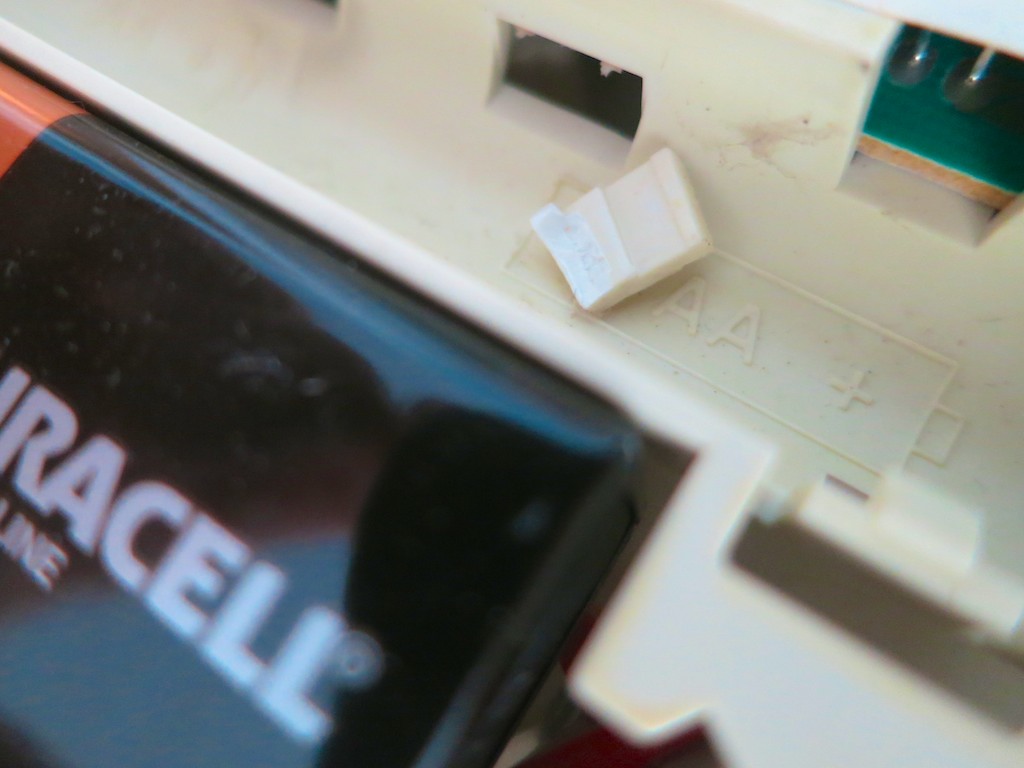
  • You can purchase either a long-life, battery-powered unit or the wired 120V version, which also uses batteries for back up.
  • The six included L91 batteries are supposed to power the device for ‘years.’
  • It’s Wi-Fi enabled.
  • That means it can communicate with the Nest Thermostat in your home.
    If there’s a CO problem, the Nest Thermostat will automatically turn off your furnace.
    And Nest Protect senses your presence, which improves the Auto-Away feature of the Nest Thermostat. Sometimes mine forgets I’m home when I’m typing away in my office.
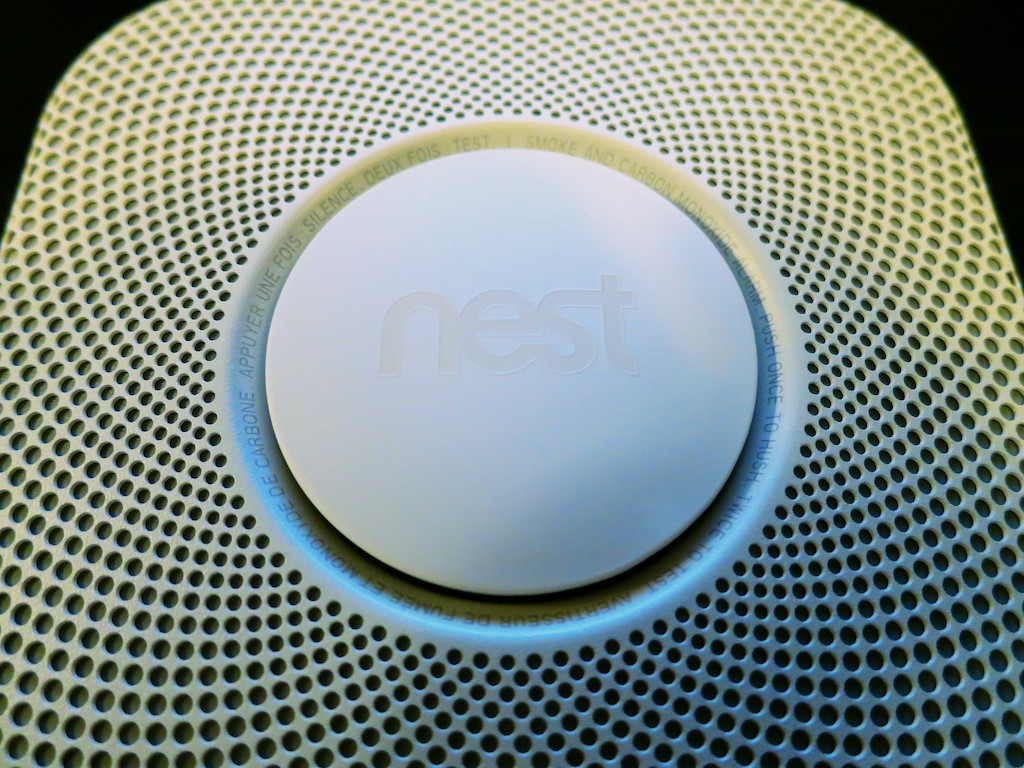
    (The wired Nest Protect is a better for this, because it gives the thermostat immediate feedback.)
  • Nest Protect talks to you in lieu of those vague chirps and explains if there’s smoke or carbon monoxide present and which room the problem exists in.
    (If you own multiple units)
  • It also uses circular color cues on its face to communicate.
    (green, white, orange and red)
  • It momentarily glows green when you turn your lights out at night, indicating all is well.
    (How civilized)
  • It can evaluate the ‘situation’ and give you a friendly ‘heads up’ notification or a full-on ‘Emergency!’
    (complete with loud horn)
  • Nest Protect lights your way at night by glowing white as you walk by it.
    (This feature can also be turned off if you like.)
  • You can keep track of it from anywhere with the Nest Mobile app, and it will send your smartphone a message if there’s a problem.

Welcome Home
Did I mention that $99 is rather expensive, regardless how cutting-edge Nest Protect is?

By comparison, Kidde makes a $33 device that senses both smoke and CO.
But Nest Protect does buy you a whole new level of connection.
(Plus, I had a Best Buy gift card I needed to use…)

A year and a half ago, you may recall I purchased my Nest Learning Thermostat.
Overall, I’ve been satisfied.
(That said, there have been a couple of glitches recently, but I’m sticking with my Nest. In fact, I’m doubling down…)

It was time to add onto my Nest ecosystem…
I hurried over to Best Buy and eagerly brought my new Nest Protect home.

My Installed Nest Protect


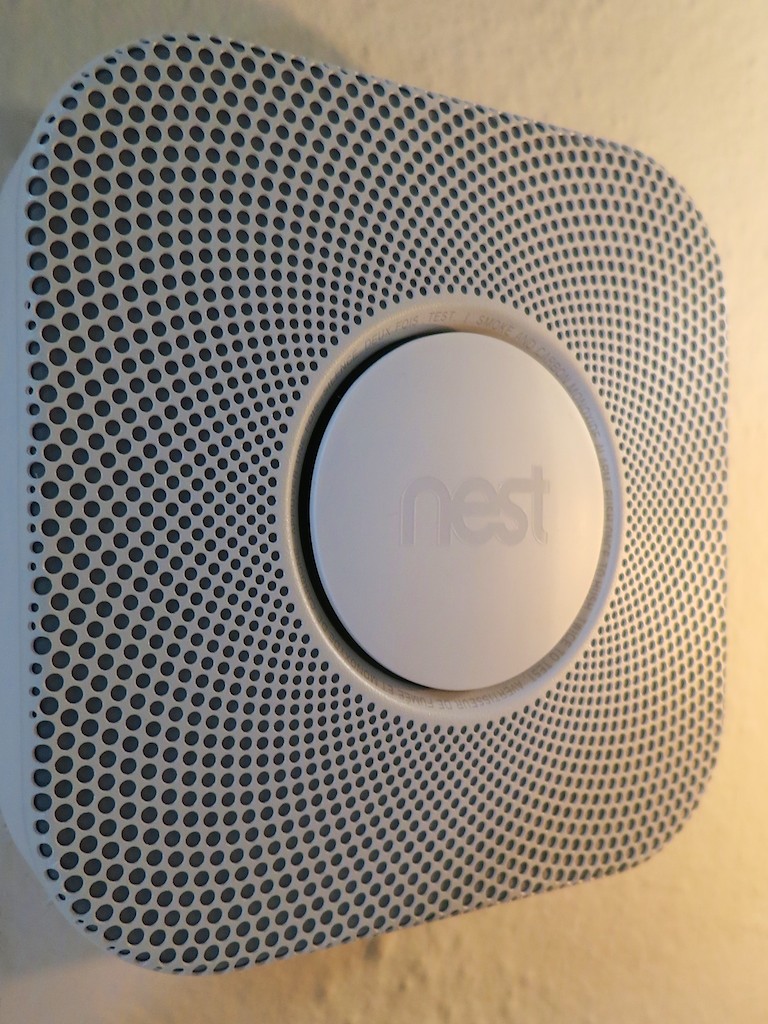
Installing it was a snap!
A few pointers:

  • You can only set up your Nest Protect with an iPhone, iPad or Android device.
  • You’ll first need to download the free Nest Mobile app.
  • You’ll be scanning the QR code on the back of the Nest with your phone.
    (cool)
  • And then temporarily connecting the two together via Wi-Fi.
    (Yes, the Nest emits its own tiny Wi-Fi bubble for this particular occasion.)
  • Finally, you’ll be connecting the Nest Connect to your home’s Wi-Fi network.

Setting Up Nest Protect


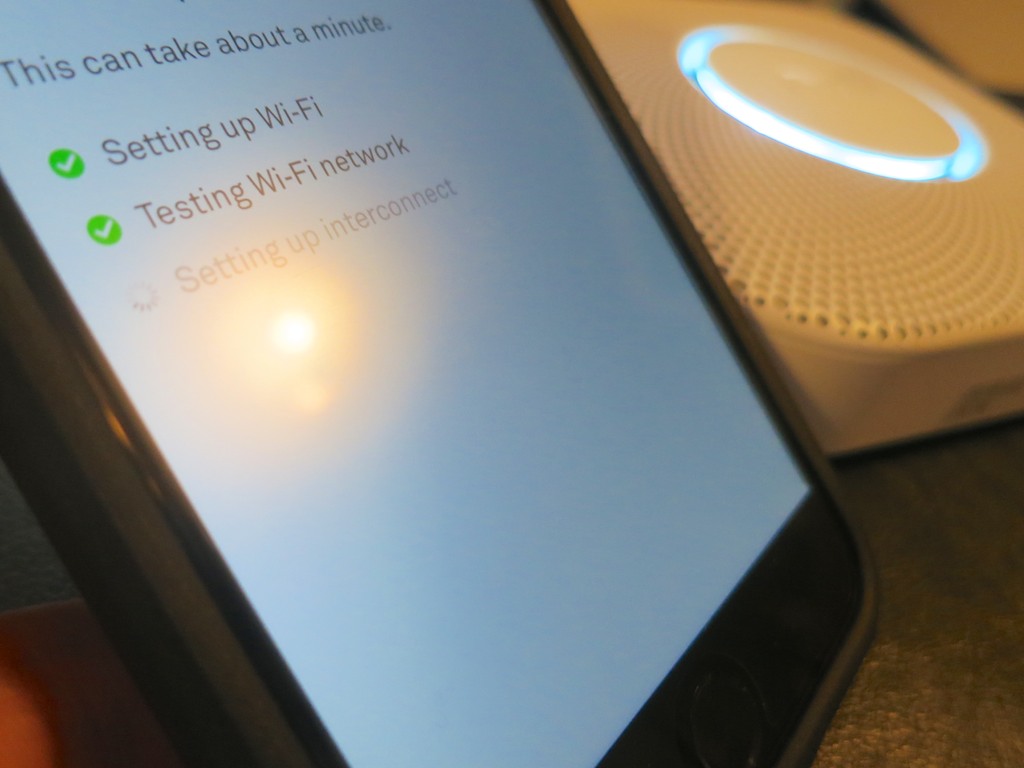
I was done with the activation process in five minutes. The installation on my upstairs ceiling simply involved unscrewing my old smoke detector’s mounting plate and screwing in the Nest’s mount.

WARNING:
As nifty as the Nest Protect is, its plastic mount works on the same principal as any smoke detector. It has plastic tabs to grip the unit. If you twist the Nest Protect on with too much force, you can break the tabs off. Just be careful…

Nothing Lasts Forever
One other cautionary note:
In the small print at the end of the manual, which you don’t need to read, you’ll discover that Nest Protect only lasts for seven years.
(I don’t think any smoke/CO detector is designed to work forever.)

Much like a “Blade Runner” replicant, this particular tech will self terminate.
(It’s supposed to give you two-week’s notice.)

I’m sure I’ll prefer a little more warning…
Maybe, I’ll set myself a calendar reminder for 2022.

Impulse Purchase?
So to summarize:
A 9-volt battery goes south. And the next day, I buy a Nest Protect.
I know… it doesn’t make complete sense.
But I was looking for an excuse to try out a Nest Protect, and I found it.

That said, I’ve got several other old-school smoke detectors around the house, and now, I’ll need to consider whether I should continue with my Nest Protect upgrade program.

It is all worth it?

I’d like to think my home is a bit safer.
It sure feels a little more fun to live in…

And isn’t that what living at home with tech should be all about?

Click.

Counting Coins for Free

It’s time to redeem all your extra change and find a self-serve, coin-counting machine. The trick is to find one that does it without taking a bite out of your loot!

It’s time to redeem all your extra change and find a self-serve, coin-counting machine. The trick is to find one that does it without taking a bite out of your loot!

How much spare change do you have at home? Ten bucks? Fifty? More?
For me, this has been a growing problem for years…

You collect all these extra coins every week, and there’s simply no use for them. How many more quarters do you really need?
And dimes, nickels and pennies? Forget about it!
Useless!!

But in its totality, it’s not exactly valueless…

You’re probably thinking, why not just cash in all your extra coins at the local bank?
Well, who’s got the time to roll up 1,400 pennies?
So it all sits.

Year after year…
Growing in piles.
Filling up jars.
Expanding everywhere!

And you don’t exactly want to throw it all away.
(Isn’t that technically illegal?)

Then, someone finally came up with a consumer-tech solution and changed the game with a coin-counting machine that you can easily toss your spare change into.

Voilà!

Now the only catch is businesses that now offer this convenience, also tend to charge a hefty service fee.

And that doesn’t feel quite right.
(Though few services in life come for free)

And so your change continues to weigh you down.
Until one day a free option emerges…

Free Coin Counter!
On a whim, I called my bank last week and asked if there was a coin counter at my local branch. No dice. But the manager on the phone told me the bank down the street had one.

Really?

So I called up the competition and asked about their little self-serve machine.
Yup. And here comes the really good news:

  • You don’t have to have an account there to use it. Plus, they don’t charge a fee or a percentage of the overall haul.

What? A free coin counter?!

You heard me correctly.

And the name of this game-changing bank?
People’s United Bank

It’s a regional bank headquartered in Bridgeport, CT with more than 400 branches throughout New England.

So I eagerly loaded up my car with what felt like twenty-five pounds of currency and headed off to make my long-overdue deposit.

Cha-Ching!
When I arrived, I made a beeline for the standalone machine.

I set down my aging loot and started pouring change into the little conveyor belt that feeds the counter inside the unit.

And then the fun really began…
I watched the digital display as the dollar count continued to grow.
(It was better than Vegas!)

As I waited, I was offered a free cup of coffee and an opportunity to open up a new CD account.
You can’t fault the marketing attempt to ‘up-sell’ me.
(A free coin-counter business strategy can’t be entirely altruistic…)

About twenty minutes later, I was done.
And the grand total to cash in my useless pile of change?

Three Hundred Seventy Five Dollars


Sweet!

Begin Your Search
This smart marketing tactic from this bank chain is certainly a differentiator.

I wondered if every People’s United Bank branch sports a coin counter, but in fact there isn’t one everywhere. The easiest way to find out is to look up the branch online on peoplesunitedbank.com and go to the ‘Branches and ATMs’ page.

The services for each branch is listed… including ‘coin counter.’

(For those folks who don’t live near a coin-counter branch, does anyone know of other banks elsewhere that offer this service?)

Don’t Dismiss Your Piggy Bank
I can’t tell you how good it felt to rid myself of decades of unused coins. And I walked out a little wealthier and wide open to our evolving cashless society.

Of course, I immediately began considering all the ways to put this ‘found’ money to work on my home tech front:

Wow…
These moments are also sobering reminders that consumer tech is not a cheap hobby.

Where’s my piggy bank?
I think I’m going to need to find a little more change!

How to Battle Blurry Photos with a Fast Prime Lens

Why is everything crystal clear in this picture except for my son?  The problem is my young bowler is the only part of the image moving quickly!  A faster camera lens could have frozen this action shot.

Why is everything crystal clear in this picture except for my son? The problem is my young bowler is the only part of the image moving quickly! A faster camera lens could have frozen this action shot.

It’s hard to believe it, but my son is almost five years old, and I’ve probably taken at least 5,000 pictures of him so far. I think 4,598 of them have been blurry.
(I exaggerate only slightly.)

He just moves too darned fast. With the exception of his first year when he wasn’t that mobile, he has proven too swift for my inadequate photo arsenal to keep up.

So I know that anybody can take a decent picture outdoors with lots of light to support an average camera lens. But as any amateur photographer has probably realized, unwanted blur usually has to do with indoor or low-light situations. That’s the Achilles’ heel for many consumer-grade lenses, which are too slow to freeze all the action in their line of sight.

Sure, you can throw some flash on your subject, but that strategy has its own set of limitations. If you want to capture the beauty of a moment in natural light, you may not want to ruin it with an obnoxious flash.

Of course, the simple solution is to buy more expensive gear.
(Isn’t it always?)
But as you start to look at your options, it quickly becomes an expensive proposition. A good zoom lens can cost you $1,000 or more…

But we’re getting ahead of ourselves. You’ve got to start somewhere…

Begin the Journey to Snapping Sharper Photos
Five years ago, I bought my Canon DSLR knowing I needed more than a point and shoot camera to get the job done.
(It’s the EOS Rebel T1i, which has since been superseded by five newer versions. The Canon T6i has just been announced.)

I picked up two ‘kit’ lenses, which were packaged with the camera body as part of a holiday sale. One was an 18-55mm zoom. The other was a 55-250mm zoom.

I found the super zoom to be relatively useless in freezing action. I liked the basic zoom better. It enabled a significant jump in the general quality of my pictures over my Canon PowerShot Elphs, but it also had trouble in low light.

The reason was neither were high-end lenses. Specifically, they weren’t very ‘fast.’ The 18-55mm had a maximum aperture of f/3.5-5.6, while the 55-250mm was only an f/4-5.6.

To capture the action, you need a faster lens with a larger maximum aperture and lower ‘f’ number. Fast lenses let in more light, allowing you to use quicker shutter speeds to freeze any motion in front of you.

But of course, they cost a whole lot more than a couple hundred dollars.
(Which is what the kit lenses go for)

Discover Prime
Fast-forward two years…
I was struggling over how to proceed forward with my increasingly expensive hobby, when a friend, who was a professional photographer, suggested I buy a ‘prime’ lens. A prime is a lens with one fixed focal length, which means it doesn’t zoom.

The quality of these lenses is typically quite high. They’re fast, and their cost… by comparison with fast zoom lenses…is a steal.

So I decided to try out a prime as a cost-efficient next step on my journey to photographic enlightenment.

50mm Prime
I just had to figure out the focal length I wanted…
I was concerned about having enough reach without a zoom.
(I didn’t want my photo subjects to look like tiny dots…)

My friend suggested a 50mm lens as a good starter prime.
So I bought the Canon EF 50mm f/1.4 USM Lens.
(It’s currently $399 at B&H Photo. But if you wait for the next Canon rebate, you can knock off $50 or so…)

When I popped on the 50mm, I immediately saw the benefits of its speed.
However, I found its reach to be a bit too tight when trying snap a photo of my boy from only a few feet away.

With the ‘cropped’ sensor of my Canon Rebel, (and I assume all entry-level DSLR bodies) its framing was 1.6x tighter than what you’d see using the same lens on a more expensive full-frame DSLR body. As a result, I always found myself stepping back as far as I could to get the shot I wanted.

I became frustrated with the results, and eventually left my DSLR at home in favor of my less bulky pocket cameras. Then, my powerful iPhone 6 Plus showed up, which takes a pretty good picture all on its own.

It was like I had dropped out of Photography 101 and was just winging it again. But I knew I needed to get back on the digital horse and find another prime lens that wouldn’t make the world seem so crowded…

35mm Prime
So I’ve been doing more research and recently came to the conclusion that a 35mm prime should give me the extra ‘room’ I want…

For Canon DSLR owners, it’s the Canon EF 35mm f/2 IS USM.
Unfortunately, it’s a pricy prime that goes for $599.
(You can almost buy a brand new DSLR body for that price!)

I then came across a review from Ken Rockwell about the previous generation 35mm Canon lens.
(The Canon EF 35mm f/2)
He loved it, suggesting it was almost as good as the current version and half the price. Unfortunately, this older lens has been discontinued.
But he mentioned you can still find it for sale in the used camera market.

A new browser window later, I found one at B&H Photo for just $249.
(lucky)

How Solid is a Used Lens?
The question was whether I should gamble on a used lens? B&H rated this lens as a ‘9,’ which is two points shy of looking like new. So it’s not going to win a beauty contest. But the lens is still supposed to work, right?

One comforting factor that continued to lead me towards the uncharted waters of the ‘used market’ is the fact that B&H Photo offers a 90 day warrantee on its used photo equipment.

I figured the lens is either going to function properly out of the box or it won’t.

Click.

So that’s the end of this chapter in my quest to become a better photographer.
My new (used) 35mm lens comes in the mail next week…

In Search of a Faster Zoom Lens
But this is not the end of the story…
You can’t really live your life shooting only with primes.
(My son will be in the next county by the time I switch lenses.)

The question here is the proper lens upgrade path for any amateur photographer aspiring to be something more. I know the endgame is to have a few really great lenses. Every professional photographer I know talks proudly about his or her arsenal of ‘glass.’

But I’m not hoping to become the next Ansel Adams. I just want snap better pictures of Junior in action.

Sure, I know my camera body is due for an upgrade.
(Hello, T6i?)
But I also know that one day soon, I should also spend some serious dough on a fast zoom. I just need to feel confident about the choice.

Anyone have any suggestions…?